|
I have put together a brand new presentation for 2021. I am looking forward to debuting this presentation for the first time next Thursday. This will mark my first in-person presentation in almost two years and I am very excited about that!  Stripers are one of the most popular game fish to catch on the planet. I have spent a good portion of my adult life pursuing this great fly fishing quarry. During my "Seven Stripes, the who, what, where, when, why and how of to catch Striper on the fly" presentation we will discuss all aspects of catching Stripers on the fly, from what or who the fish are, to how and where to catch them. If you are a striper junkie like me, then you will not want to miss this presentation! 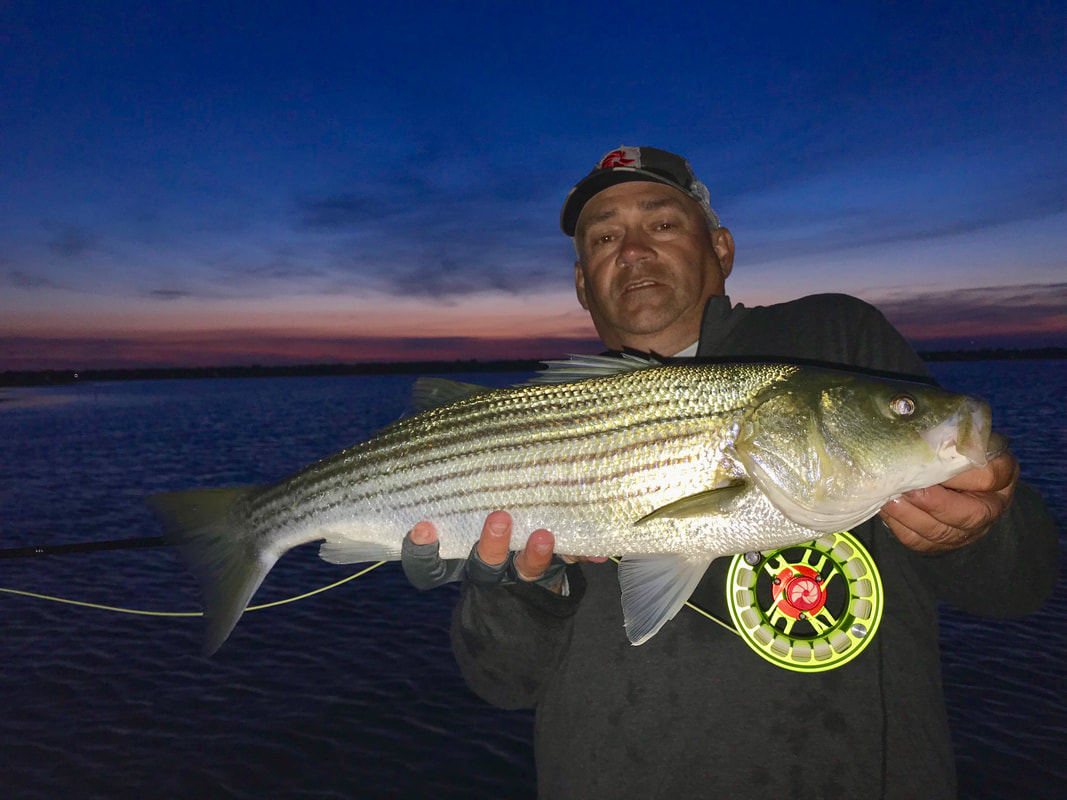 The first chance to catch this presentation will be at the October Delaware Valley Fly Fishers meeting. The DVFF meeting will be Thursday, October 14th, at 7:00 PM, at the Churchville Nature Center, located at 501 Churchville Lane, Churchville, PA. Click HERE for directions. I will start the presentation shortly after the end of the club business. There will be something for every type of fly fisher in this presentation, from the first-year rookie to the seasoned jetty rat. This event is open to the public, with a nominal entry fee for non-club members. This promises to be a great evening; we hope to see you next Thursday night. 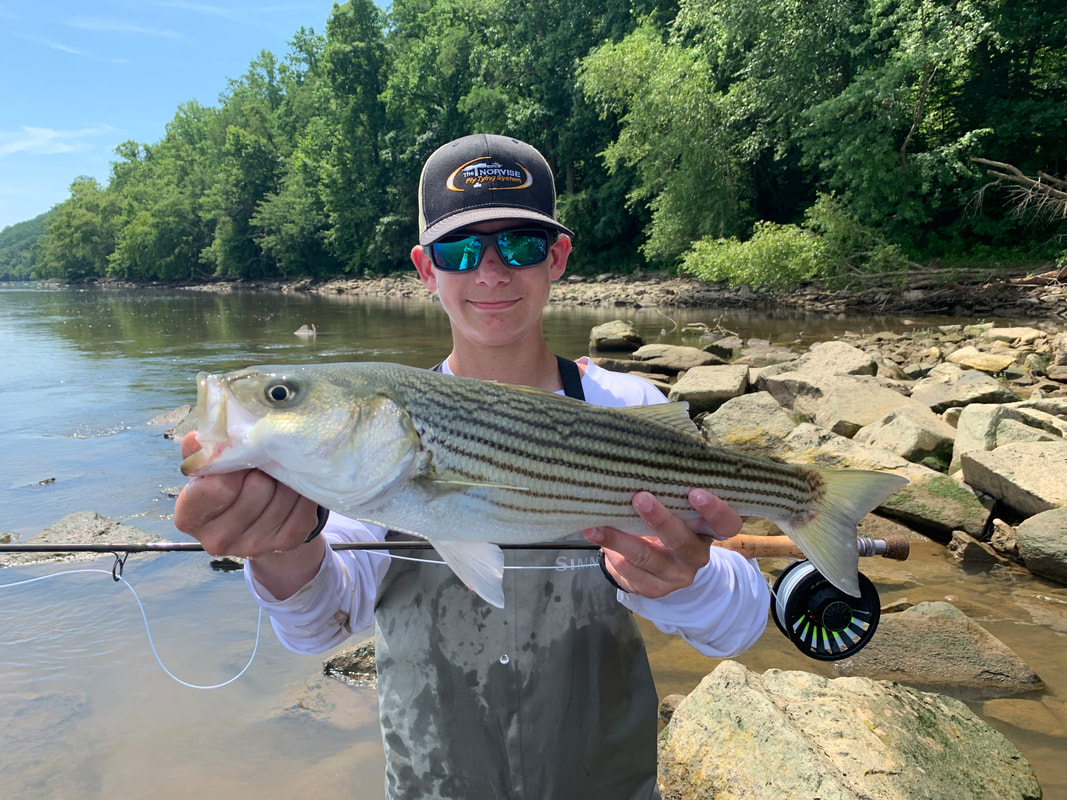 If you have any questions please feel free to contact us, if not we look forward to seeing some of our Norvise tyers attending this great event. 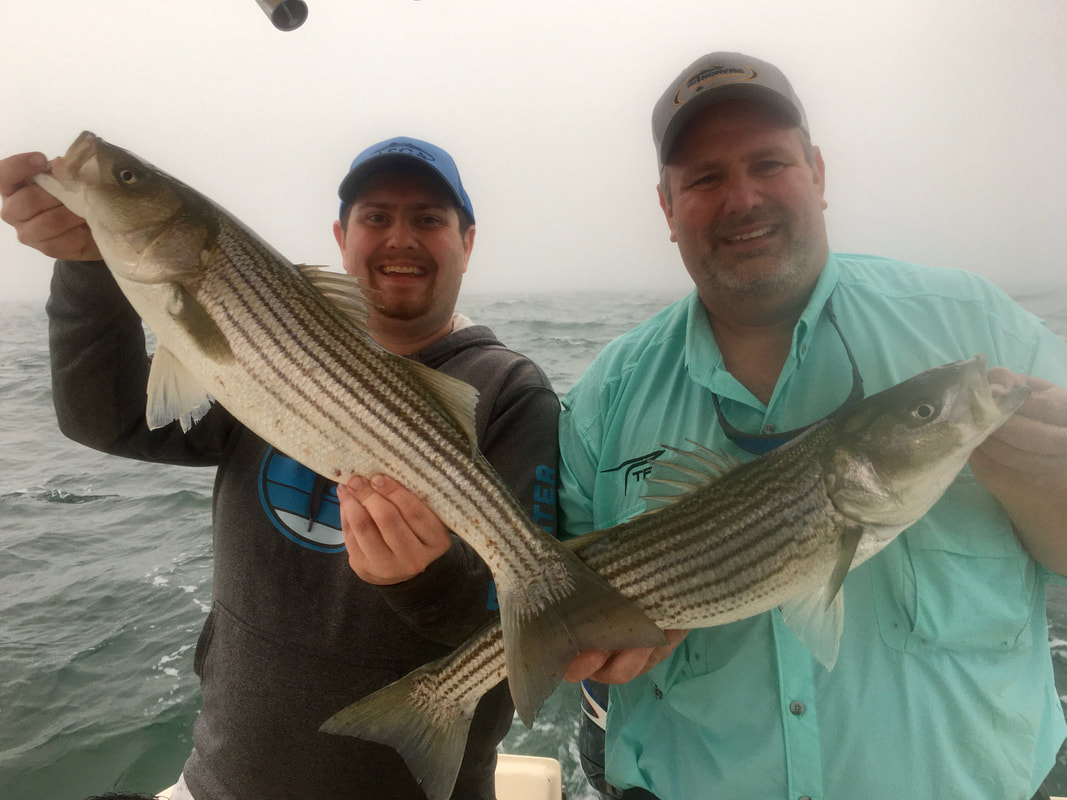 Till next time...
Tight lines - Tim We had a great time this past weekend. Sunday we spent several hours floating down the famed Juniata river or the "Big J" as the locals say chasing my favorite fish. I actually spent most of the day on the oars rowing Ed and Tyler down the river. The fishing was tough, we did manage to scratch out a good day with approximately 15 landed fish including this 18" tank landed by Ed. Yes, Sunday was a great day, Saturday was even better...  This fish was an absolute tank! So, about a 10 months ago we got a sweet deal on a nice little John boat from the Millers. You may remember last July I broke my elbow and some ribs, well this is the boat I was on when I fell. The obvious next step would to be to buy the damn thing, makes perfect sense right? Well, we have it and have affectionately named it "The Rib Breaker" Seriously, that is what Braden named the boat after we bought it. This is a perfect little boat to do a lot of the fishing we like in the ponds that litter the lower part of Delaware. We will waterfowl hunt out of it in the fall and winter and as I learned this weekend, this is a great little boat to run a trot line for crabs. Living in our area Blue crabs are something we look forward to every summer. and this year was no different. What was different is this year we are catching them ourselves instead of paying the close to $300.00 market price per bushel of jumbo crabs. Tyler did all the research and built the 1200 foot trot line, which sounds much easier than it is. There are a lot of parts to a trot line including anchors, bouys, lengths of heavy chain and many brass carabiners. 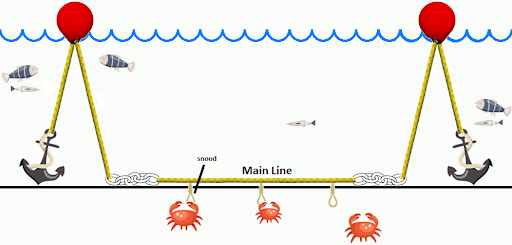 There are a lot of parts to a trot line. We started out early (much earlier than I care to get up) at 3:30 am on Saturday morning. We were at the dock and launched by sun up and forsake of a little issue with the plug we were on our way. 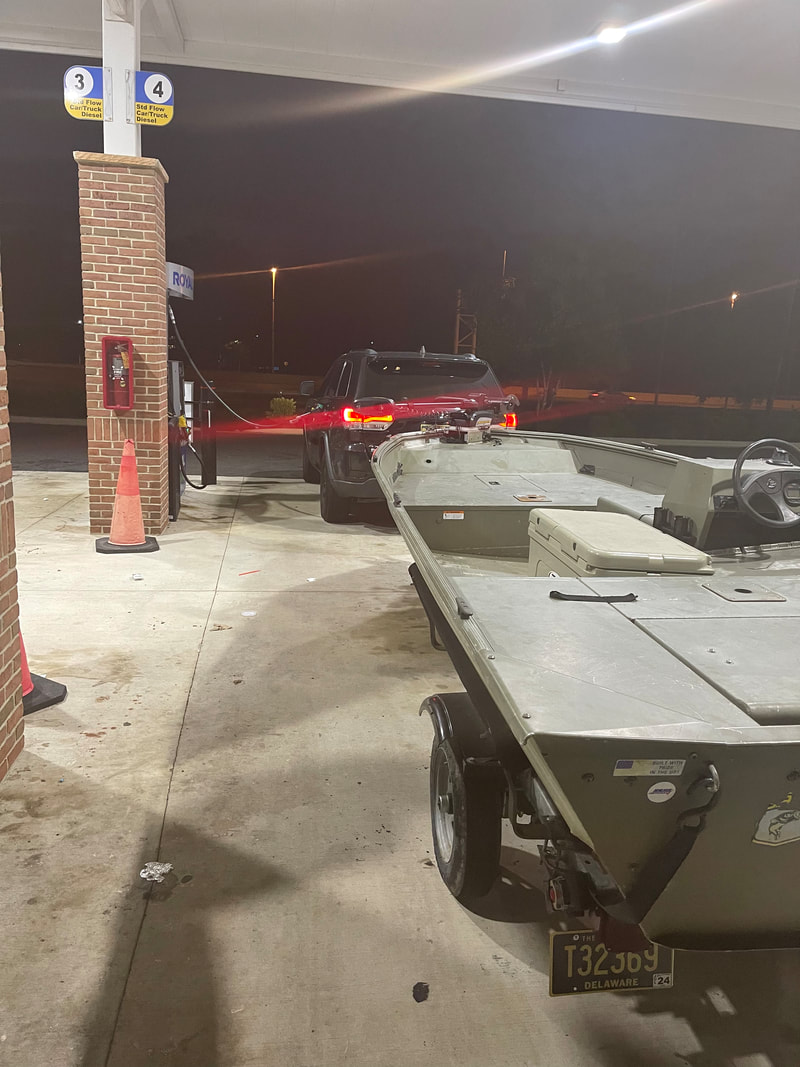 Fueling up the boat and the Jeep early Saturday morning. 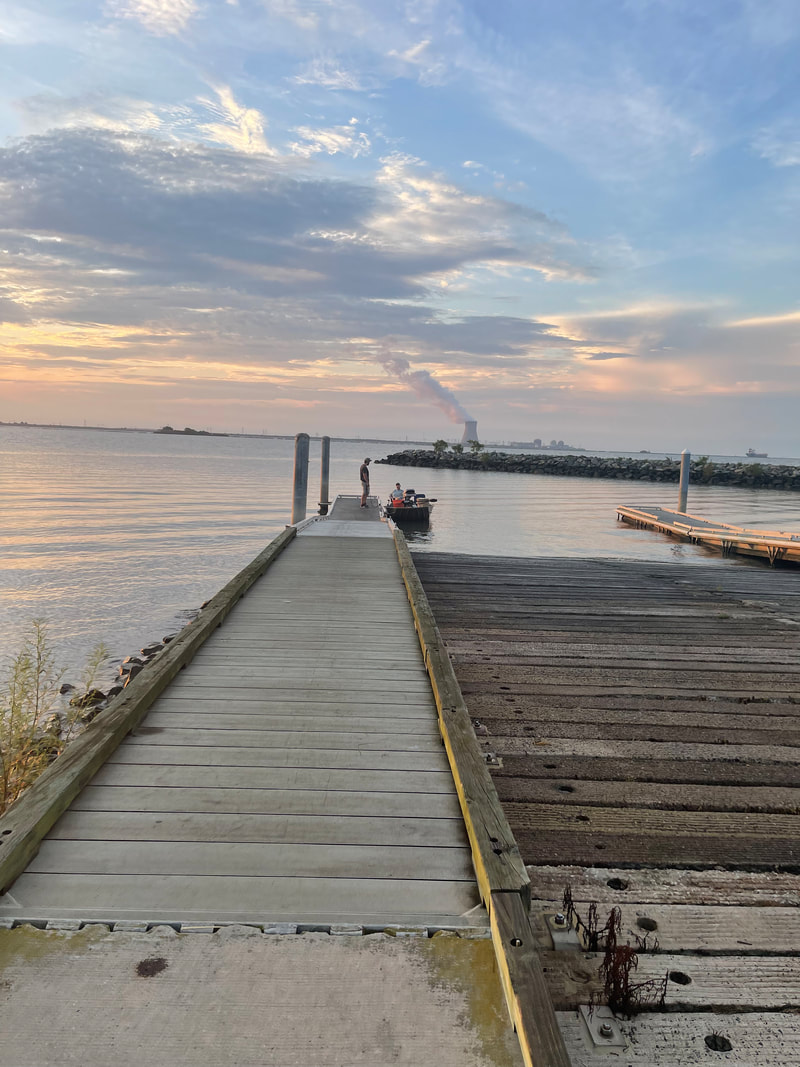 Yes, that is the Salem NJ nuclear power plant in the background. We always wonder why the crabs are so big here???? So, the most important thing in the initial set of the line. The straighter it is, the easer it will be to "run" the line. With a ripping tide, this is easier said than done. Our line was crooked as an old kerr dogs leg when we were finished, this made for some interesting tending when we ran the line a bit later. One thing that is pretty cool is the more you run the line the straighter is becomes. While the first couple of passes were a little challenging, after that we were running the line like a well oiled machine. 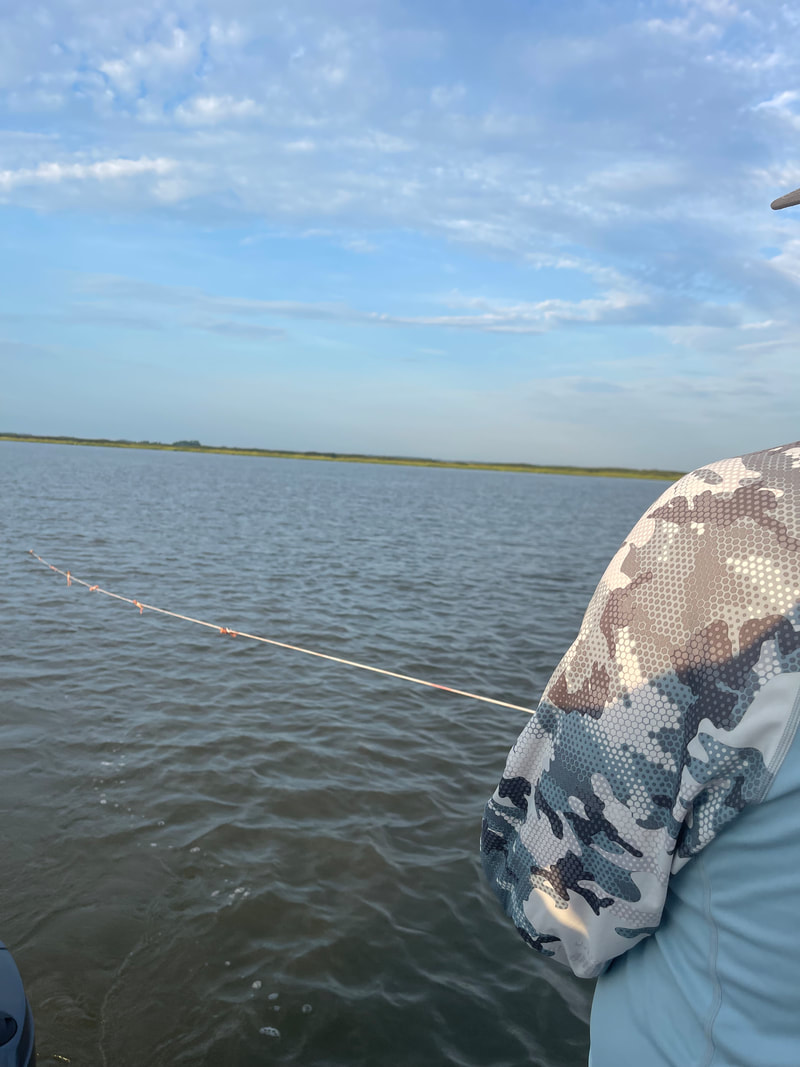 Tyler running the first half of the 1200 foot line. 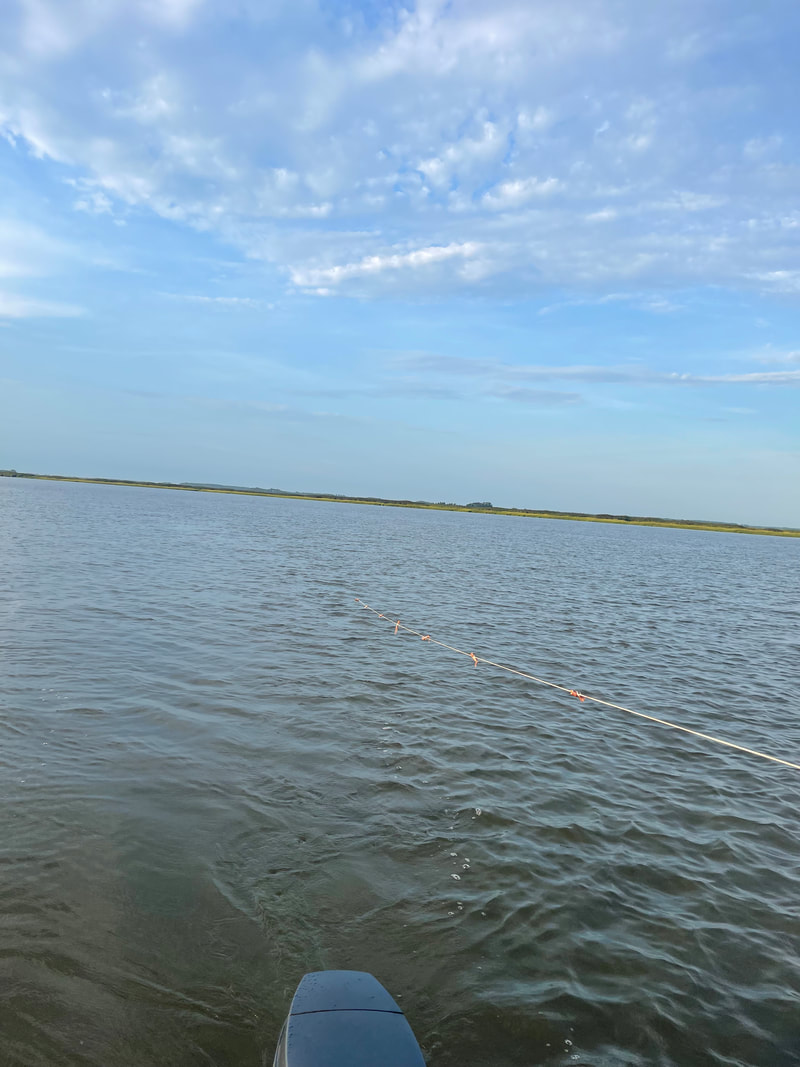 There is a chicken neck placed about every 5 feet on the line. 1200 feet of line with a neck every 5 to 6 feet feet equals around 250 chicken necks. Once the line has had a bit of soak time you run to the down tide side of the line and place the line on the "prop stick". The prop stick is basically a hook hanging off the side of the boat. With the line on the hook the line will ride up off the bottom of the river, up over the hook and back down to the bottom as the boat idles from the bottom of the line to the top. 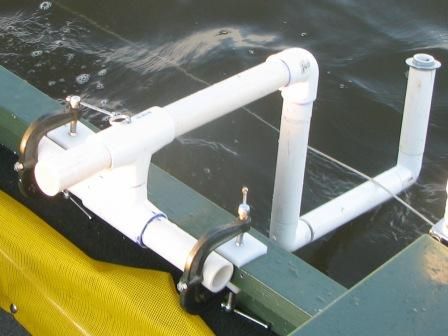 Example of a simple PVC prop stick. This is not ours, I pulled this from the internet. Now, this is where the fun begins. As the boat is idling up the line with the line on the prop stick the line is gently lifted from the bottom of the river. As the line is coming up and the baits come into view the crab that are on the baits will hang on, all you have to do is net them and put them in the cull bucket. Sounds easy doesn't it? When you get to the end of the end you take the lone off the prop stick and let it settle back to the bottom. While you are motoring back down to the other end the crabs in the cull bucket are sized. The little ones and females go back and the legal sized males go into the keeper bucket. If you are running a 1200 foot line, by the time you get all the way to the end, cull the crabs from the last run and get back down to the bottom it is time to go again. Once the line is in there really is not any down time. 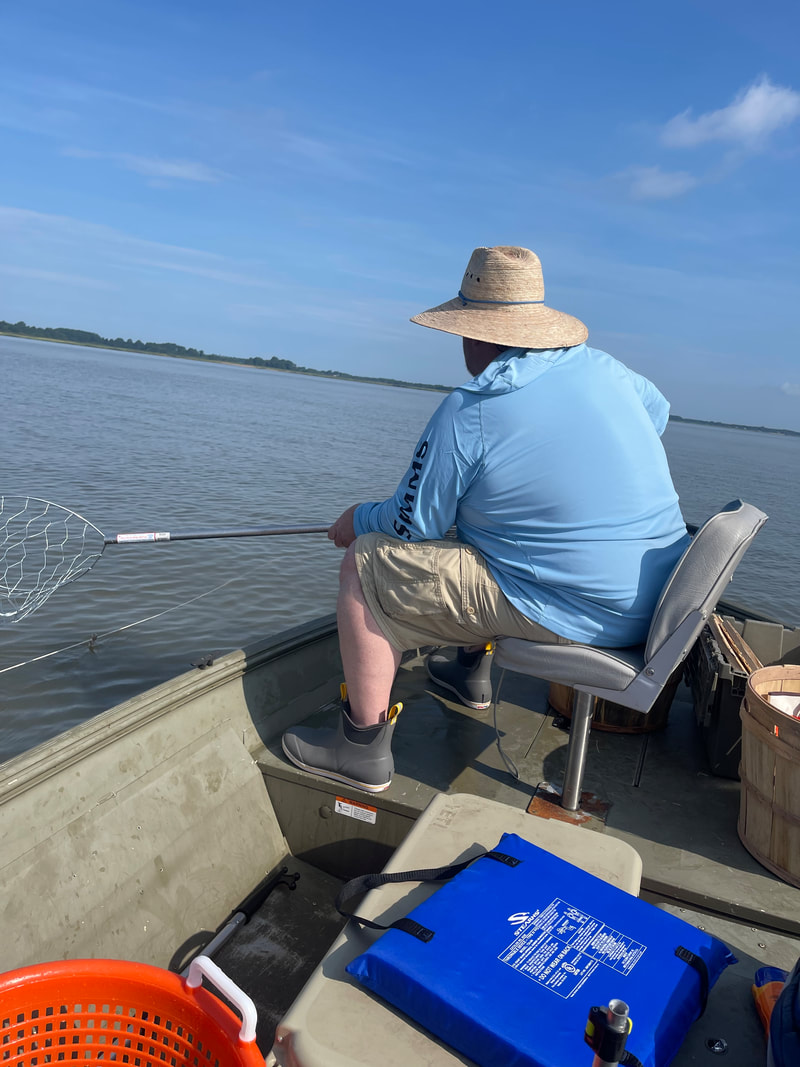 Look at that technique... 7 to 10 keepers per run is a good average. At that pace it does not take long to fill a bushel basket. 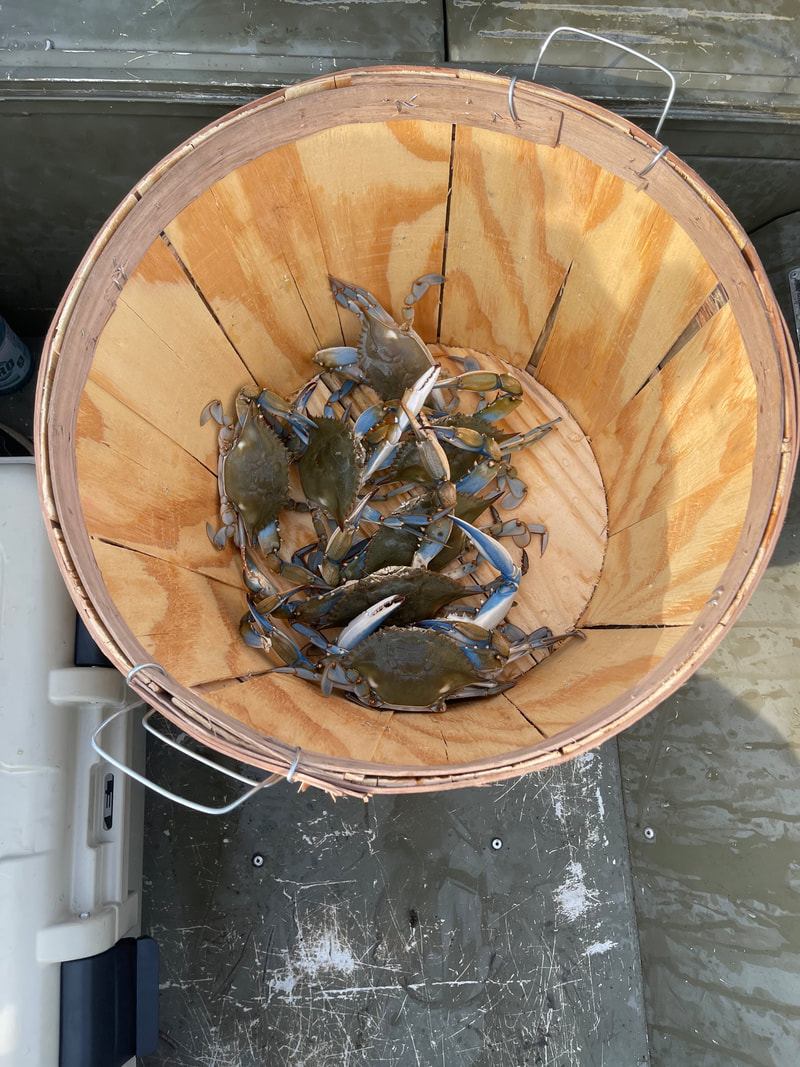 Every crab goes in the cull basket until they can be sized and sorted. We did about 7 runs on Saturday and had a bushel of big ole Blue Claws. We were off the water and back home by 2:00 in the afternoon with the boat washed, motor flushed, gear cleaned and stowed for next time. Remember those 250 chicken necks. Well, they don't take themselves off the line... 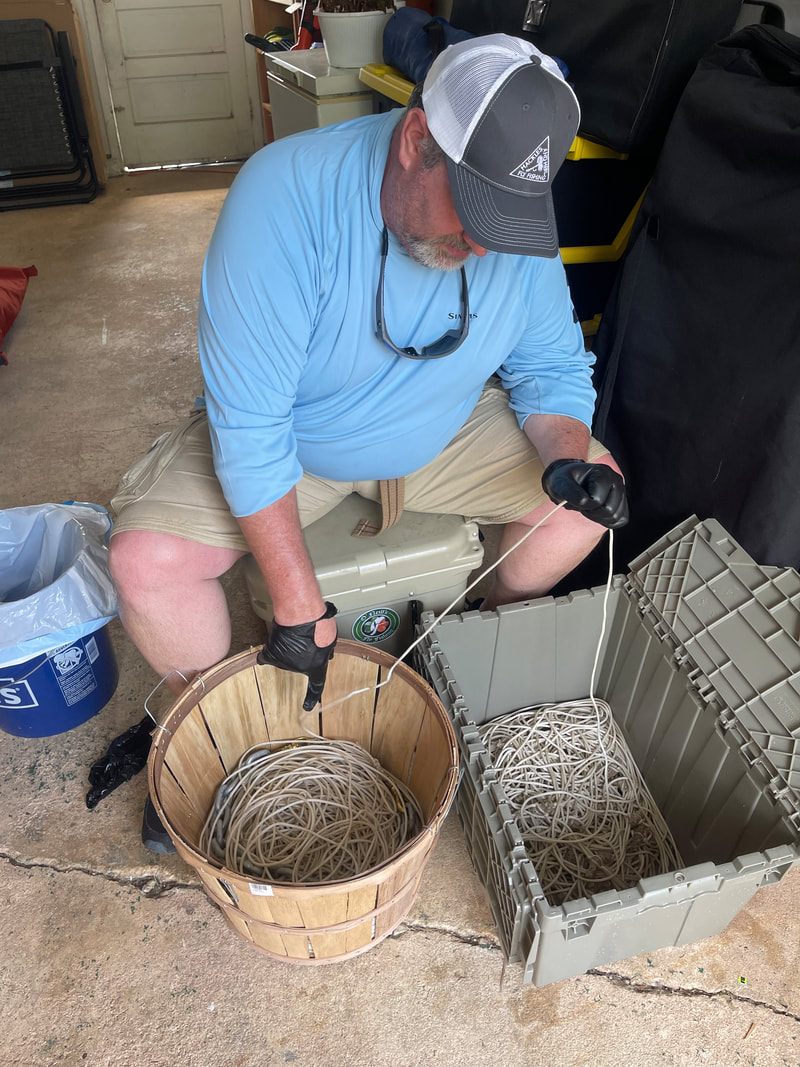 Even as nasty as un-baiting the line is, it is all worth it later that evening. Not much is better than a good batch a crabs for dinner. 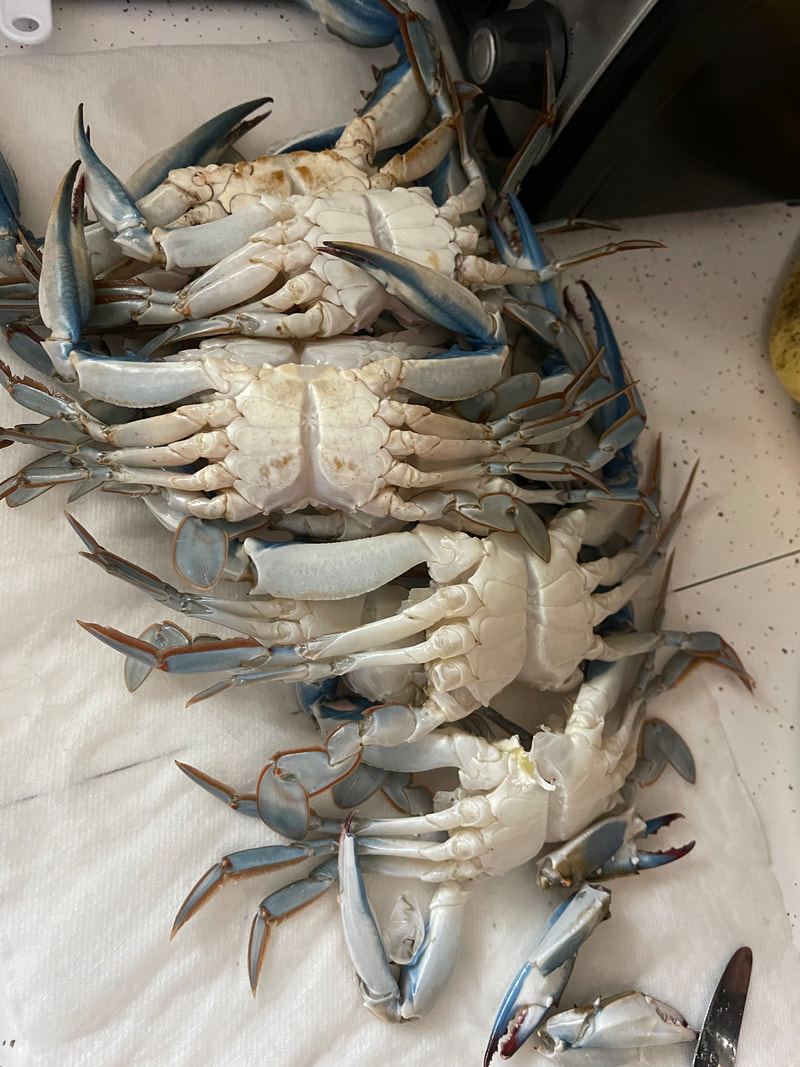 I always clean my crabs before steaming them. 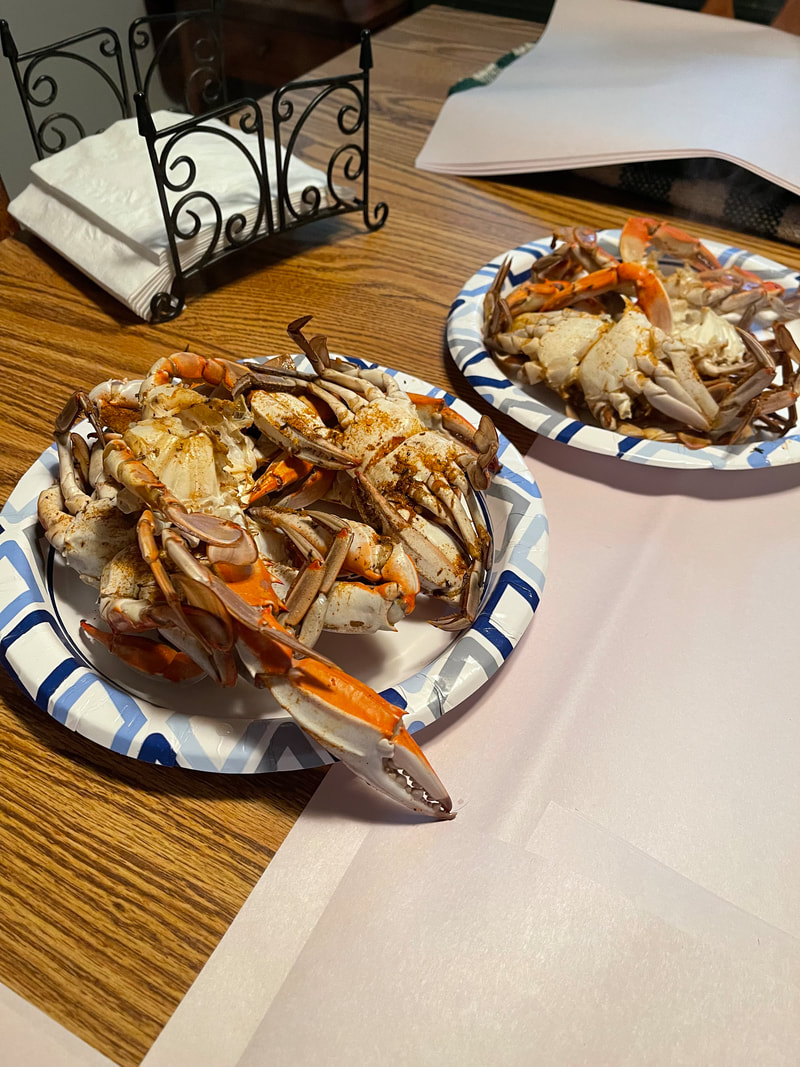 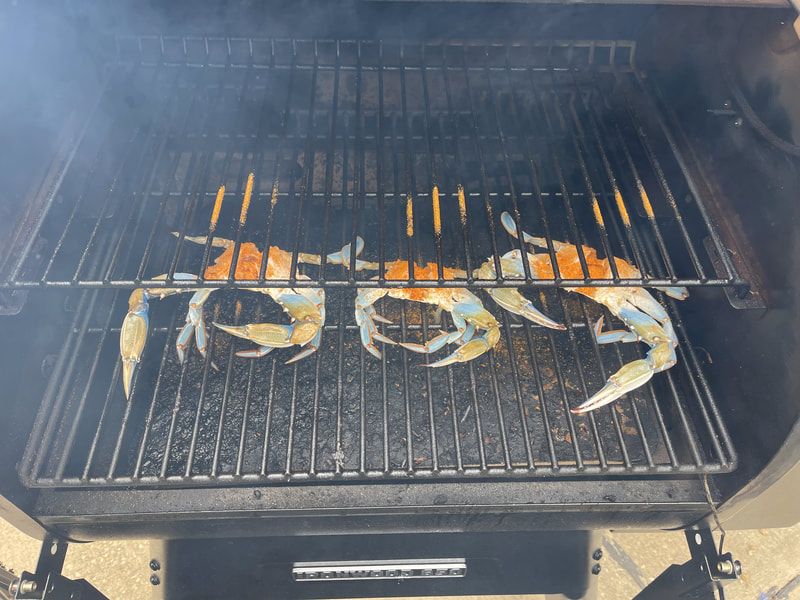 Tried something new this time. Did a few of the crabs on the Treager. Smoked crabs ROCK! Like I said, this is not the type of blog post you would normally see on a Fly Fishing web site. Every now and then it is good to do some different things. Till next time...
Tight Lines - Tim Today we take a look at our good friend and Norvise ambassador Marc Williamson. Marc is a retired teacher that still spends much of his time teaching others how to fly fish. A Father, Grandfather and friend to many, Marc is as kind of an individual as you will ever meet. To learn more about Marc check out his Norvise Data sheet. Today we take a look our buddy Kevin Griffin. Kevin is a southern fly fisher from Georgia. Kevin is a self proclaimed Trout nut. He has many patterns he had perfected, my favorite is the Caddis pattern used as a strike indicator. Check out more about Norvise ambassador Kevin Griffen. Grant Alvis is a Virginia angler who is as much at home on a native Brookie stream as he is in the salt chasing Reds, Tarpon or Bonefish. His forte is the Northern Snakehead. Grant is an ambassador for the great gamefish, educating people on their misrepresentation as an invasive species and getting people to realize these are not the "Frankenfish" some people would have you believe. Grant is a fantastic fly tyer, tying patterns for just about everything. If you would like to learn more, read on... My evolution as a fly fisherman is similar to many others. I started out catching trout with a can of corn, mepps spinner, or the old faithful rooster tail. I purchased a float tube and started floating down the Toccoa river which has become my favorite local stream. As I would pass fly fishermen, at first I stereotyped them as being snobby, stuck up, and having more money than they knew what to do with. One day on my float I had stopped near a fly fisherman and he struck up a conversation with me. To my shock, he was actually extremely nice and friendly. I asked many questions as far as equipment, flies, casting, etc and he was very generous in sharing his knowledge. That day changed my life. I made up my mind that I wanted to get into fly fishing so I went straight down to the local Academy sports. $100 later I had me a complete set…….fly rod, fly reel, fly line, backing, leader and even a few flies included. After hitting the river and catching my first trout on a flyrod, I was hooked. The next step for me was trying to tie my own flies. I decided it would be amazing to catch a trout on something I created with my own hands. I started with a $60 fly tying kit that I got from Bass Pro Shops. I remember the first fly I attempted was a flying ant. I thought it looked perfect at the time. 😊 I then joined a trout club and decided to post in the forum mentioning that I was learning fly tying and to see if anyone had any tips. I got several replies that I should look up this well known tyer, Chuck Morris, who lived just down the road from me. He had been tying flies 46 years at the time. I messaged him and he told me to feel free to come by his house anytime. I was there that same night. Chuck took me under his wing and taught me the fundamentals of tying and then got more and more advanced as we went along. Chuck had been taught to tie flies by the one and only George Harvey. He was a student in George’s first fly fishing class at Penn State. Learning the correct proportions and fundamentals from the beginning has served me well over the years. Chuck gave me countless bags of materials when I would go see him. He would give me a pattern to go home and practice and then the following week, I would bring in several flies I tied and he would critique them. I tried over and over again to pay Chuck for his time and materials and he would never take a dime from me. He always said, “Fly tying is an artform. Just pay it forward and that is all the payment I want from you.” That is what I have always tried to do from tying at Atlanta Fly Fishing Show, Spring flings, Fall Flings, Trout Unlimited meetings, etc. I finally realized why Chuck had made that request of me when I was tying at an annual Spring Fling and a young boy came up to me with his dad. His dad said that his son wanted to come over and thank me. I was taken off guard a bit and asked “Thank me for what?”. Apparently a few years earlier I was a guest tyer at an outdoor expo in Atlanta area and the little boy came over to me and was very interested in the art of fly tying. His dad said that I took the time to actually help him tie his first fly and on the way home he begged his dad to get him a fly tying kit which he did. He said fly fishing and fly tying has become their favorite hobby to do together and it all started with the “First fly”. That let me know exactly what Chuck meant by “Paying it Forward”. Later, I lucked into a fly tying lot full of materials, hooks, beads, etc and part of the lot was a Renzetti traveler vise. I was, and still am tying on a Norvise so I just showed up at Chuck’s door one day and when he opened the door, I handed him the Renzetti as a thank you and he is still tying on it today, 13 years later. I have learned since then that the fly tying/fly fishing community is full of some of the best people I have ever had the fortune of meeting. Most of them would give you the shirt off their back and are always paying it forward. With that being said, thank you Chuck for everything. Sharing your time and knowledge has been a true blessing to me and developed in me a passion that I hold dear to this day. Till next time... Tight Lines.  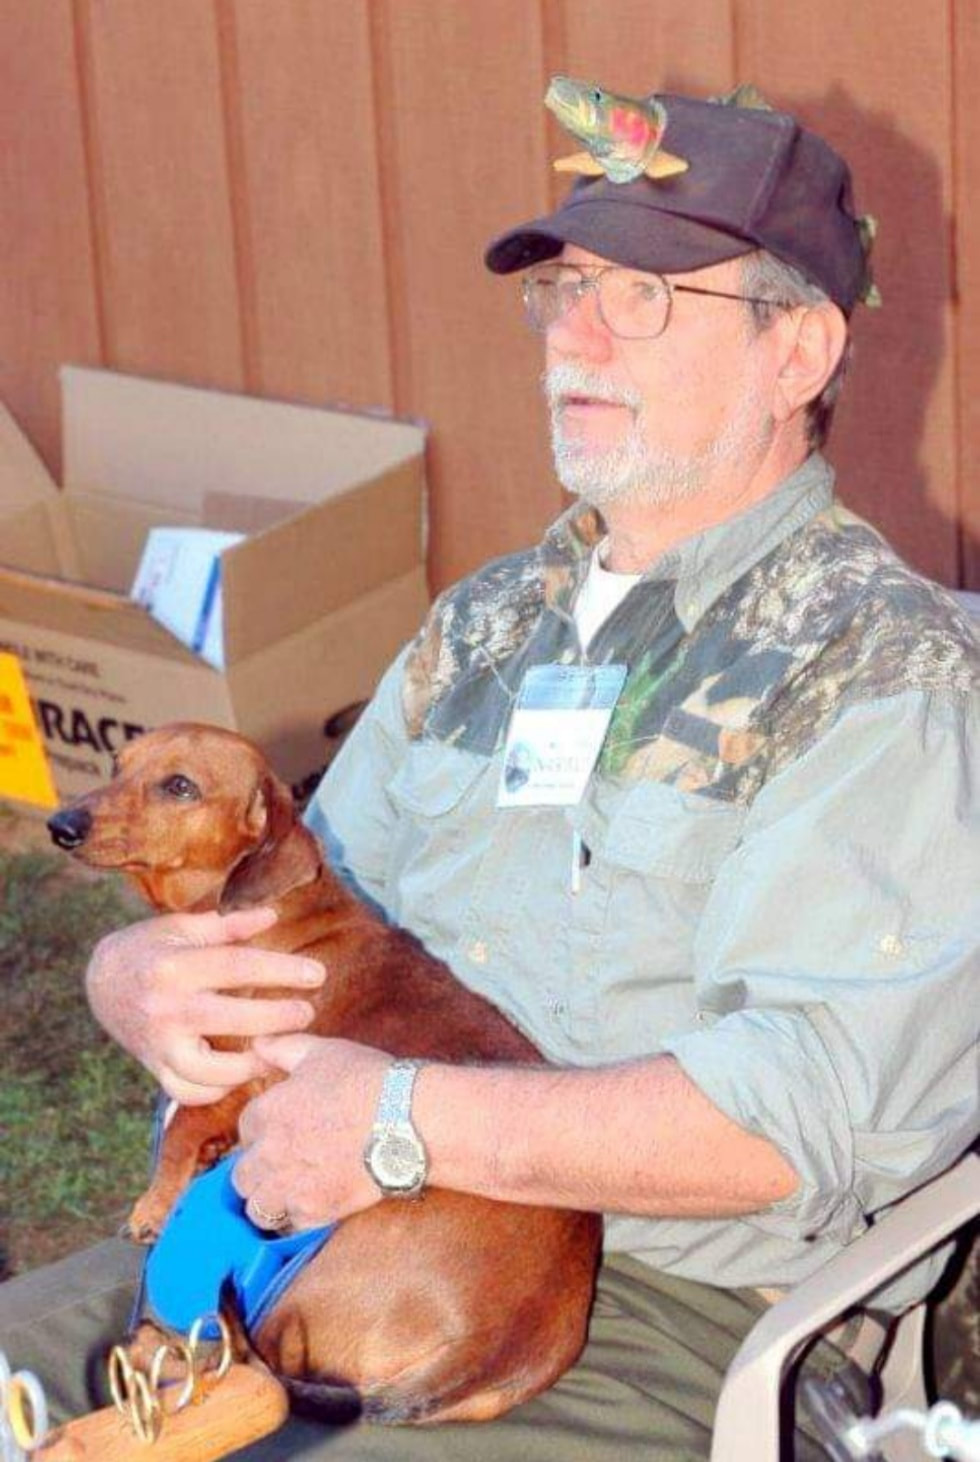 I was fortunate to meet Shawn many years ago when I was managing the fly shop in Delaware. We have since become the best of friends. Shawn is an accomplished fly fisher with a life list of 60+ species landed on fly gear. He as also an IGFA record holder (should be 2 IGFA records, but that is a story for another time) and is an exceptional fly tier. For a deeper look take a look at his Norvise Data Sheet. By Norvise ambassador Marc Williamson.Through the years of fishing spring creeks, I have learned many lessons on fishing them.
 Some great tips for fishing some smaller water. Good stuff Marc, thank you for sharing these with us. Till next time...
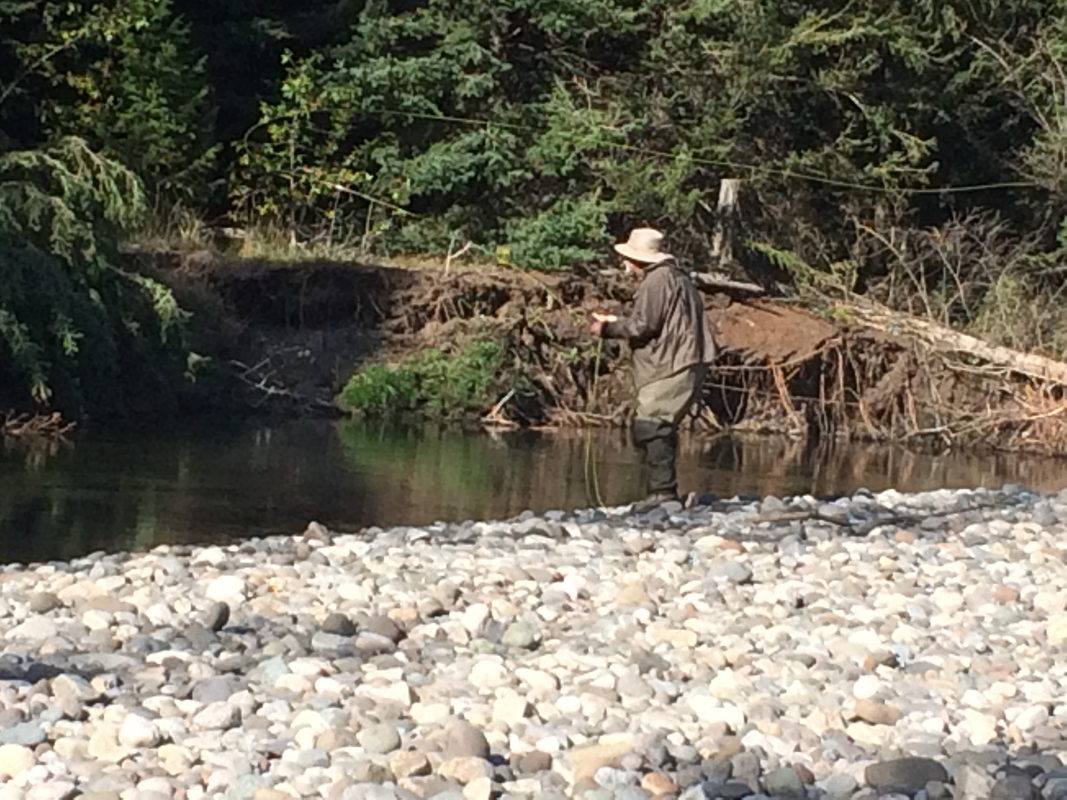
Tight lines - Tim By Norvise ambassador Brian Davenport. Everyone has a comfort zone-whether in fly tying or fly fishing. Some folks are comfortable at tying certain styles of flies, or fishing in a certain style. But not too many folks are comfortable with more than a couple types of styles of fishing or tying. The ones that are comfortable with various styles, you can bet they are the ones consistently catching fish. During the Norvise March Madness competition there were 64 tiers and some very accomplished tiers. Even some of the more accomplished tiers found themselves being pushed out of their comfort zone by the fly categories that were drawn. It’s not that they could not tie the flies, but that the type of flies were different than what they normally tie. Some really awesome flies were tied, as they stepped out of their comfort zone.  As for your comfort zone while fly fishing, I know some fly fishers who follow the motto of dry fly or die. When you consider that trout especially, eat 90% of their food subsurface, that does not give them very favorable odds of consistently catching fish. I also know some anglers that only fish subsurface and refuse to fish a dry fly. They are also missing out in some circumstances, like when a hatch is on. Some anglers are so set to one style of fishing, to the point of they will avoid certain places to fish because they cannot fish it the way they are comfortable with. My favorite fishing partner loves to fish dry flies, and I mean who doesn’t- it is very cool to see the fish come up and take your fly off the top. But she was missing out on other times because that is all she would fish. However, over the last couple of years she has started expanding outside her comfort zone, to include streamer fishing and swinging a wet fly.  The "Holy Grail" of Trout fishing (Pssst...this only happens about 20% of the time). Last year we both got out of our comfort zone more, and started to learn and experiment with Euro Nymphing. After reading several articles and talking to some friends about how it is done. We gave it a try on several outings. We had some awesome days on the water, that likely would have only been so-so using other methods. 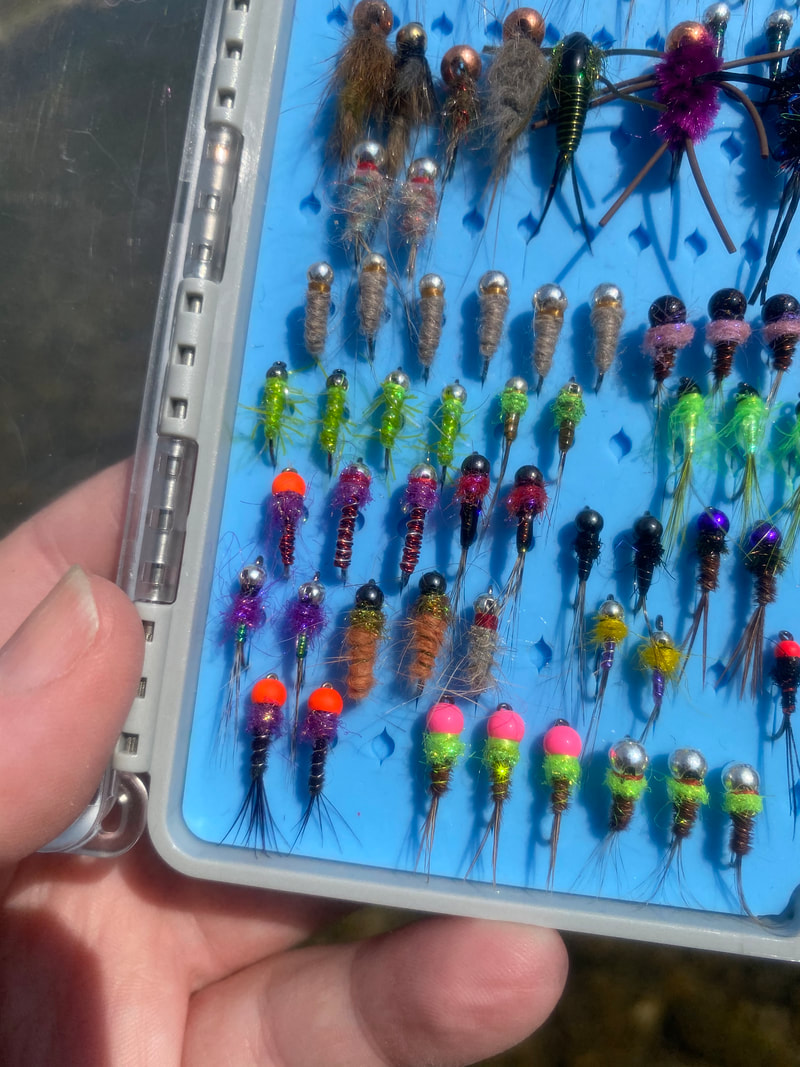 A nice selection of Euro type nymphs. 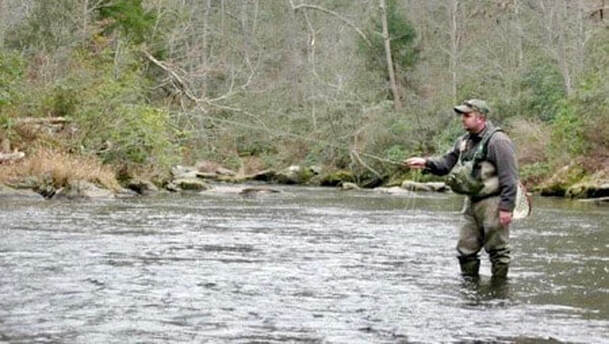 We live in central Idaho along the Clearwater River. During steelhead season we swing a wet fly with two handed rods for steelhead, however we are going on the Norvise hosted trip to Steelhead Alley this fall. Tim has said that a lot of times they fish with nymphs and indicators as swinging a fly is only when conditions are right-which doesn’t happen too often. I have fished this way for trout and am not very proficient at it, and have had very limited success- so it is definitely out of my comfort zone. I plan on reading up the technique, watching videos and pestering everyone I know that has fished for steelhead in this manner to learn more about it. Also, on my trout fishing outings this year, I may try fishing with an indicator rig more often, so that I can get better at it and more comfortable with it. 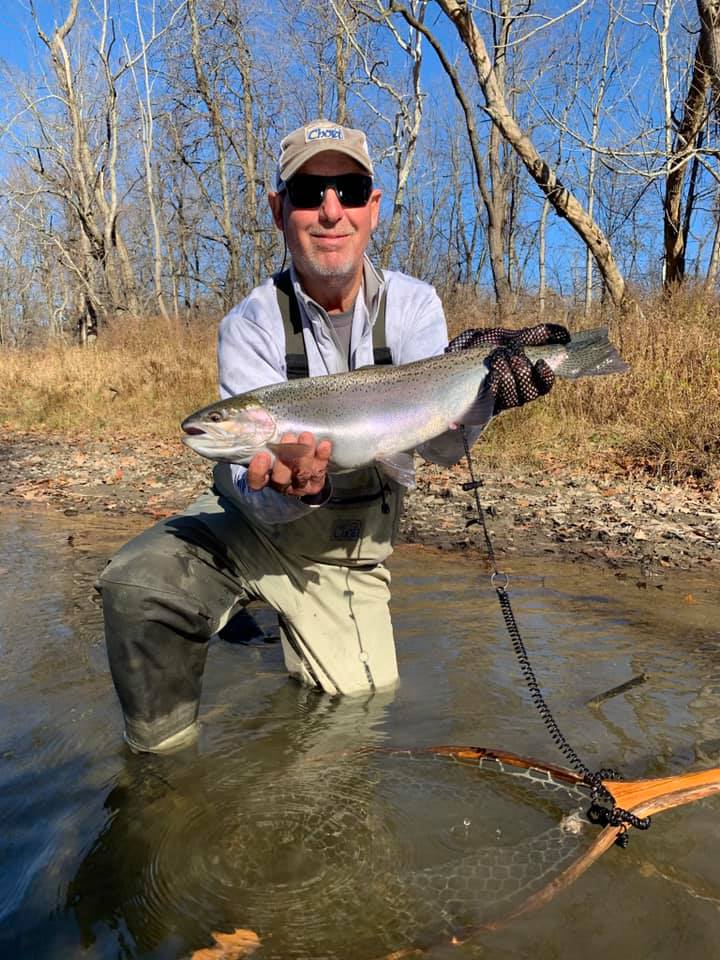 David Delk with his first ever Steelhead on the first morning of the Norvise hosted Steelhead trip. David has been fly fishing for a little over a year and is new to fishing an indicator rig. Now I am definitely not suggesting to give up your favorite flies that you tie, or your favorite fishing technique. I’m just saying that if you normally fish with dry flies, perhaps work a run with the dry fly and then work your way back thru with a nymph rig. Fish most of the day with your preferred method but set aside a couple hours to specifically fish different types of water and different method. 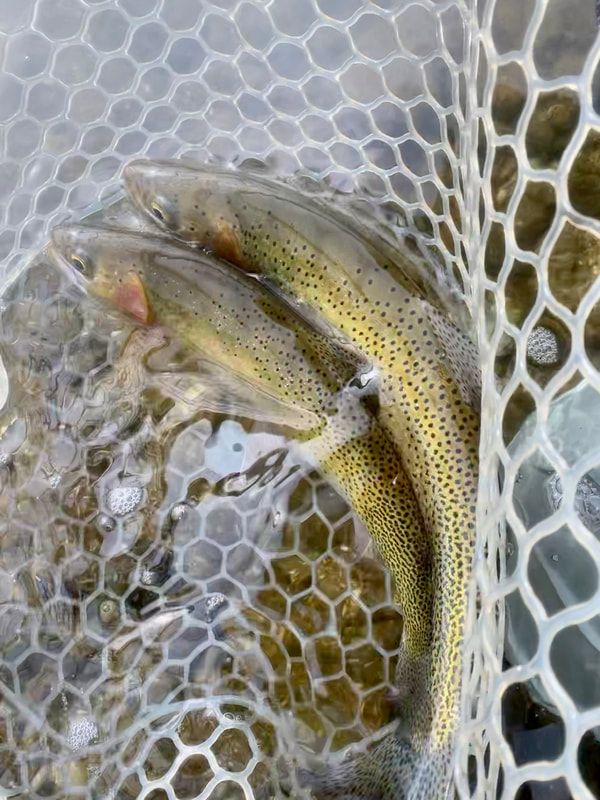 This also brings up another point-go and fish different bodies of water! A lot of people go to the same body of water and fish the same holes with the same methods each time they go out. Don’t be afraid to step out of that comfort zone and fish a different body of water or a different place on that body of water. If you are willing to step out of your comfort zone it will help you become a more rounded tier and angler and you might just have some great days on the water while venturing outside of your zone! Till Next Time...
Tight Lines. |
Archives
June 2024
Categories
All
Get Your Norvise! Click Here!
|

 RSS Feed
