|
I have put together a brand new presentation for 2021. I am looking forward to debuting this presentation for the first time next Thursday. This will mark my first in-person presentation in almost two years and I am very excited about that!  Stripers are one of the most popular game fish to catch on the planet. I have spent a good portion of my adult life pursuing this great fly fishing quarry. During my "Seven Stripes, the who, what, where, when, why and how of to catch Striper on the fly" presentation we will discuss all aspects of catching Stripers on the fly, from what or who the fish are, to how and where to catch them. If you are a striper junkie like me, then you will not want to miss this presentation! 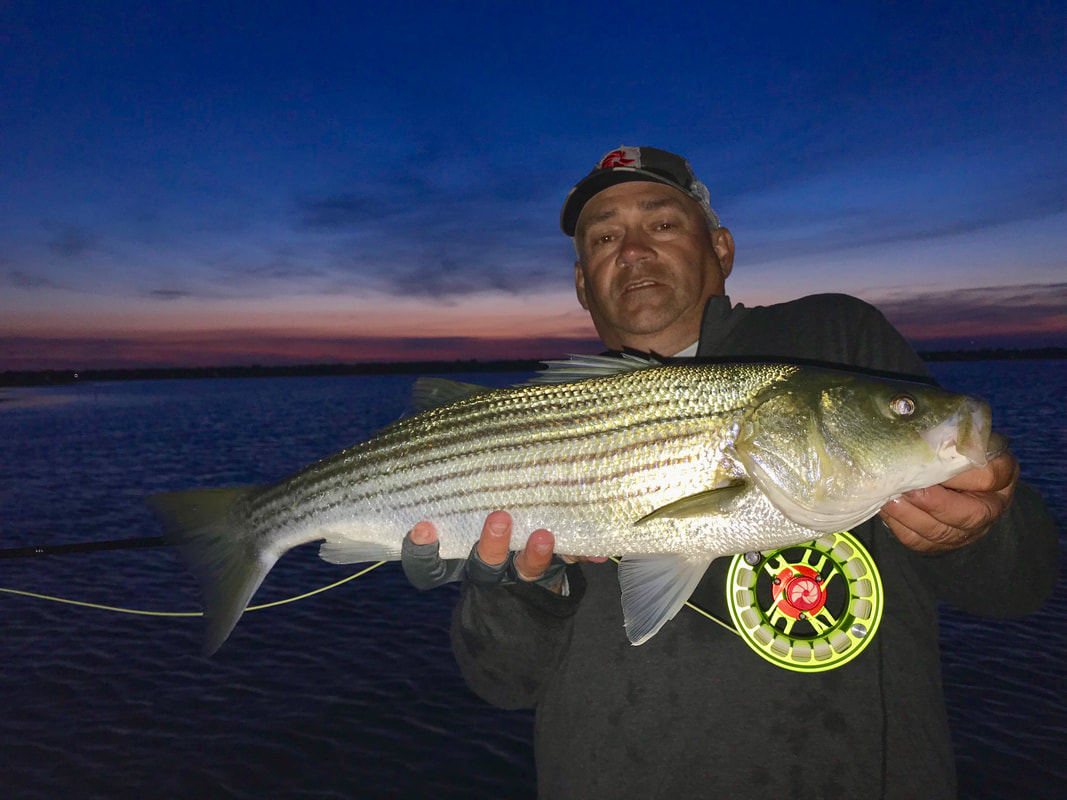 The first chance to catch this presentation will be at the October Delaware Valley Fly Fishers meeting. The DVFF meeting will be Thursday, October 14th, at 7:00 PM, at the Churchville Nature Center, located at 501 Churchville Lane, Churchville, PA. Click HERE for directions. I will start the presentation shortly after the end of the club business. There will be something for every type of fly fisher in this presentation, from the first-year rookie to the seasoned jetty rat. This event is open to the public, with a nominal entry fee for non-club members. This promises to be a great evening; we hope to see you next Thursday night.  If you have any questions please feel free to contact us, if not we look forward to seeing some of our Norvise tyers attending this great event.  Till next time...
Tight lines - Tim Tonight's blog post is an interview of sorts from a few years ago when we had just taken over as owners of Norvise. My buddy Shawn and I were driving to a fishing spot and we were talking about fly tying, the investment to get started, and if a premium vise was worth the cost to a casual tier. We turned the discussion into an interview of sorts. I believe it was posted on his local club's newsletter while he was the president. I stumbled across it the other day and I would like to share it with you, here on the website. Why the cost of a quality vise is justified, no matter how much or how little you tie. An interview by Tim O’Neill with Shawn Rakes TO: Why do you think it is better to begin tying flies using a premium vise rather than upgrading over time as you become more experienced as a tier? SR: Because experience in fly tying, manufacturing, and metalworking has taught me that you will spend more money upgrading over time that way. Cheap tying equipment, vises, tools, etc., are just that. Most are made in China or Korea and will break down quickly either from just use or from time and/or exposure. They lack quality, premium materials, and warranties. So what happens is these manufactures are not in the [fly fishing] industry and are using the cheapest recycled steel or aluminum that they can find. In some cases, just from being exposed to the atmosphere (oxidation) occurs with these devices, and they just fail. Eventually, they will rust, break, crack, or crumble in pieces, and it is unrepairable, rendering them useless. Likewise, Sub-premium springs, pins, threads, bolts, and pretty much any kind of connection or hardware will fail or rust out. TO: What was your first vise? My first vise was a Regal knock-ff. I got it from a big-box outdoors retail store. The jaws began to crack and fail within one year, and eventually, the spring-loaded jaw mechanism just gave out and fell to pieces in my hand. When I contacted the retailer, as it was their name on the vise, they said they could do nothing because it was “fair wear and tear.” Truthfully I was only tying a couple of flies a week. It was ridiculous. TO: So what did you do after that? Is that when you went to Norvise or what? SR: No, I am what you call a slow learner; so at this point, I was just starting to get my [tying] legs under me, really getting excited about tying up my flies to catch fish, just like what happens to a lot of people who fly fish in those beginning years. But, I think because I was a fisherman first and a tier second, I felt that I should spend my money more on fly fishing gear than a vise. I mean, you are trying to get a rod/reel [size] to fit all the different types of fish you are perusing on the fly, and you look at the 500-1000 bucks for a premium vise, and you’re thinking, man I am only tying a handful of patterns right now and so on. So I went for the $150 vise made in the USA; the quality was better, but low-and-behold, my tying abilities gained momentum, and I needed more hook size capability for all those different species I was chasing. Plus, I wanted something with a heavier base for some of the spun hair, articulated, and more complicated patterns I was starting to tie. Even just tying a clouser, I had to turn the fly over in the jaws and then goof around with getting it secure again; it was a pain. I kept that vise for a while, but eventually, the jaws failed on it as they were regular blued steel. So I replaced the jaws and ended up giving that vise to a kid in my fly fishing club to learn on. TO: So you switched to Norvise after that? SR; Yes. My son Ethan took a tying class and learned the vise [from you]. After he had it home for a while, I sat down and started tying on it. It is different at first; you have to get used to turbo-rotary ability. I kept losing the thread and having to restring the bobbin. Once I figured this out though is that this vise can do it all. It is truly a “SYSTEM.” I have tried tying on a regular vise since I switched over, and there is simply no comparison. The three Editors note; there are 4 jaw types now with the addition of our shank jaw. quick-change jaws are stainless steel and hold a hood like they are set in concrete. I also have a marble base, so it does not move at all. I tie a lot of big stuff, and it handles it with no problem. This thing is heirloom quality; I just love it. TO: So I guess you would recommend it? SR: Absolutely, I think for the price of one quality fly rod and reel set-up, you can have a system that is heirloom quality, ties consistently and quickly and will last forever. I am a slow tier, so the vise [Norvise] makes me respectable when attending fly-tying meetings, events, or gatherings. Also, I target a vast array of species from creek chubs to tarpon in a single season, so I don’t know how you can beat the flexibility of the jaws. My Norvise is like a Fox or Parker shotgun, a Hardy Brothers ‘perfect’ reel, or a Rolex watch. I guess what I can say is: It is entirely efficient. Norm left nothing to chance; there are no wasted movements. Its development is the marriage of engineering and intimate fly tying knowledge. TO: You ready to go fishing? SR: Yep. Well, he makes a good argument and one we certainly agree with. It is funny, just prior to working on this post I was talking with a customer on the phone. She told me that she has one of Norm's original vises. She believes it to be close to 30 years old and it is as good as the day she bought it. Quality parts made in the USA with a lifetime warranty...what's not to like. Thank you Shawn for helping me with this post and a big thank you to all of the Norvise customers out there. Til next time... Tight Lines - Tim Today we take a look at our good friend and Norvise ambassador Marc Williamson. Marc is a retired teacher that still spends much of his time teaching others how to fly fish. A Father, Grandfather and friend to many, Marc is as kind of an individual as you will ever meet. To learn more about Marc check out his Norvise Data sheet. This month I was honored to have been asked to do an interview for "On the Fly South" online magazine. This was a fun interview, Usually people want to talk about the vise or how Norm and I started to work together. That is fine as I always like to talk about Norvise. This interview was a little different as you will see. To check out "Getting a Grip on the Fly Tying Business" Click the image below. 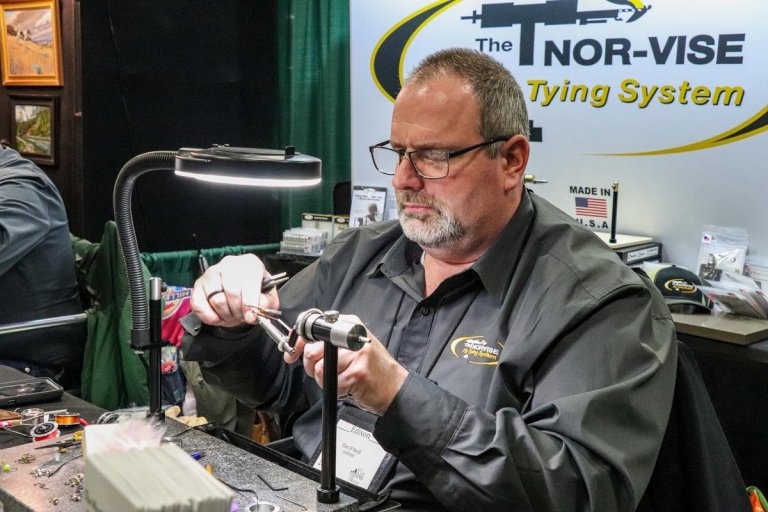 I am always humbled when I am asked to do these types of things. Never in a million years did I think I would be in this position. Thank you for reading, thank you for your support, and thank you for tying on a Norvise! Till Next time...
Tight Lines - Tim By Braden MillerThursday, after 8 days in Emerald Isle Albie fishing, spending time on the beach with my family, wearing board shorts and flip flops we made the four hour drive home to meet Tim at my house. Mom and I were home for a hour and a half, just enough time to unpack the trucks, switch some clothes into another bag and we got back in the truck to head to Sylva, NC for the Tuckaseegee Fly Shop’s Norvise Demo Day at their Sylva location. Our 6 hour drive ended up being close to 8 hours due to accidents and all lanes closed for a bit. Friday morning we woke up to temps in the 40’s so we traded our board shorts and flip flops for jeans, sweatshirts and shoes! Mom, Tim and I got some breakfast before we headed to the shop to set up our vises for Demo Day on Saturday before we heading to the river with Shannon “Big Mess” Messer (I loved how he answered the phone Tuck Fly Shop, Big Mess speaking can I help you?). We all got our waders on (even Mom) and headed out to do some Euro Nymphing, which I had not done before. Even Mom got waidered up and hit the river with us.  Braden working the first run.  Rule #1...Don't guide the guide.  It was not long before Tim was into the first wild "Bow. 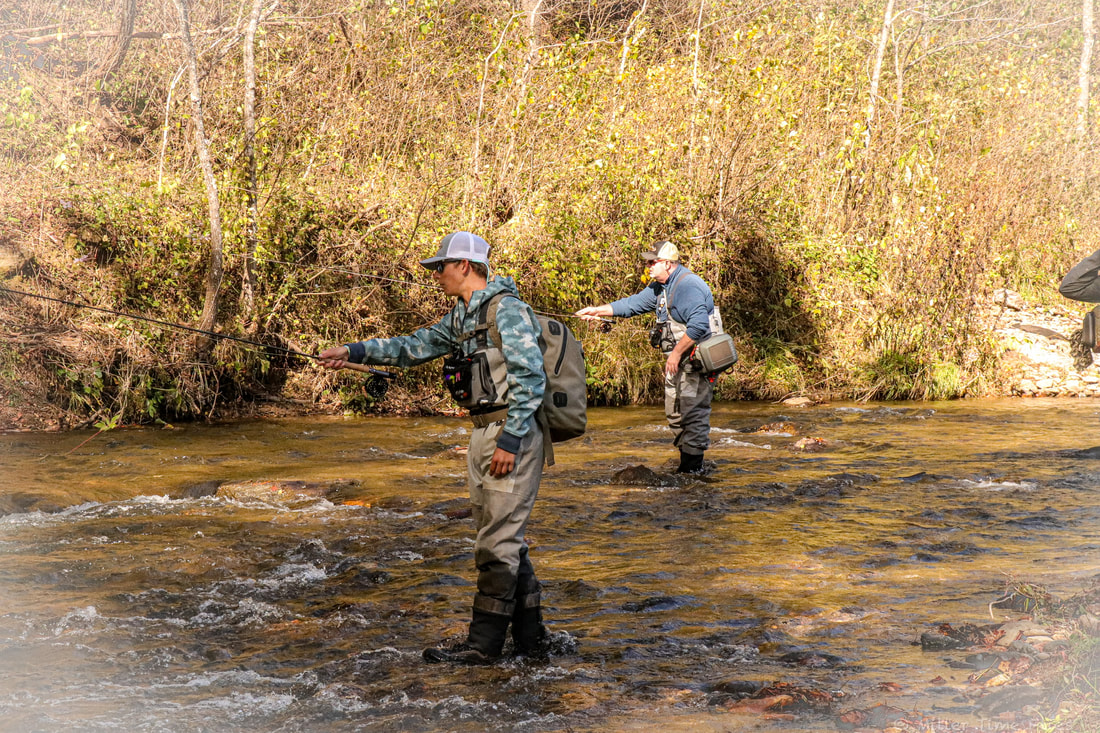 Braden and Tim working a run. (Shannon came behind BOTH of us and caught fish here...people, Big Mess is GOOD)! 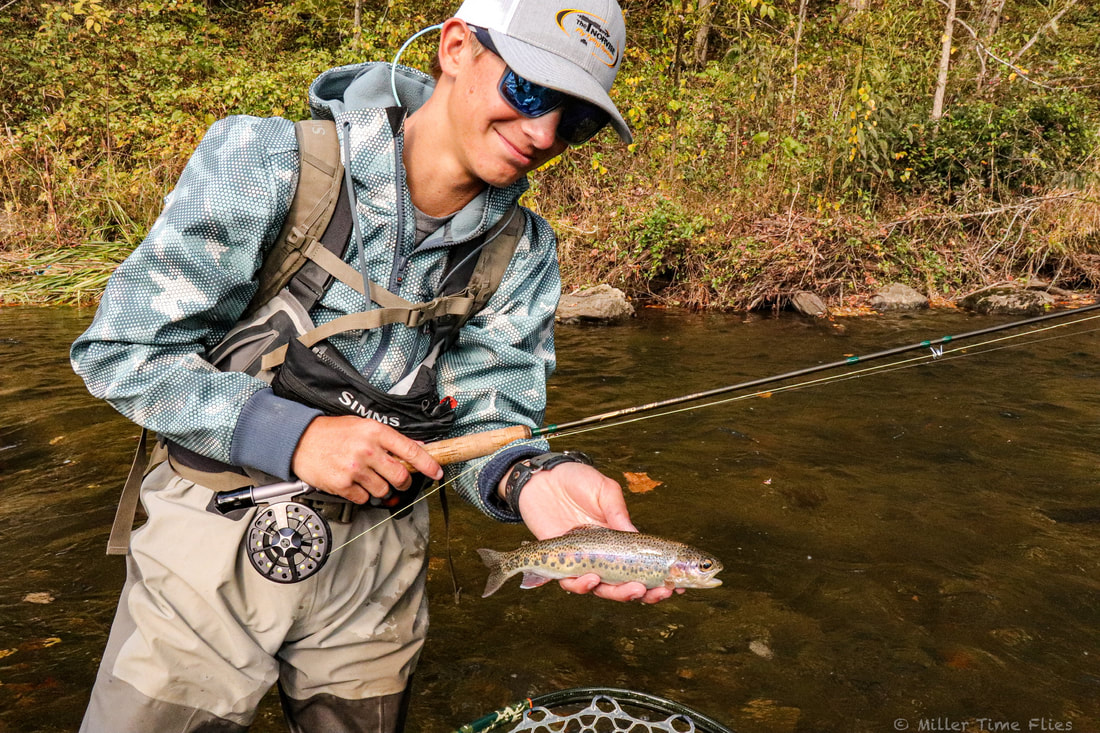 Awesome fish 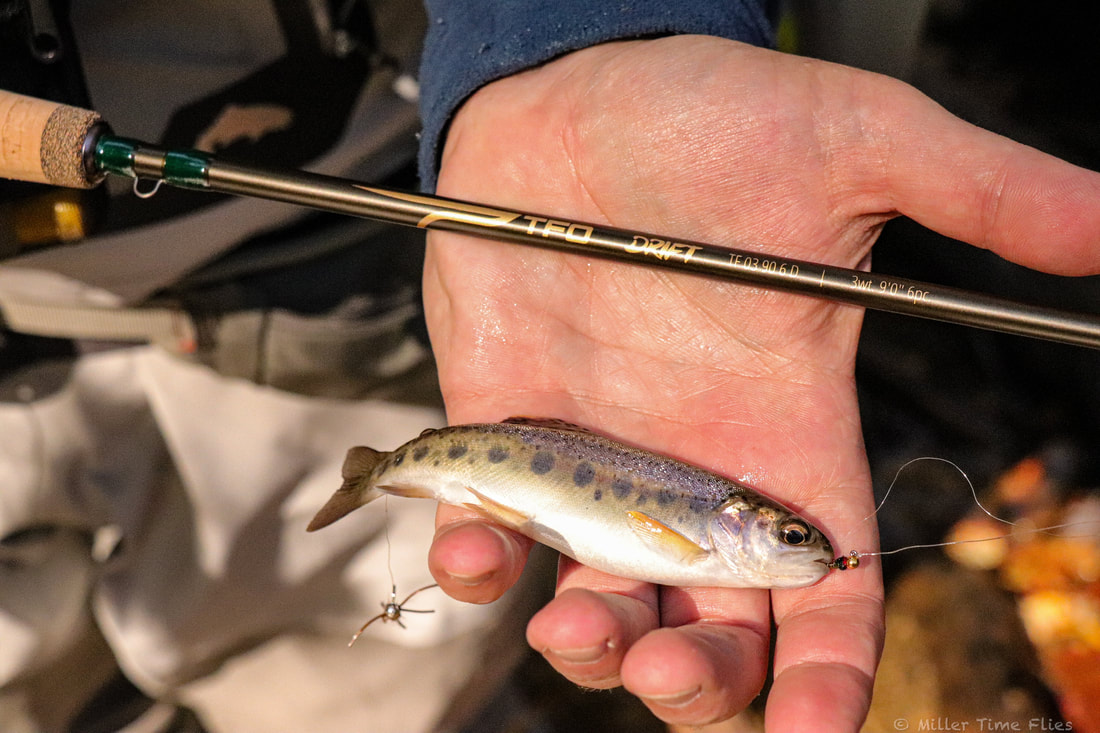 The TFO Drift Rod was perfect for this type of fishing. 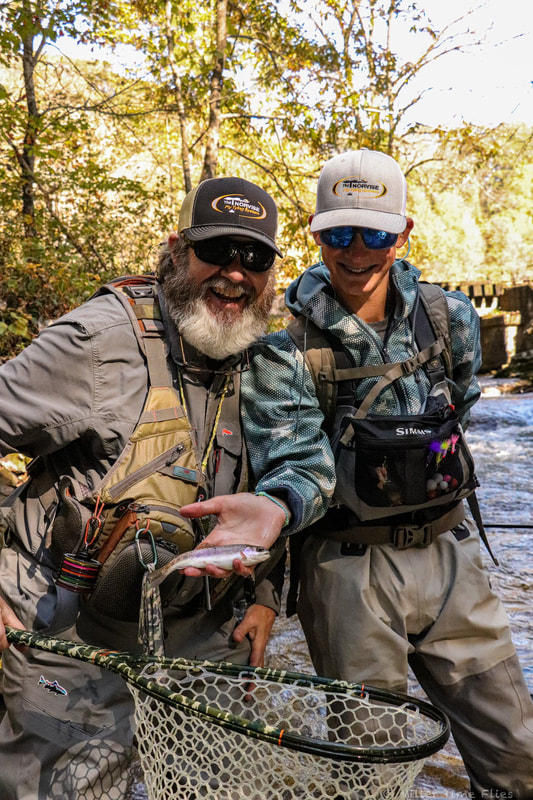 2 happy fisherman. Tim and I both were using the Temple Fork Outfitters Drift Rod. After a quick Euro Nymphing lesson and some tips from our amazing guide, Big Mess, Tim quickly caught his first wild rainbow of the day and I wasn’t far behind him. After fighting Albies in the Atlantic Ocean for a week, I set the hook rather strongly and launched two poor little rainbows right out of the water. Luckily for both the fish and myself they stayed on the hook and landed back in the water. We fished several sections of the river and probably caught 25 or so wild rainbows and Tim landed one wild brown.  Love these wild Rainbows   There is a picture an artist can't paint! 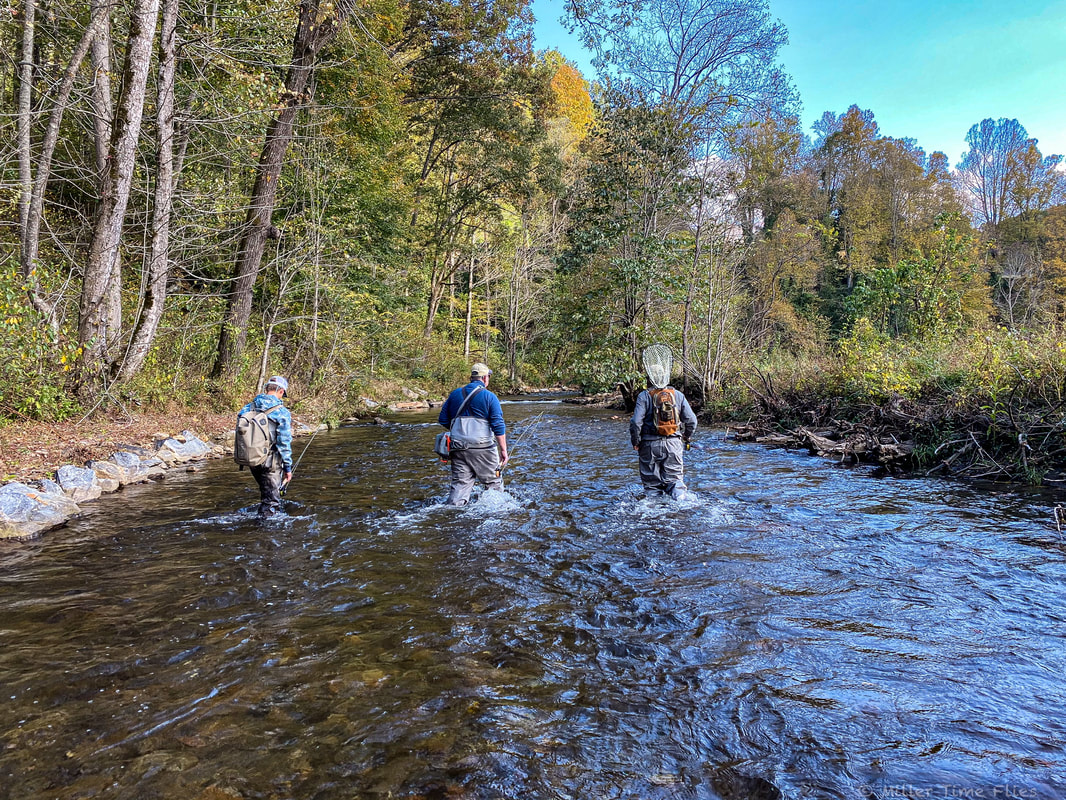 Moving to the next run while Big Mess is dropping some wisdom! 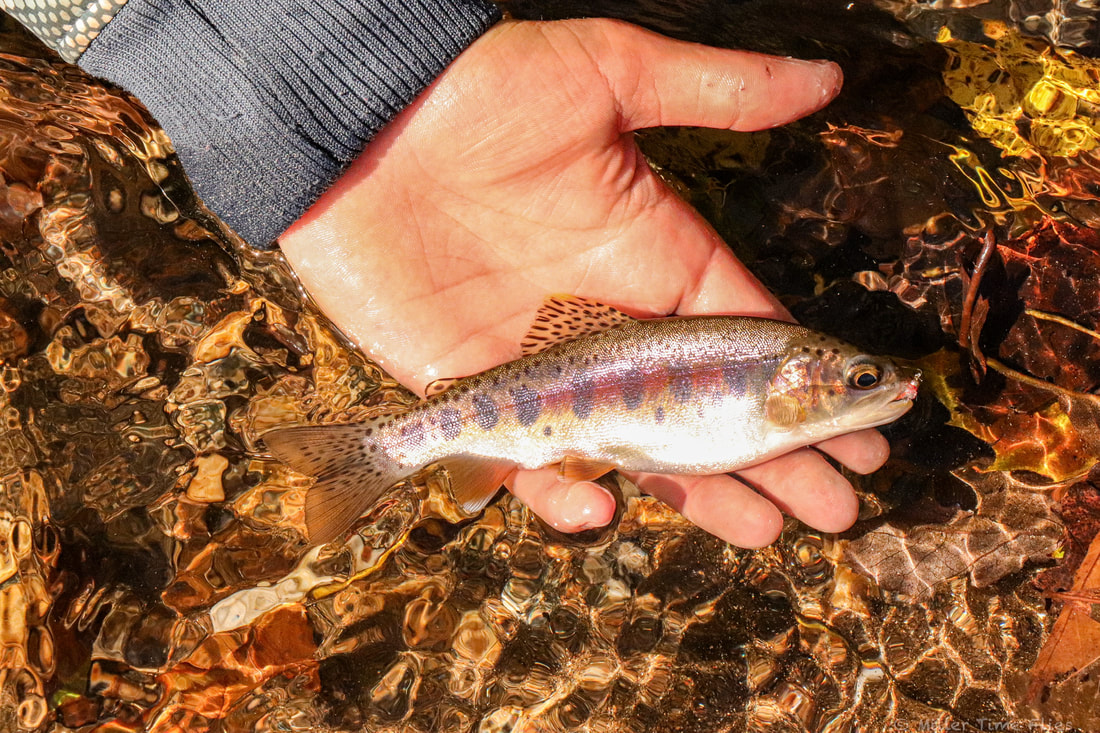 This little guy needs to visit Jenny Craig! 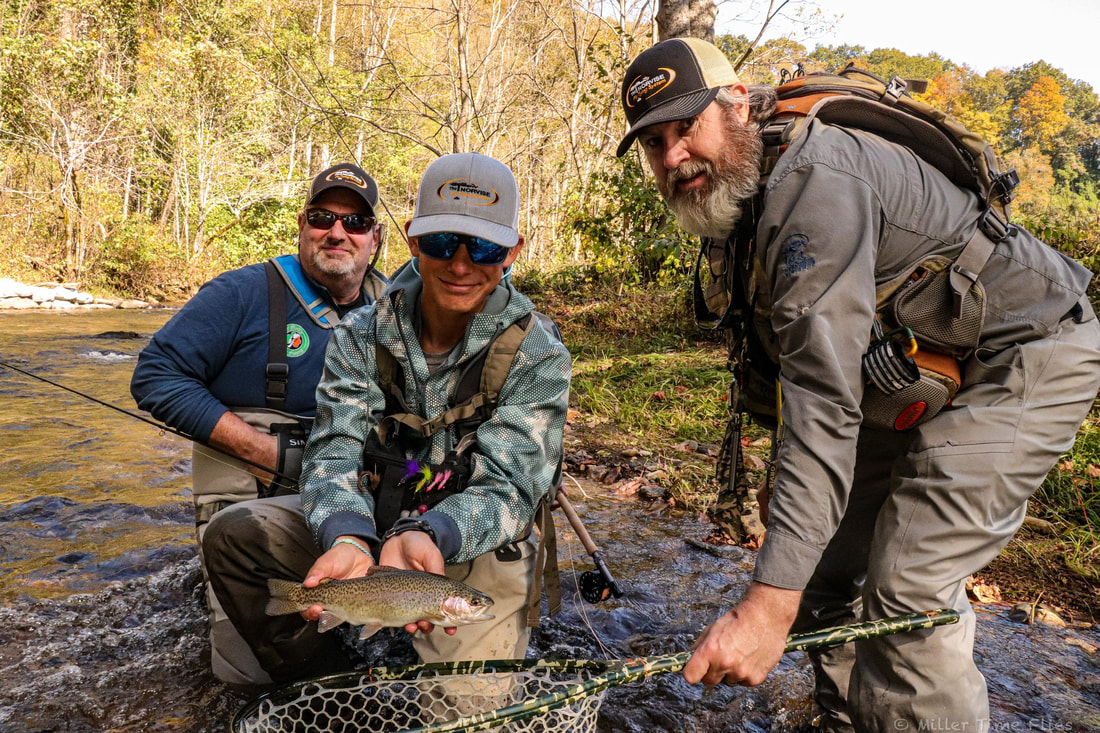 Braden with one of the better ones of the day! 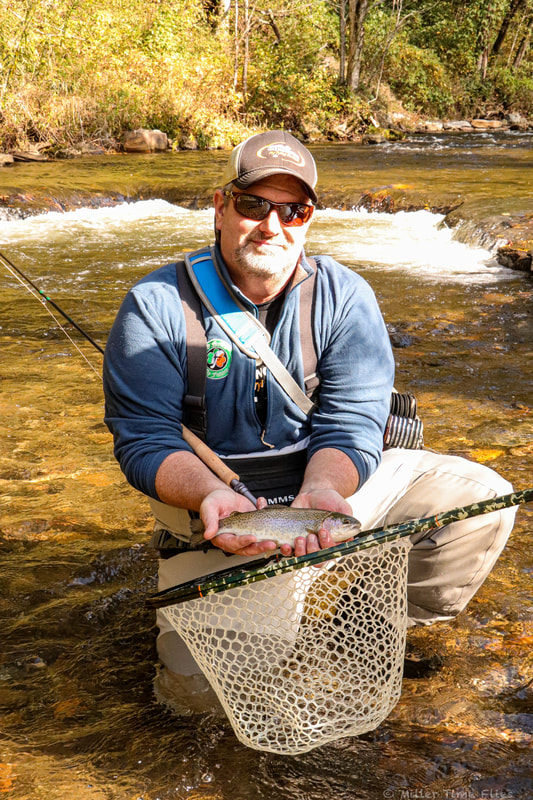 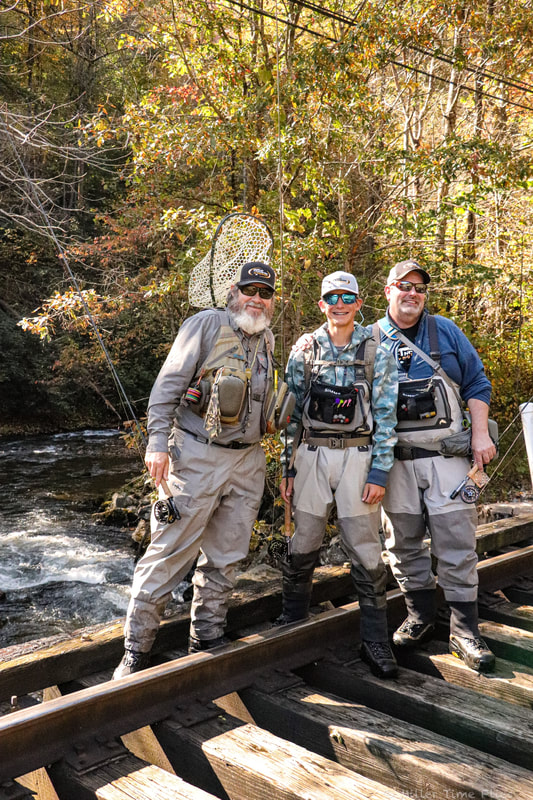 This was truly a great time!  The smile says it all! 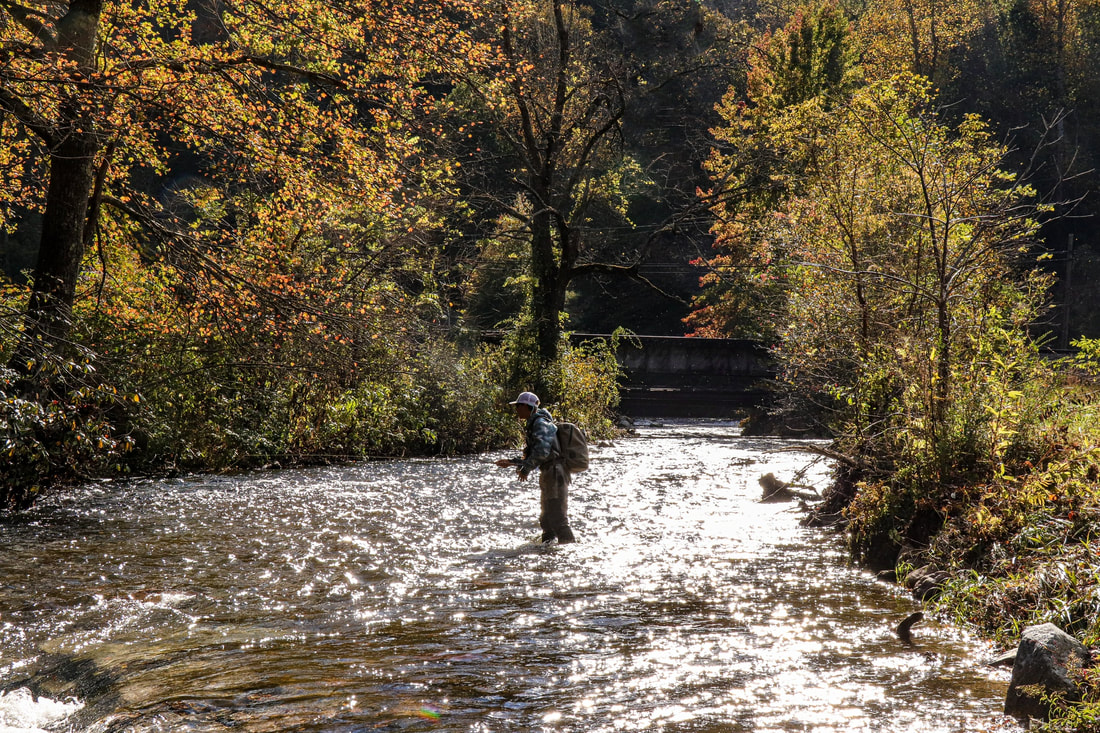 This may be my favorite picture of the whole weekend. We caught a bunch of beautiful small rainbows, a handful of decent sized rainbows and I caught a rather chunky fellow. Shannon recommended we have dinner at really good BBQ restaurant called Haystack Smokehouse. Man was that some good food; from the Brunswick Stew, to the pulled pork, brisket, andouille sausage and especially the Banana Pudding. I can personally say we will never go to Sylva and not eat at the Haystack Smokehouse (man now, I wish I could eat dinner there tonight). It was an early night for the three of us so we could be ready for Demo Day Saturday. 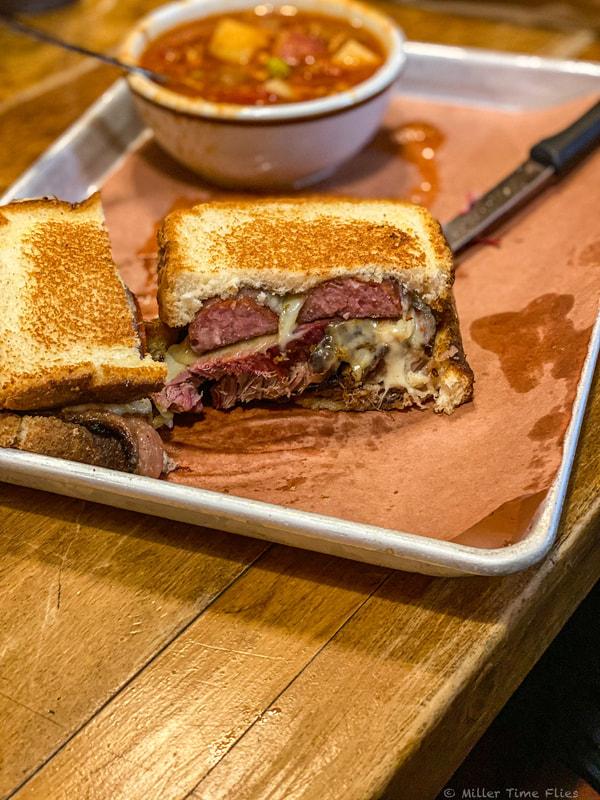 Good stuff here 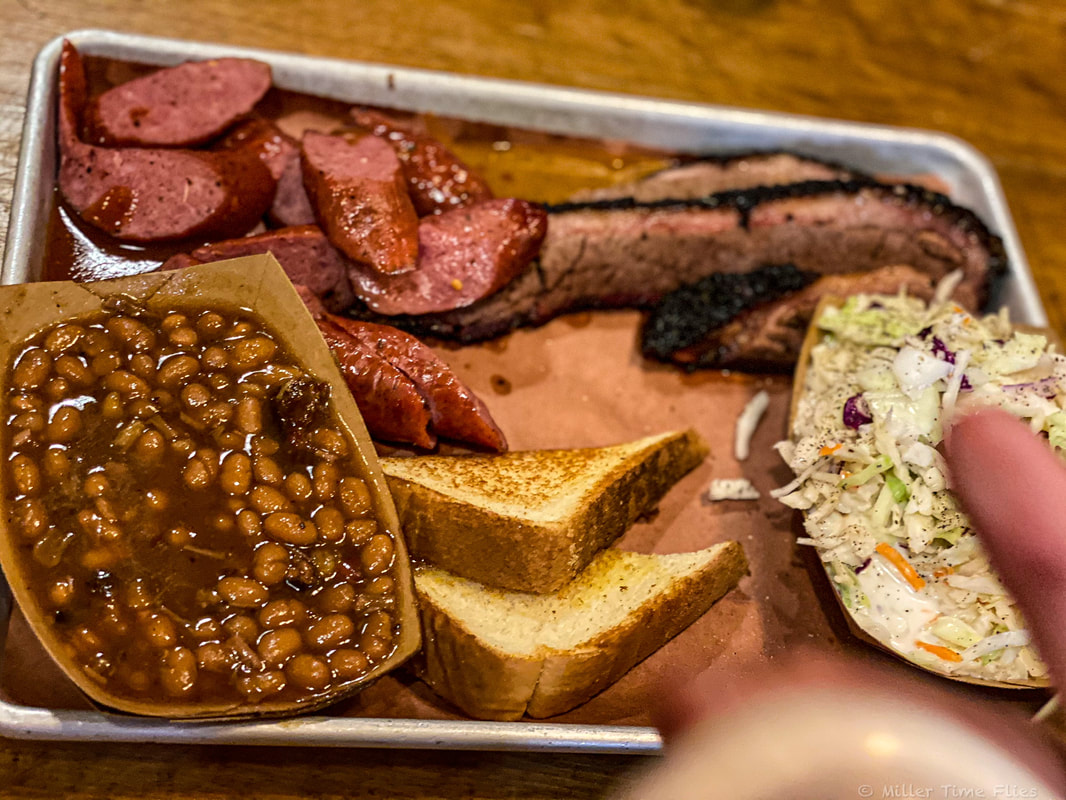 Tim was on this like skin on day old pudding! Brr, Saturday morning was even colder than Friday! This was the first morning this year I have seen frost on our truck. We arrived at the shop around 7:45 to make sure we were ready when the store opened and so Tim could record his episode for the shop’s *podcast called, Tuck Cast, With A Splash of Bourbon, with Shannon “Big Mess” Messer, Bobby the Bearded Wonder and Coach Dale Diesel Collins. Tim and the guys talked about the story/history of Norvise and what makes it so unique. They dove into Tim's relationship with the late Norm Norlander and what it takes to produce the Norvise Fly Tying System. Saturday was Big Mess’s 50th birthday and Tim’s 49th birthday. Once the shop opened there was a steady flow of customers throughout the day. We meet some current Norvise owners that came to visit for Demo Day. Some upgraded their vise or added a new Auto Bobbin or two to their collection. There were some who came to the shop to check out exactly what the Norvise was capable of and some came with intentions of joining the many other Norvise tiers. Tim gave his normal show demo for a group of people, he challenged several to take his bet could he tie a wooly bugger in under 60 seconds? If you have never seen him in person at a show, Tim bets someone that if he can tie a wooly bugger in under 60 seconds then they have to purchase a full set up and if he fails, he will give them a full set up. I have been going to shows with Tim for two and a half years now and I have never seen him lose… not too many people ever take the bet. I spent my day tying game changers and a baitfish or two. Every time I finished tying a new game changer, someone would buy it from me. I know selling flies is what a tier strives for, but for those of you who know me, whenever I tie a new fly, especially a game changer, I form this sort of attachment to each one of them. I am very thankful to those who loved the flies I tied Saturday so much, they wanted to fish with them. I look forward to seeing what they catch. 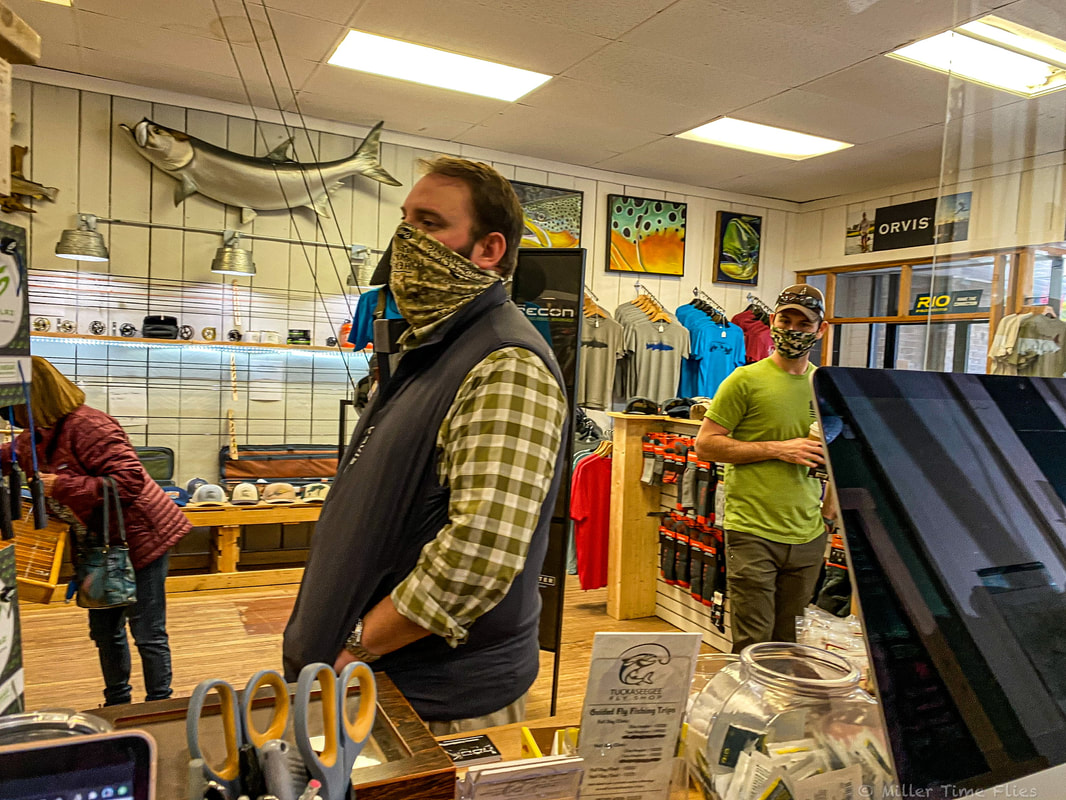 Bobby "the bearded wonder" checking out the crowd. 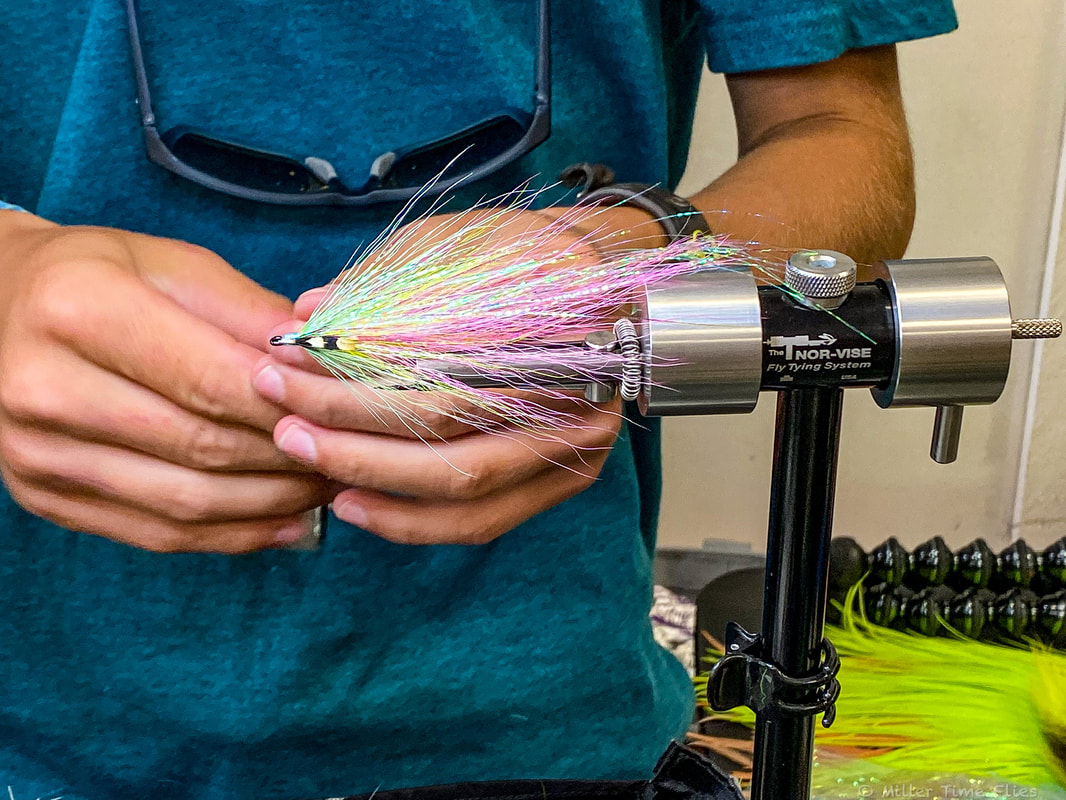 One of the flies Braden spun up this weekend.  A couple of Gamechangers Braden tied.  DAMN! 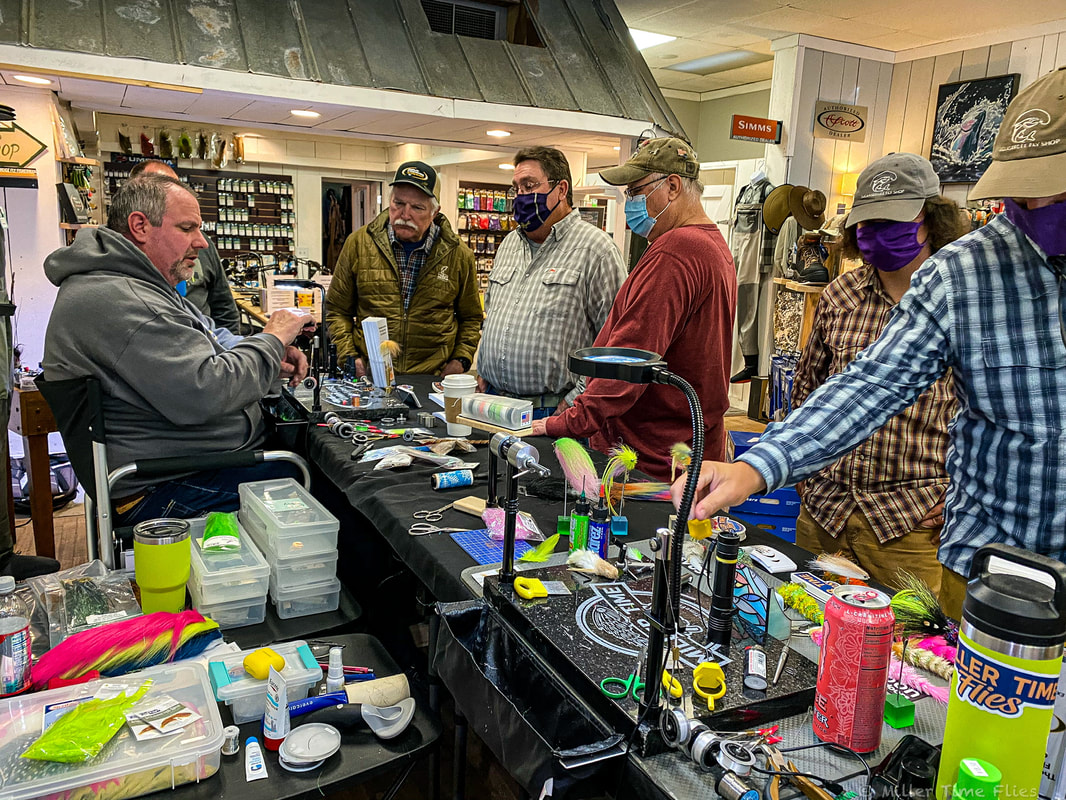 A small crown watching Tim spin the Norvise. 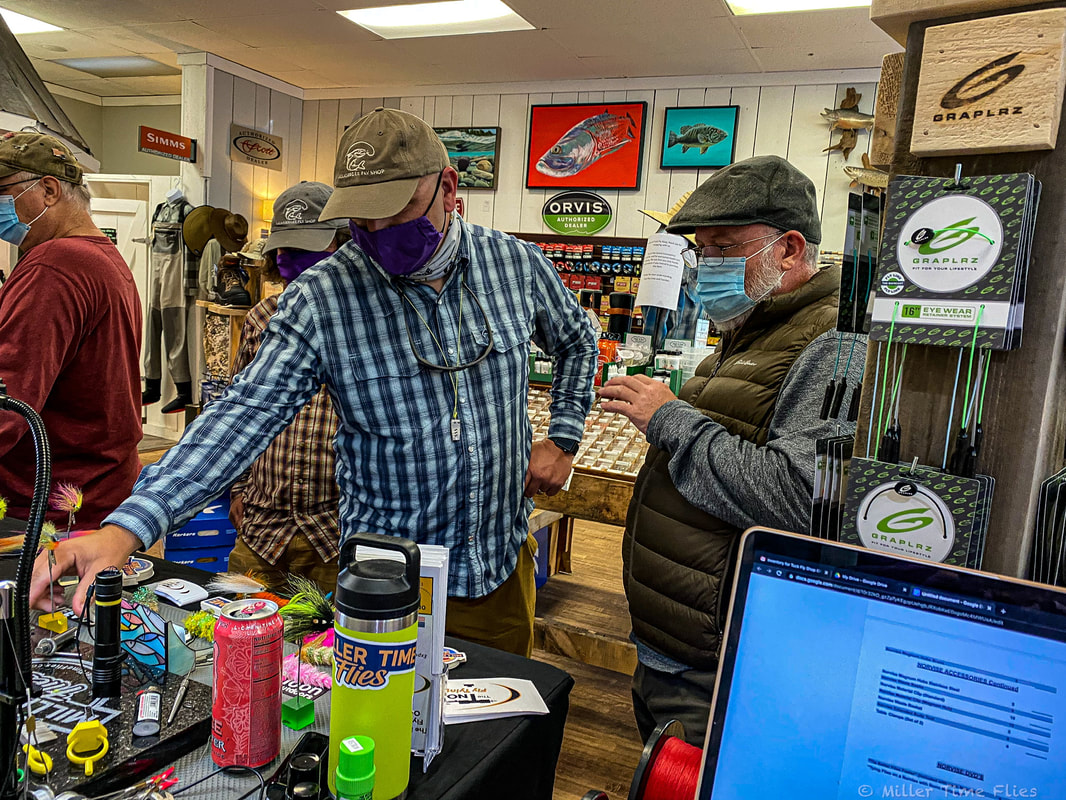 Coach Dale "Diesel" Collins, Jarrod and a customer looking on. Mom, Tim and I all had a wonderful day at Tuckaseegee Fly Shop for their Norvise Demo Day. We look forward to returning to Sylva soon to visit the shop again, see all they guys and Norvise fans, and of course to do some more fishing in the trout capital of North Carolina. Thank you to everyone who came out to the Norvise Demo Day to see Mr. Tim and I, and for checking out what makes the Norvise the most innovative fly tying system on the market today. If you are ever in Sylva or Bryson City, North Carolina you have to remember to stop in one of Tuckaseegee Fly Shop and say hello. Till next time...
Tight lines - Tim Here is installment #2 if the beginner fly tying series we are doing for The Riversage Journal. In this video we talk about some of the knots we use to tie on and finish the flu as well as tying a staple Trout Fly that should be in every Trout fishers fly box. Click the logo below to see the video.  We hope you are enjoying watching this series as much as we are enjoying bringing it to you. while you are there check out the Riversage Journal, there is a ton of good information there for the beginner and advanced outdoors men alike. Till next time...
Tight Lines - Tim Tyler and I had the pleasure of fishing with central Pennsylvania's premier Smallmouth guides, Brian Shumaker. Brian is the owner of Susquehanna River Guides and has spent the past 30 years floating the rivers in and around west central PA including the fabled Susquehanna and Juniata rivers. Brian has become a good friend over the years so we jumped at the chance to spend a day on the water with him. We did the 2 hour ride from our place to the meeting spot in record time where we then followed Brian with his Hyde drift boat in tow to the um, well, we will say...boat ramp. We were on a smaller piece of water Brain can only float in his hard hull during the Spring. later in the year there is simply not enough water to get down this particular river. Getting the boat in the water was interesting, but we got it down the bank and we were soon on our way. 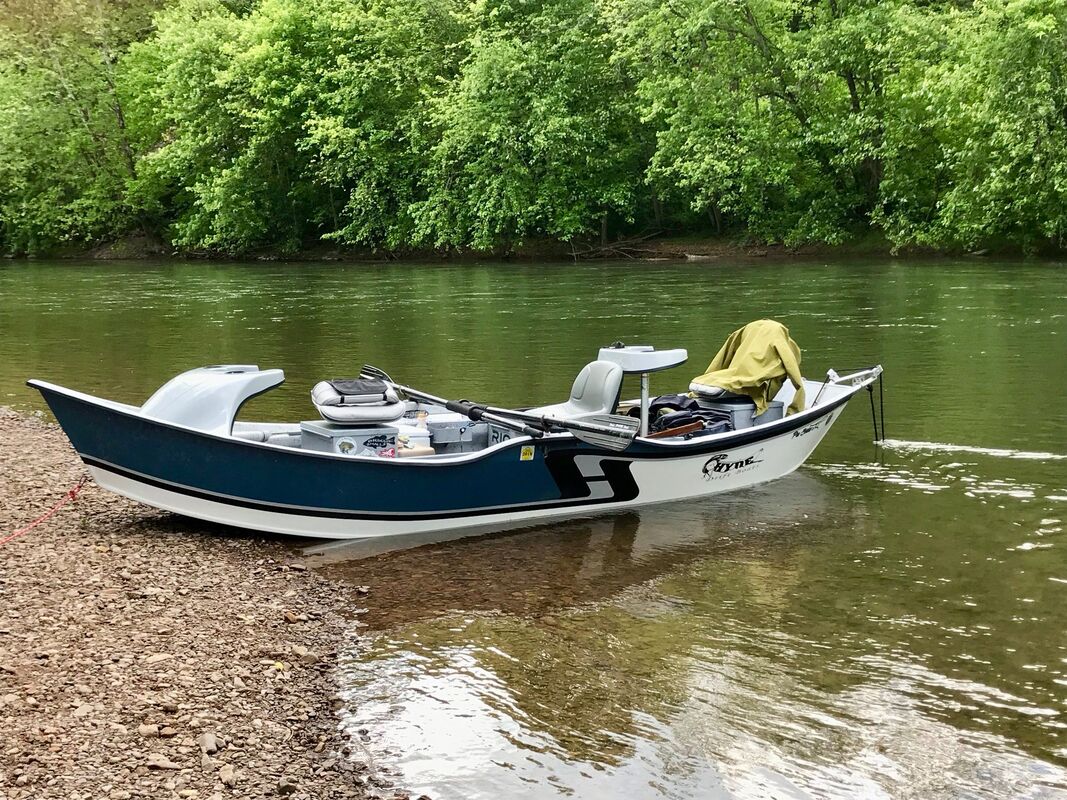 Smallmouth are my favorite fish, they are beautiful, hard fighting and are tailor made for fly fishing. We spent the day pounding the banks and back eddies with streamers and slowly stripping them back. "Stripping them back" is really a bit of a misnomer, really we were just letting the flies hang and swing a bit and just keeping the line tight as the boat drifted down river. This is a cool technique as once you "get" it you can literally hold the fly in one spot for an extended amount of time to entice a big ole' bronze back to come up from the deeper water and smash it. We started off a little slow, typical with spring time smallmouth fishing as the water was still a bit on the cool side at 52 degrees. When the sun got up and the water warmed so did the fishing. As soon as he stepped up on to the front casting position Brian was tight to a solid smallmouth. Literally it was on his first or 2nd cast!  nThis was not a guided trip, it was what we call a "row and go" meaning three guys are in the boat, 2 guys fishing and 1 rowing the boat. We would switch positions so every got to fish and every one would row. If rowing a drift boat is not something you do every day you will soon appreciate the skill of an accomplished oarsman. It is not as easy as a good rower makes it look...just ask Tyler. I really think you should spend some time on the oars if you can, it will give you a better appreciation of how everyone needs to work together for the boat to be successful. Tyler was picking it up toward the end, I am very excited for our Smith Fly raft to be completed so we can start floating some of our local (and not so local) rivers this summer. On his second stint on the bow Tyler stuck a good fish followed by an even better smallie. 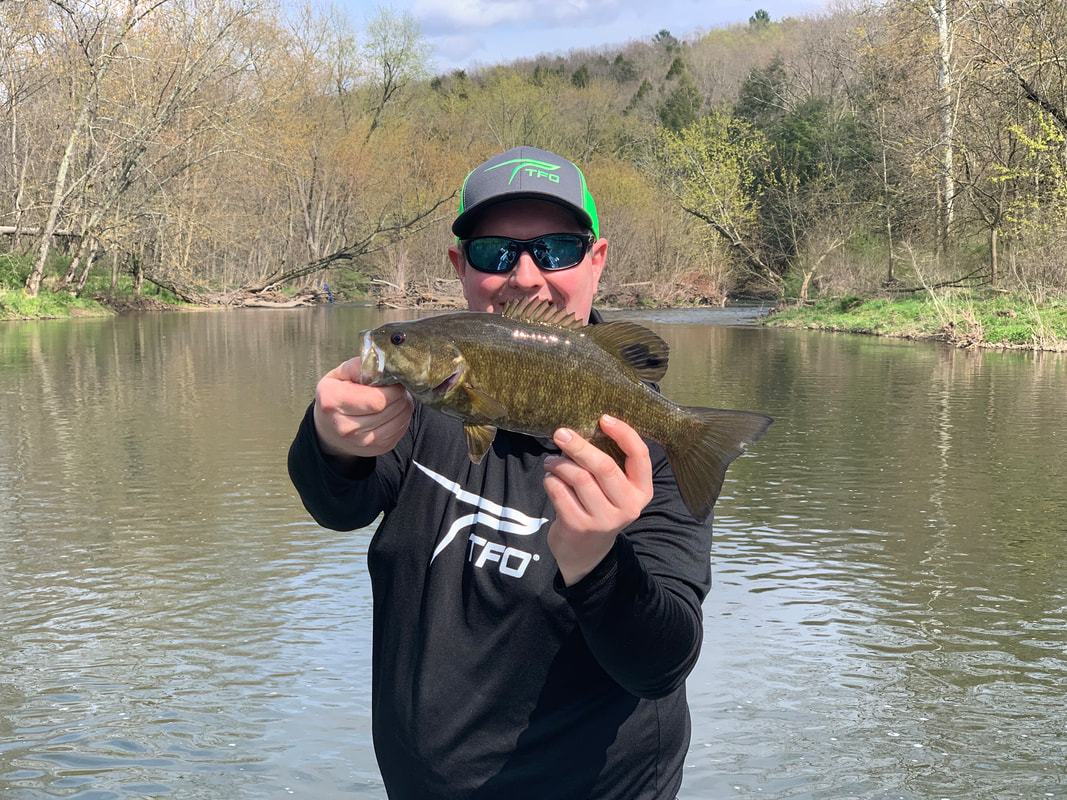 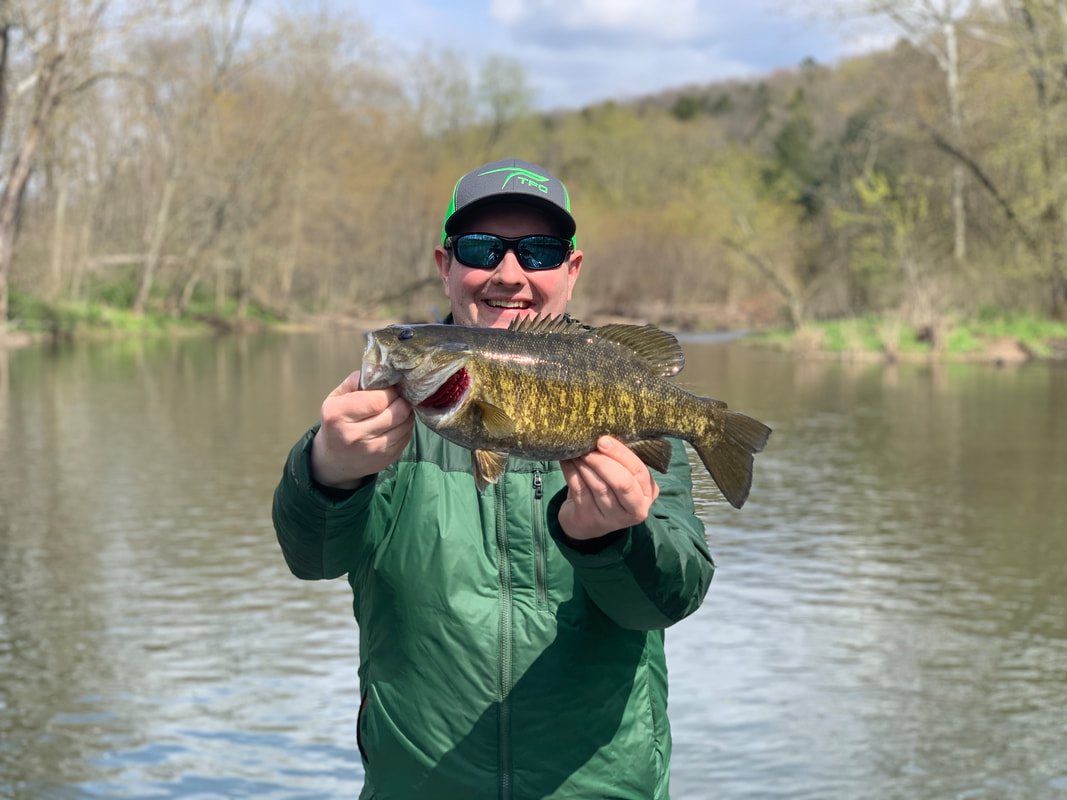 Tyler and I were fishing some of TFO's new gear, mainly the Axiom 2 X rods and the new BVK sealed drag reels. As mentioned smallmouth are my favorite fish to fish for, coincidentally we spend a lot of time chasing them each year. For years my go to set up has always been a 7 weight. We throw some pretty big flies when chasing smallies; Game changers, O'Neill's Controlled Chaos, O'Neill's Hovercraft, weighted crayfish patterns and the like. For me a 6 weight just doesn't have the muscle needed to punch these bigger, wind resistant flies through the air. It is not uncommon for us to be on the water all day and honestly an 8 weight was just too heavy to cast for 10 hours straight, that is why I prefer a 7 weight. Until now. During one of my turns in the back of the boat I looked down in the rod holder and low and behold there was Tyler's Brand new A2X 8 weight. Will, I am not one to let a new rod to go to waste so I figured I would break it in for him. As mentioned earlier I am a huge fan of a 7 weight. That being said, if you get a little more than I light breeze the shortcoming of the 7 weight quickly comes to light, especially if you are trying to punch 60' casts with big flies. This was the first time I really got to spend with the A2X 8 weight. The first thing you notice is the overall weight of the rod. If you didn't know any better you would swear it you were holding a 6 weight. Load it up to cast and it is quite apparent what you are holding. Paired with an aggressive, weight forward shooting head this stick is an absolute rocket. It is light in the hand, you can cast it all day and it has plenty of punch to drive a big, articulated fly through the air with ease. It is a bit early to say it is my new favorite, but it will be a staple in my quiver for sure.  Several hours later and sever rotations on the oars we were at the take out. We had had a fantastic day with several Smallmouth landed along with a bonus Walleye, my first ever. 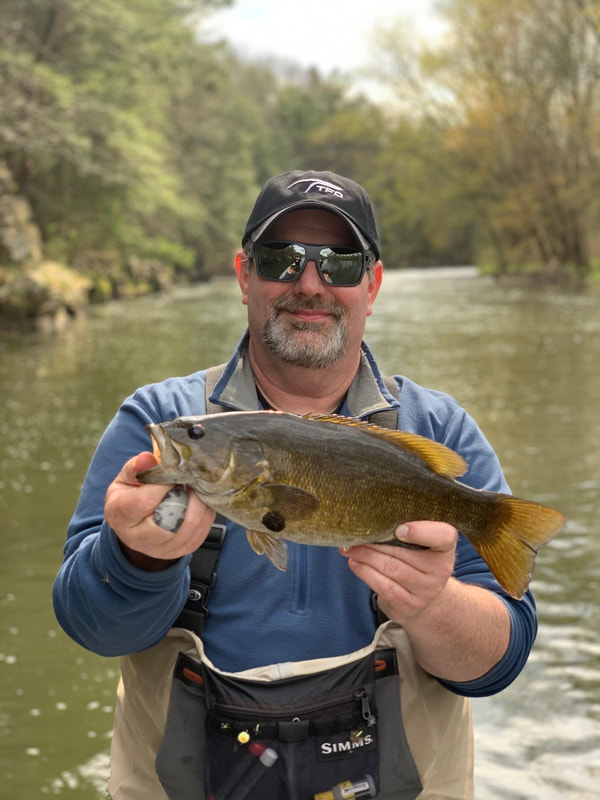 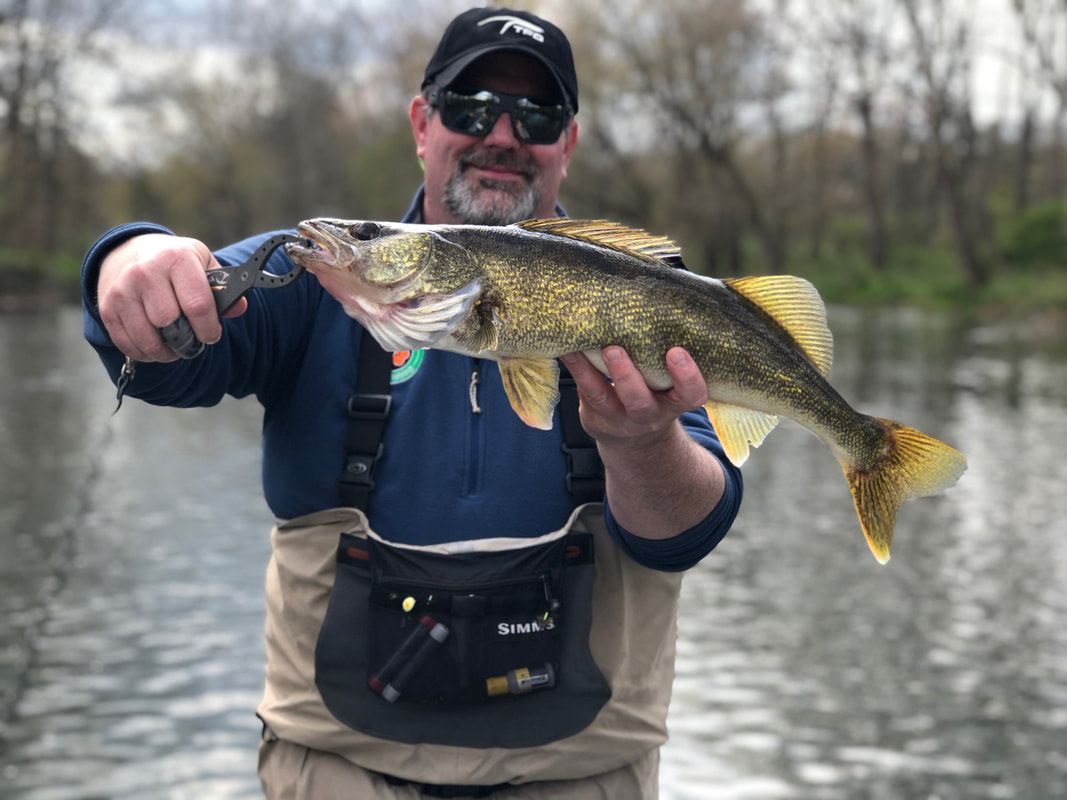 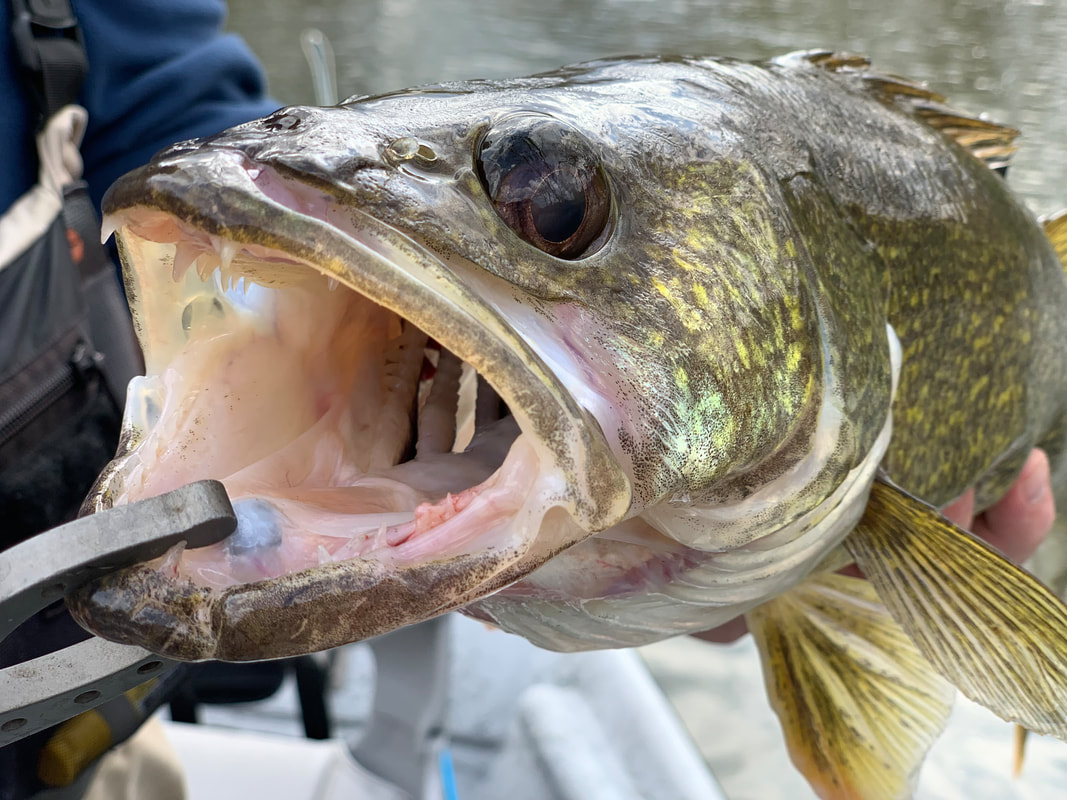 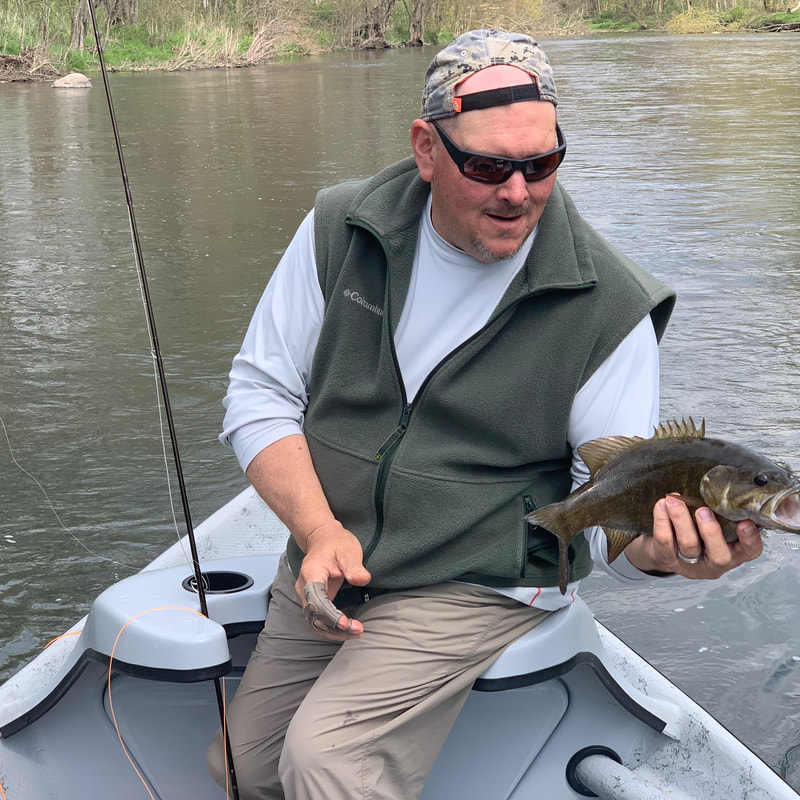 If you are looking for a fantastic central Pennsylvania Smallmouth experience Give my buddy Brian a call or check out his Facebook HERE. You will be glad you did. Till next time...
Tight lines, Tim By Norvise ambassador Brian Davenport Congratulations on your new purchase. Hopefully you also bought a Norvise Automatic Bobbin as well. If you haven’t- you should go do that right now! The two go together like peanut butter and jelly. The only way to get the full potential of the Norvise system is to have both the Norvise and the Norvise Automatic Bobbin There is a bit of a learning curve with the Norvise, but there are some things you can do to shorten the curve tremendously! First things first, start by watching the video that came with your Norvise to see how the system works. If your brand new to fly tying this will be a great help and you will learn a lot. If you’re a seasoned tier, this will show you how to use the system, and how it differs from your prior setup. (to see the video Brian is talking about click HERE) After watching the video, I sat down behind my Norvise and got to work. Now a Norvise Automatic Bobbin is a special tool that you will learn to love! In the video, Norm demonstrates how to wrap the thread around the leg of the bobbin, to provide adequate tension. Here is a little trick to help with that. Once you have the thread through the tube on the bobbin, attach it to the thread post across from your vise. Do this by placing a few wraps of thread around the button. At this point, your bobbin will be hanging from the button on the thread post. Make sure the bobbin is oriented with the thread coming off the bobbin towards you. With your thumb, push the thread through the legs of the bobbin, and catch it with your finger on the back side. Bring it down, around the spool. Do this twice and then the tension is set. This helps so that you don’t accidentally pull the thread back out of the bobbin-- and once you’re done it is already secured to the post. 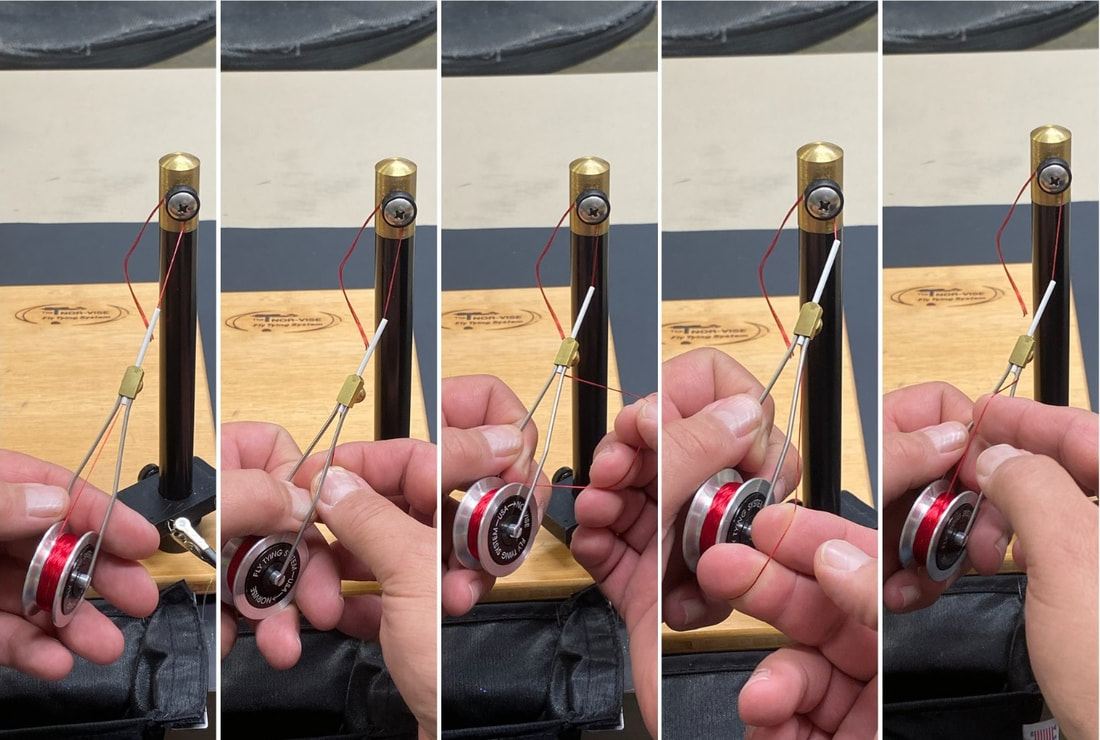 During the learning curve, this will be something you do quite a bit of! Part of the learning curve is to make sure when you cut your thread, to use your hand to put tension on the bobbin hub, so that it doesn’t zip the thread back through. It will happen-so just prepare for it! After a few times of having to rethread your bobbin, you’ll get the muscle memory down to do it and then you will do it without even thinking about it. One of the things I missed when watching the video, is which way you spin the vise. It seems pretty straight forward, but I had a few issues with my flies until I watched the video a second time. If you watch carefully, Norm spins the vise towards him, rather than away from him. When I really thought about how I used my old vise and wrapped the thread on the hook, it makes sense. You need to turn the vice toward you so that it will wrap the thread away from you like on your old vise. Small detail, but easy to miss. And can make your first few interactions on your new vise frustrating if you don’t get it right. Learn to tie a half hitch. The half hitch is your best friend when using the Norvise system. If you break your thread, it will save your fly from completely unraveling. It will also help when you use the vise for other techniques such as dubbing. Also, when you go to move the bobbin off the thread post, be sure to keep enough tension on the thread, so that your material doesn’t unravel. One final thing— materials go on the hook very easy with the Norvise—sometimes too easy! So it is very easy to crowd the hook eye. If you start your thread in the spot where you want your materials to end 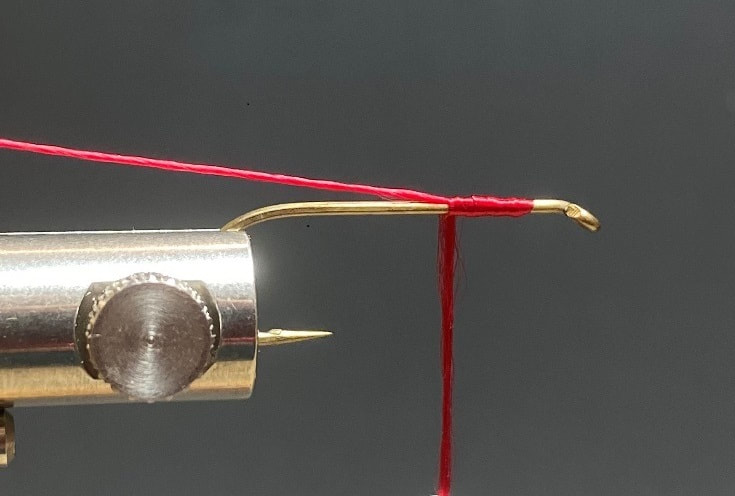 Brian gives some sound advise in this article about the vise and the bobbin. Hopefully this will shorten the learning curve with your new Norvise. Till next time...
Tight Lines, Tim In this video Norvise ambassador Brittany Davenport of Hackles and Hurl shows us a cool hair wing Steelhead pattern. I really like this video for many reasons. First Britt does a fantastic job of explaining what she is doing during each step. This is something I believe is lost in a lot of today's videos. It seems, instead of teaching, many of today's video posters have adopted a "look at me" mentality and they forget the instructional part of tying videos. There are also several instances here where the Norvise and it's rotary function is used perfectly. Great video Brittany, thank you for sharing it with us. For this weeks post I have chosen a video by Norvise Ambassador John Schultz. As the weather cools my mind and thoughts change from Smallmouth and worm water species to Trout and ultimately Steelhead through the winter months. John and his buddy Dave Allison (also a Norvise ambassador) spend a lot of time chasing Trout in the still waters of their home area. Still water Trout fishing has always intrigued me. I have never done it, and I want to learn more about the tactics and tricks for catching Trout in still water. IN this video John shows us a very simple, yet effective Damsel Fly pattern. I really like the way he blends the 2 body materials to get the taper or silhouette he is looking for, good stuff. Also, you just gotta love "box filler patterns". Flies that are effective that you can crank out in a hurry after a long day of fishing. We will be posting more videos in the coming weeks. If you have something you think you might like to see let me know, I will see if I can get one of our guys to shoot a video of a particular pattern or technique. That was a great video, Thanks for sharing it with us John. Till next time...
Tight lines - Tim |
Archives
June 2024
Categories
All
Get Your Norvise! Click Here!
|

 RSS Feed
