By Norvise Ambassador Shannon MesserNose down, tails up searching for fiddler Crabs, Shrimp, Mullet, and Menhaden Shad, Redfish move amongst the marsh grass revealing their location to a keen eye of a captain atop the poling platform. The order is given, "30 feet nine o’clock now, strip, strip, strip", bang fish on! The Scott Tidal 7wt is bent, feeling every burst of strength the angry red exhibits as it comprehends what has just happened. Just as quickly as the battle starts it ends with the redfish coming unbuttoned without warning. Just like that the battle is over. I take a moment to replay the memory tattooed in my brain, dissecting each move. What seemed like hours was only a nanosecond in the battle between fly fisherman and redfish. Redfish won. Let’s take the time to set the stage, and explain how a mountain Trout fly fisherman ends up on the bow of a skiff in the low country of Charleston, South Carolina. I give credit to my wife of twenty years as she threw out the idea of fishing on our twentieth wedding anniversary. Like many of us, we were looking to travel and explore to celebrate our accomplishment, or let's call it like it is— Tanya putting up with me for all these years. I jumped at the opportunity and we selected historic Charleston, South Carolina. Charleston was an easy choice for us. We love visiting the area, the food is great, you are surrounded by history, and the weather can be amazing! Every time we visit, somehow, we discover something new. This trip we found Ye Ole Fashioned Ice Cream and Sandwich Bar in lovely Mount Pleasant, SC. While waiting on ice cream we couldn’t help but notice they have a fried bologna sandwich on the menu. If that doesn’t make it a first class food joint your expectations are too high. I was excited and a bit apprehensive after we booked our excursion. I did not want to look like I had no clue on how to cast to saltwater fish. The double haul is a cast that we very rarely, if ever, use in the North Carolina mountains. I am a stealthy predator, roll casting in tight quarters to almost invisible trout, which is a far cry from a seventy or even sixty foot cast on the money for a saltwater species. I practiced as perfectly as I could until I felt confident in my abilities to present the fly as instructed by the captain. The morning was picture perfect, mirror smooth water and chamber of commerce temperatures greeted us as we departed on our adventure. I must have felt like a fresh major league call up to the show stepping into the batter’s box for the first time. Just my luck it would be MLB Hall of Fame Greg Maddox on the mound that day. The casting turned out to be the least of my struggles. It was the spotting of the fish that kicked my butt! Regardless of what lens I had in my Smith Optics, I struggled spotting moving redfish as they revealed themselves to us. I was able to spot a few tails, but that was it. Don’t ask me if I saw the mullet because it was a big fat no! I now felt like many of the guests that I guide in the mountains at that point. They tell me they struggle seeing what I see, and now I was experiencing what they feel and it was frustrating. Spotting reds was the biggest challenge for me and I was frustrated, disappointed, and helpless at that point. Tanya knew it, and she was supportive as I pressed on. If you are someone like me who has never tried sight fishing for a new species you should do it. Don’t be afraid of failure, and accept the challenge head on. I am motivated more than ever to seal the deal the next time out on the skiff! I continue to practice, and I look forward to the next opportunity in the near future. I have had the opportunity to fish in many different places the past three years, and for that I am thankful. I have faced many challenges along the way, but in the end it has made me a better fly fisherman and guide. You will see me on the bow of a skiff again, but this time holding a redfish. Who knows? It just might be the skiff that the @georgia_drifter owns. Till next time... Tight Lines - Shannon 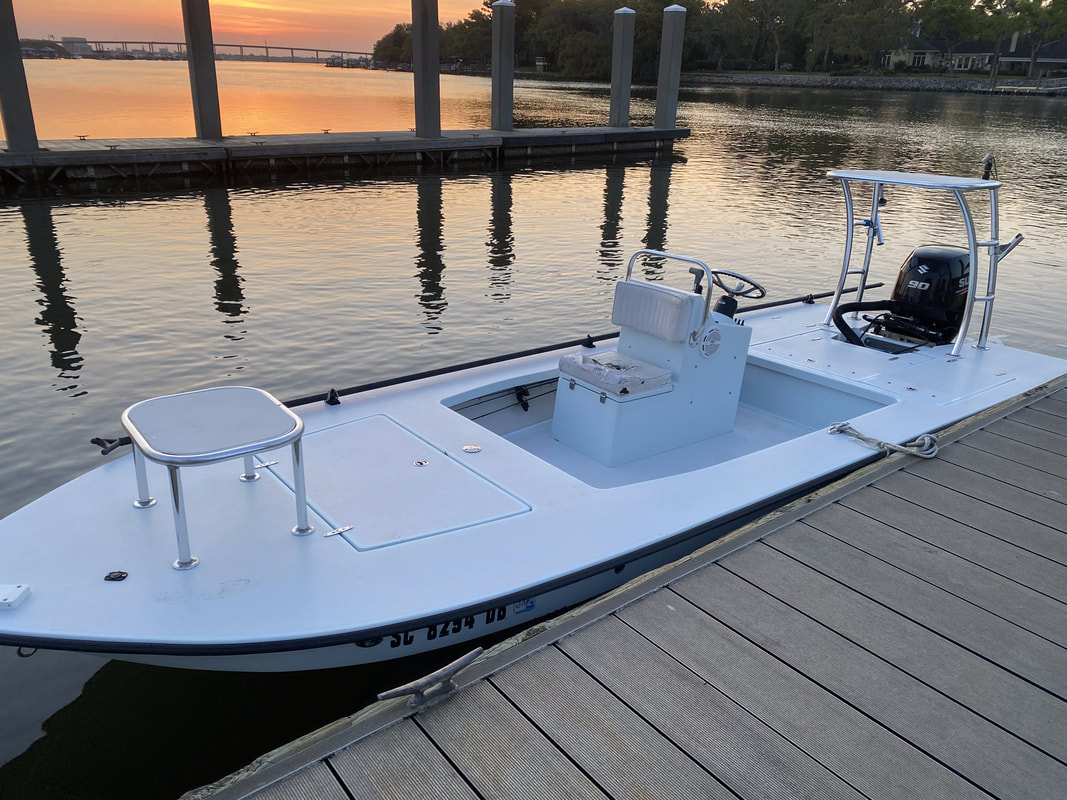  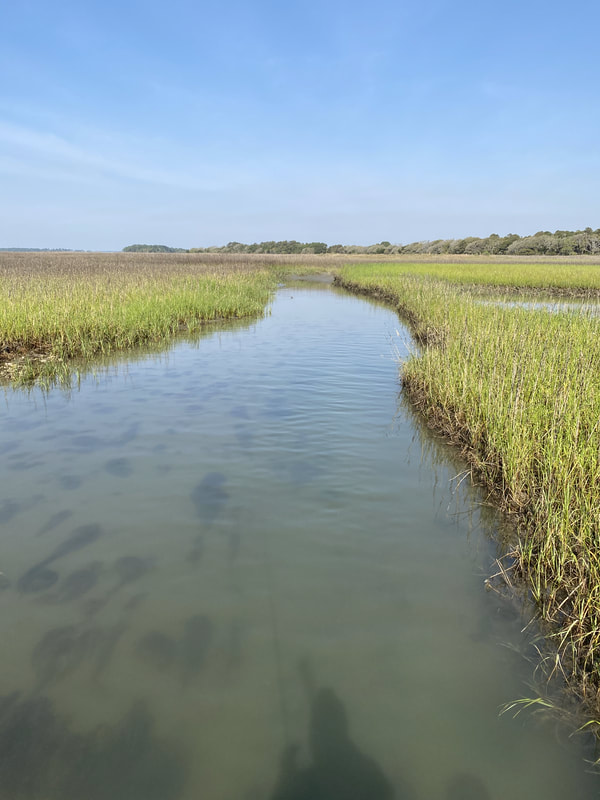 This month I was honored to have been asked to do an interview for "On the Fly South" online magazine. This was a fun interview, Usually people want to talk about the vise or how Norm and I started to work together. That is fine as I always like to talk about Norvise. This interview was a little different as you will see. To check out "Getting a Grip on the Fly Tying Business" Click the image below.  I am always humbled when I am asked to do these types of things. Never in a million years did I think I would be in this position. Thank you for reading, thank you for your support, and thank you for tying on a Norvise! Till Next time...
Tight Lines - Tim By Braden MillerThursday, after 8 days in Emerald Isle Albie fishing, spending time on the beach with my family, wearing board shorts and flip flops we made the four hour drive home to meet Tim at my house. Mom and I were home for a hour and a half, just enough time to unpack the trucks, switch some clothes into another bag and we got back in the truck to head to Sylva, NC for the Tuckaseegee Fly Shop’s Norvise Demo Day at their Sylva location. Our 6 hour drive ended up being close to 8 hours due to accidents and all lanes closed for a bit. Friday morning we woke up to temps in the 40’s so we traded our board shorts and flip flops for jeans, sweatshirts and shoes! Mom, Tim and I got some breakfast before we headed to the shop to set up our vises for Demo Day on Saturday before we heading to the river with Shannon “Big Mess” Messer (I loved how he answered the phone Tuck Fly Shop, Big Mess speaking can I help you?). We all got our waders on (even Mom) and headed out to do some Euro Nymphing, which I had not done before. Even Mom got waidered up and hit the river with us. 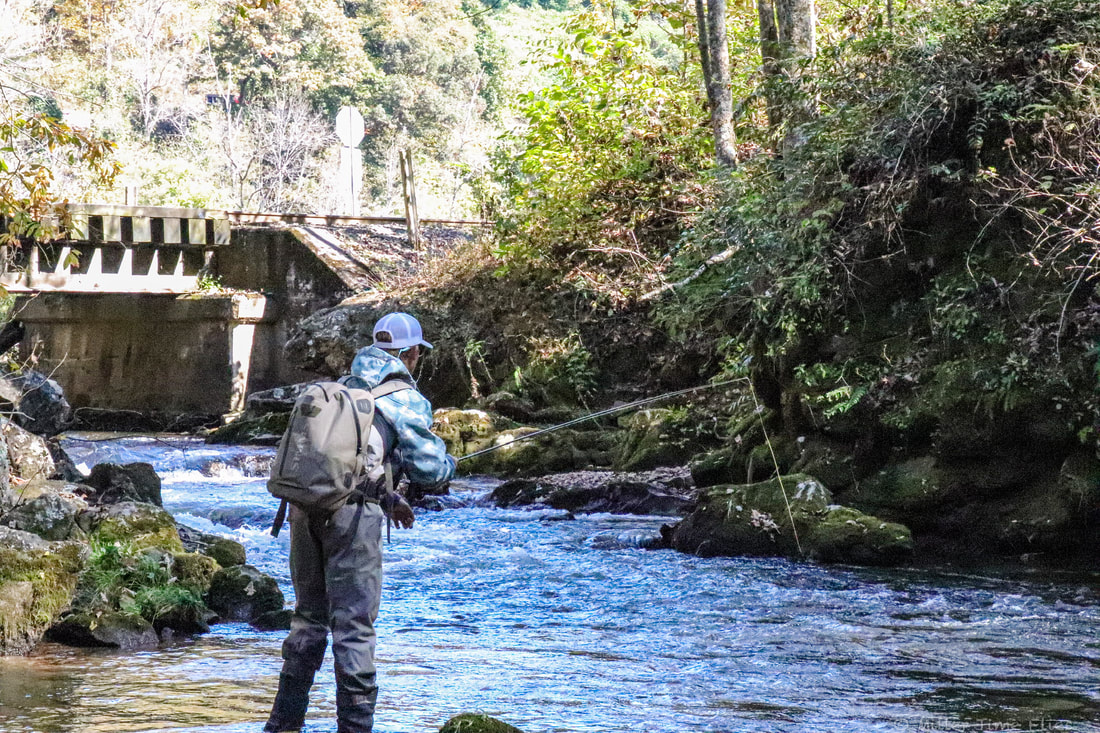 Braden working the first run. 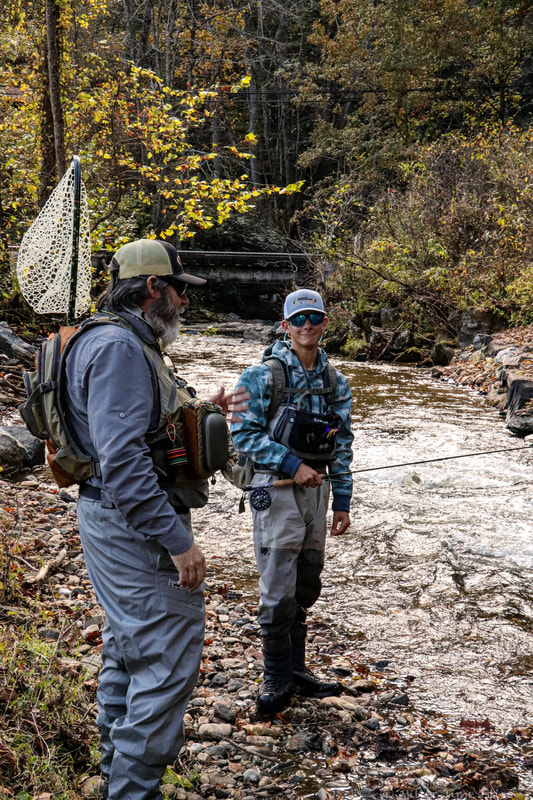 Rule #1...Don't guide the guide. 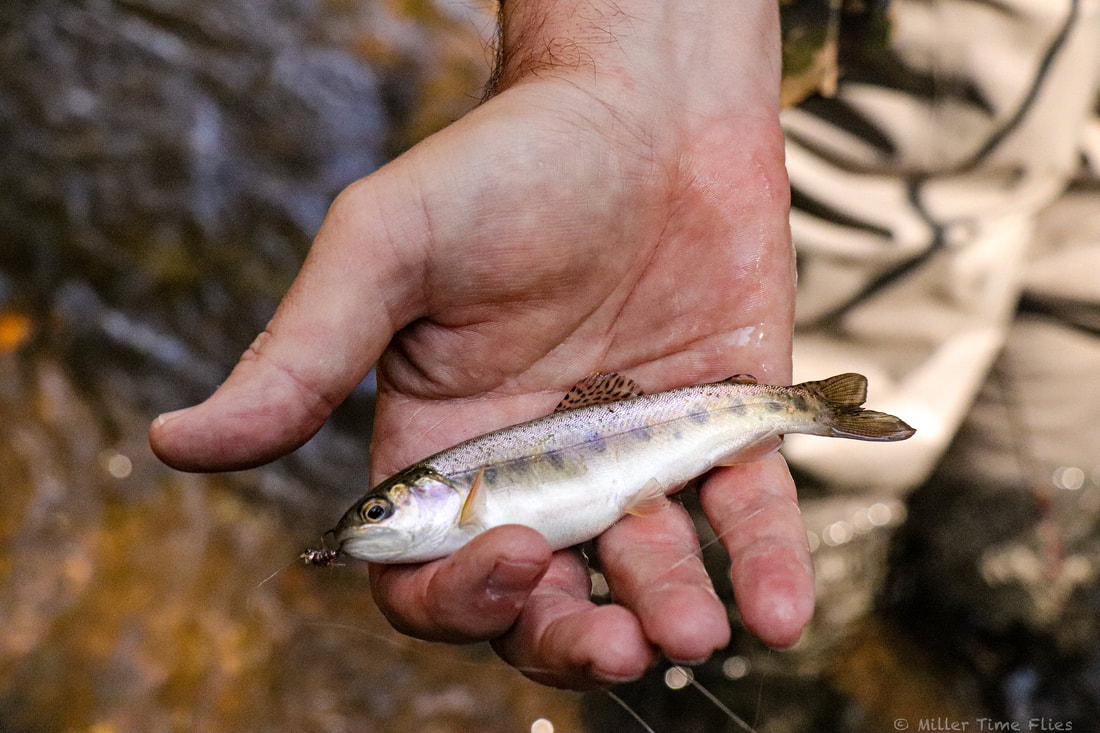 It was not long before Tim was into the first wild "Bow. 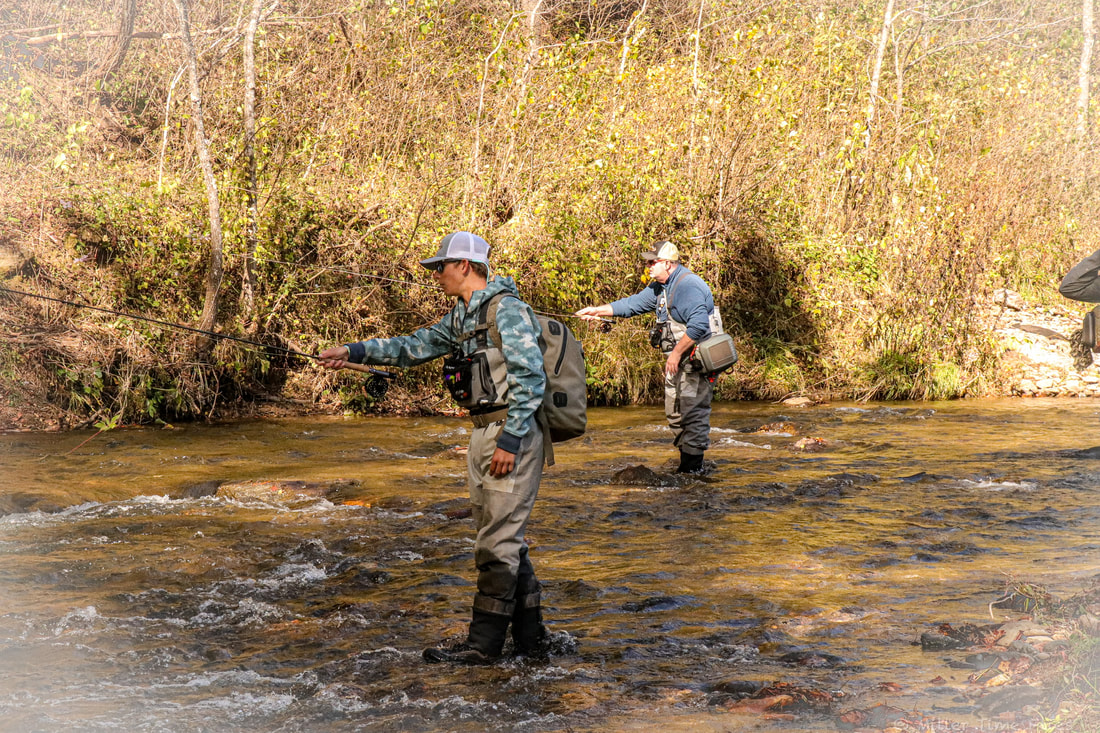 Braden and Tim working a run. (Shannon came behind BOTH of us and caught fish here...people, Big Mess is GOOD)! 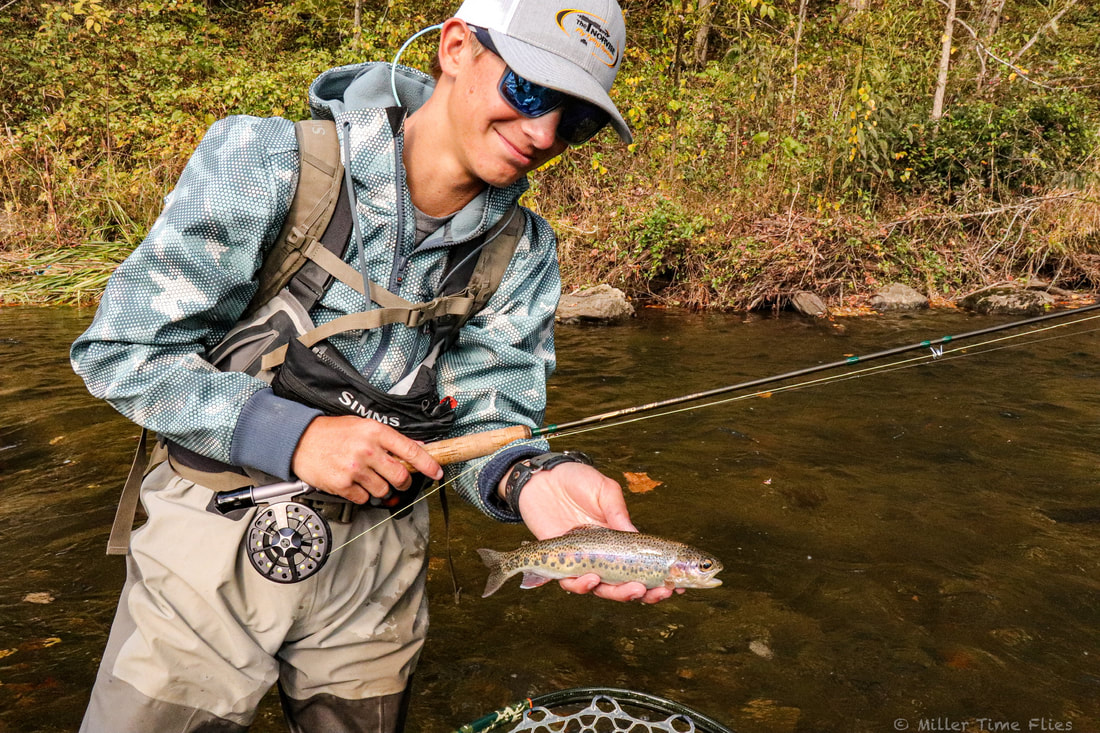 Awesome fish 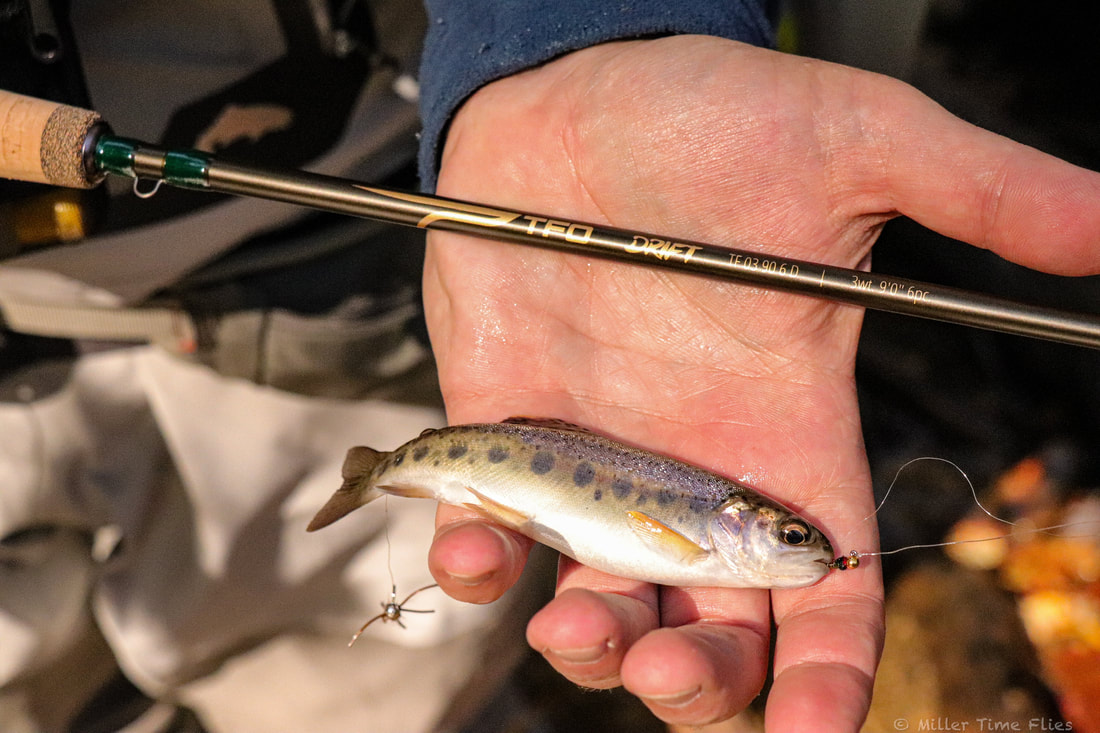 The TFO Drift Rod was perfect for this type of fishing. 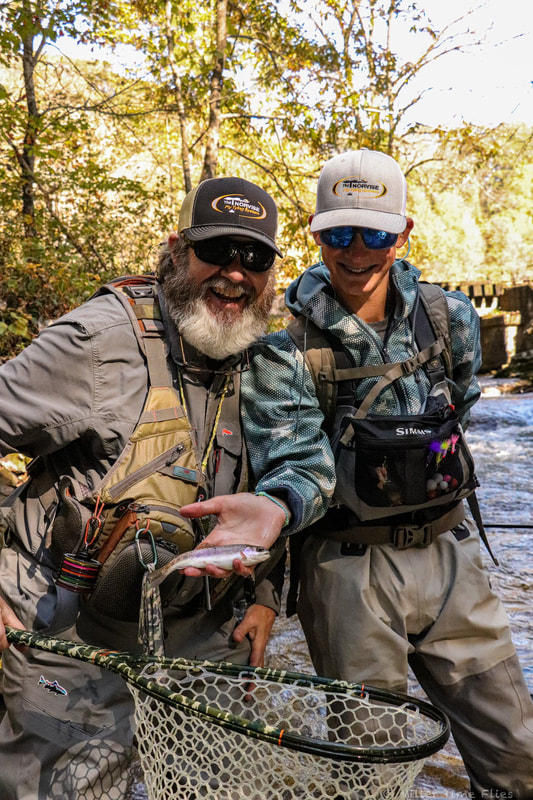 2 happy fisherman. Tim and I both were using the Temple Fork Outfitters Drift Rod. After a quick Euro Nymphing lesson and some tips from our amazing guide, Big Mess, Tim quickly caught his first wild rainbow of the day and I wasn’t far behind him. After fighting Albies in the Atlantic Ocean for a week, I set the hook rather strongly and launched two poor little rainbows right out of the water. Luckily for both the fish and myself they stayed on the hook and landed back in the water. We fished several sections of the river and probably caught 25 or so wild rainbows and Tim landed one wild brown. 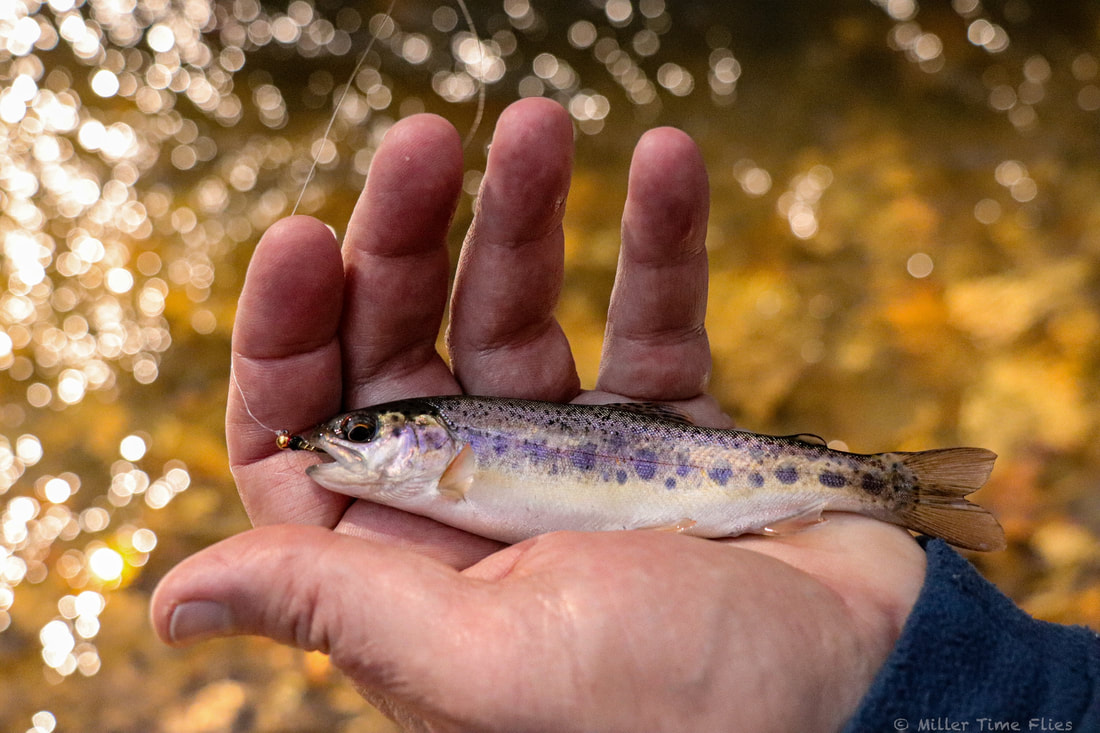 Love these wild Rainbows 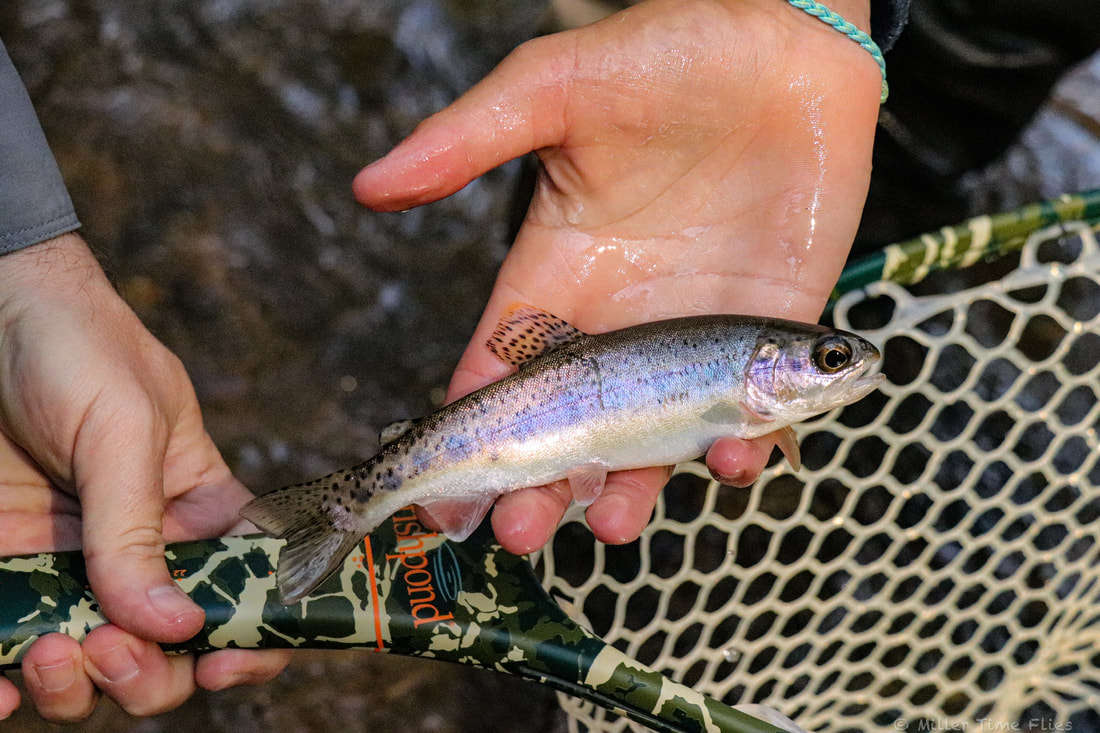 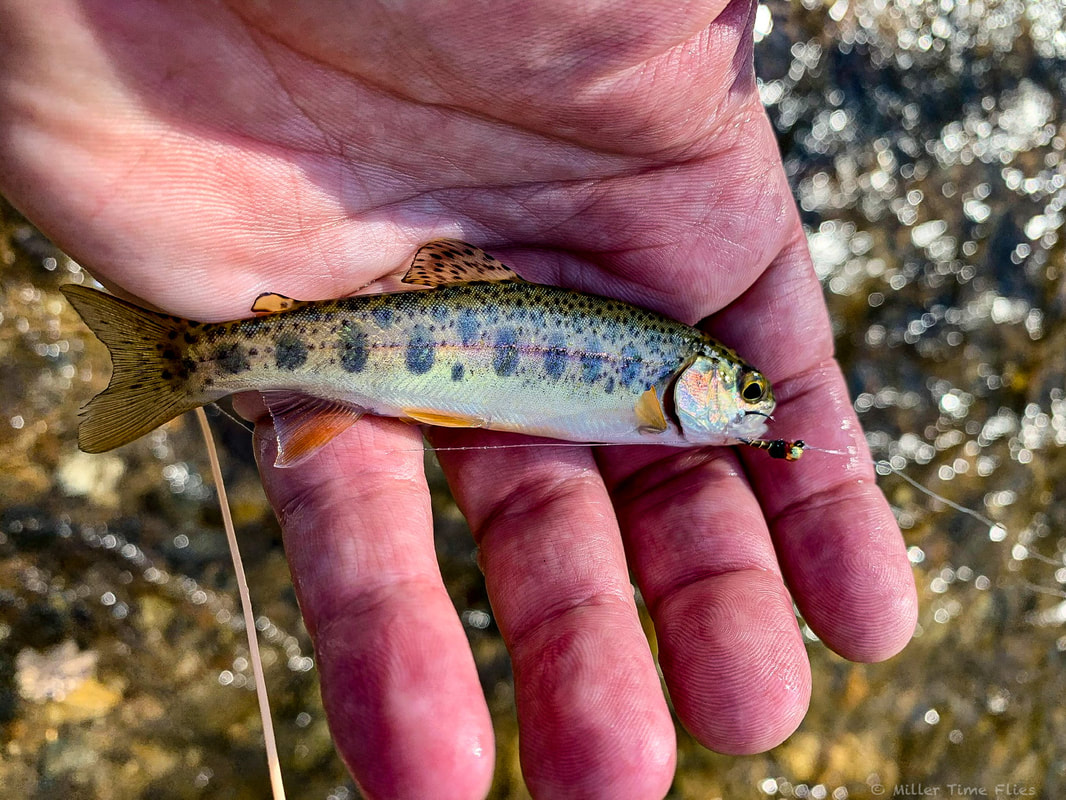 There is a picture an artist can't paint! 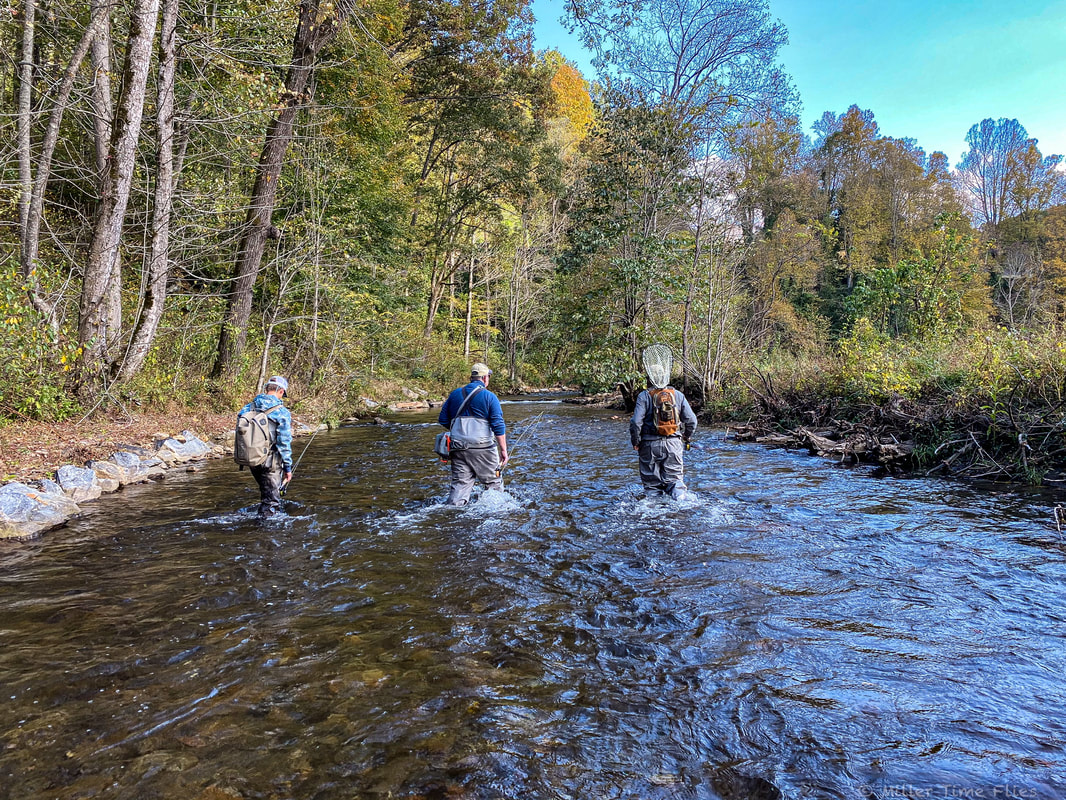 Moving to the next run while Big Mess is dropping some wisdom! 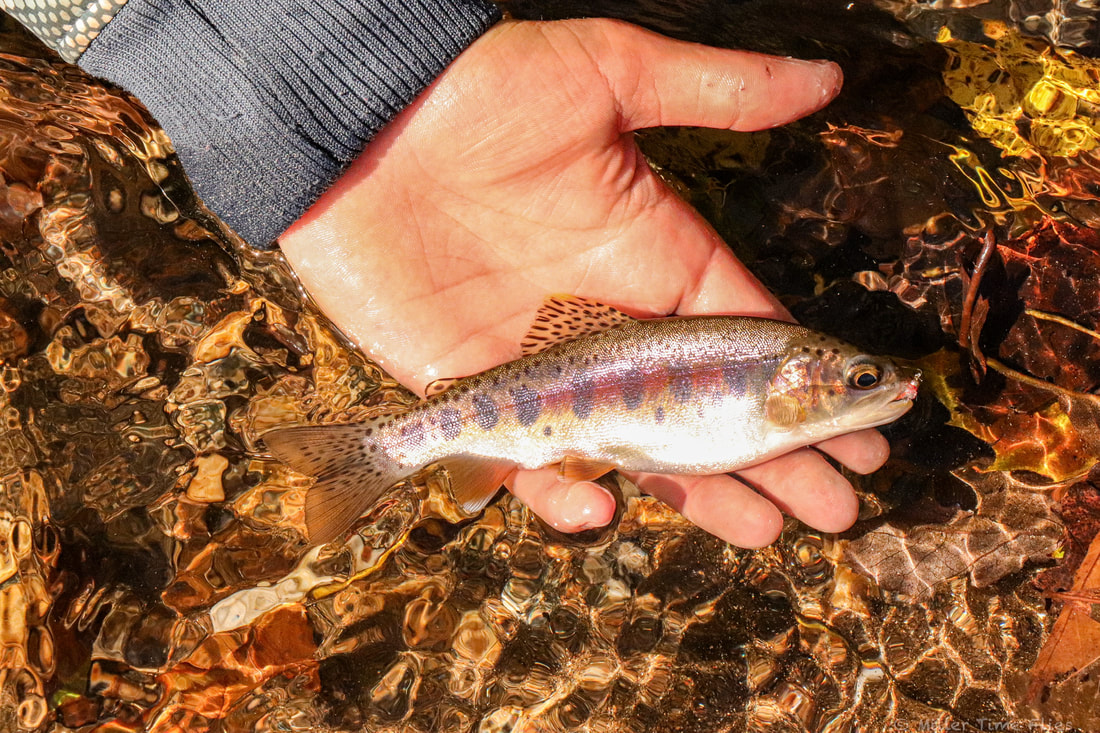 This little guy needs to visit Jenny Craig! 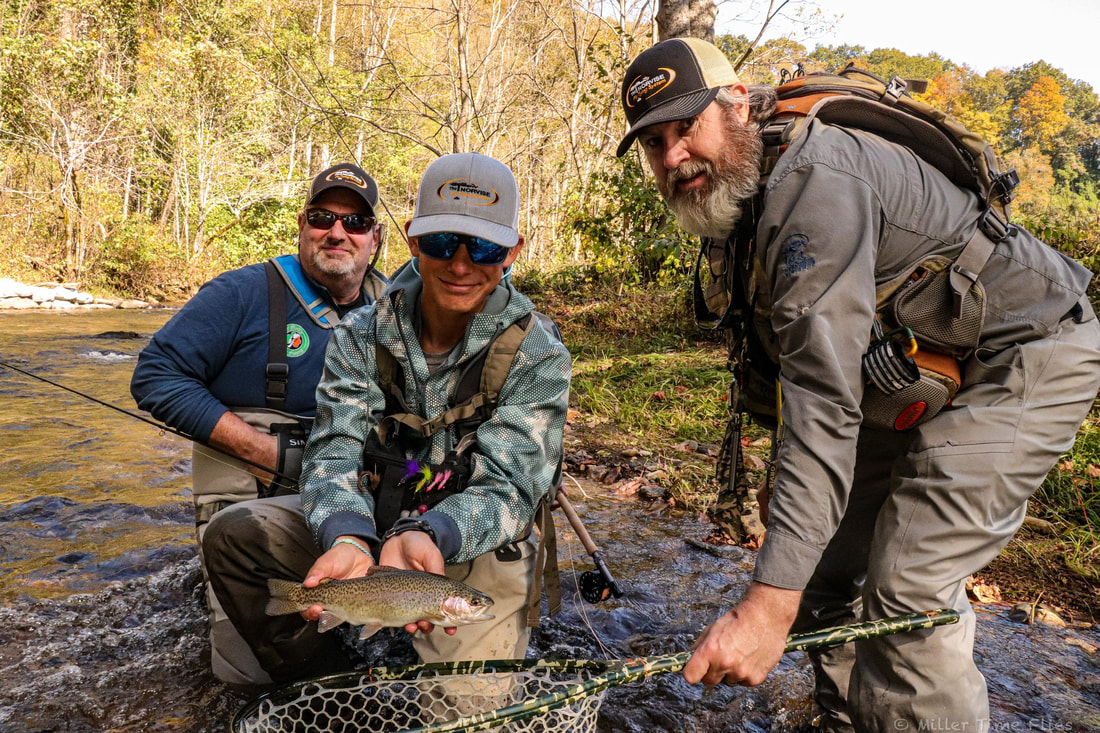 Braden with one of the better ones of the day! 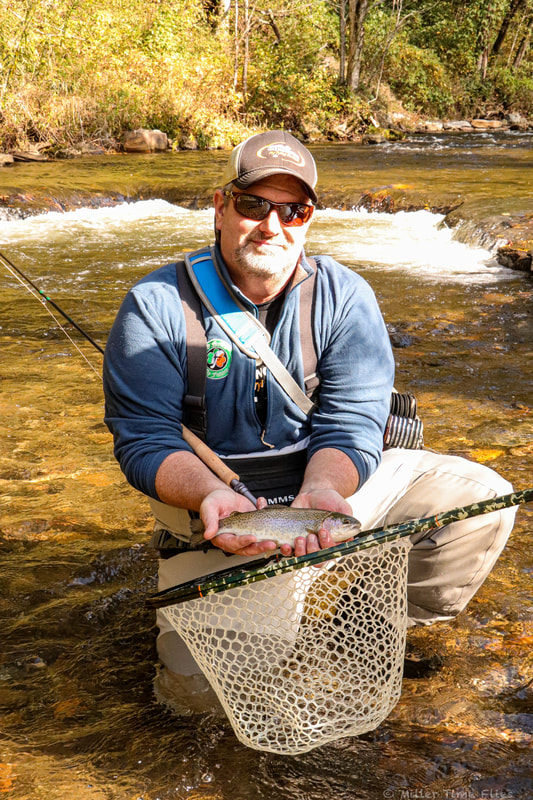 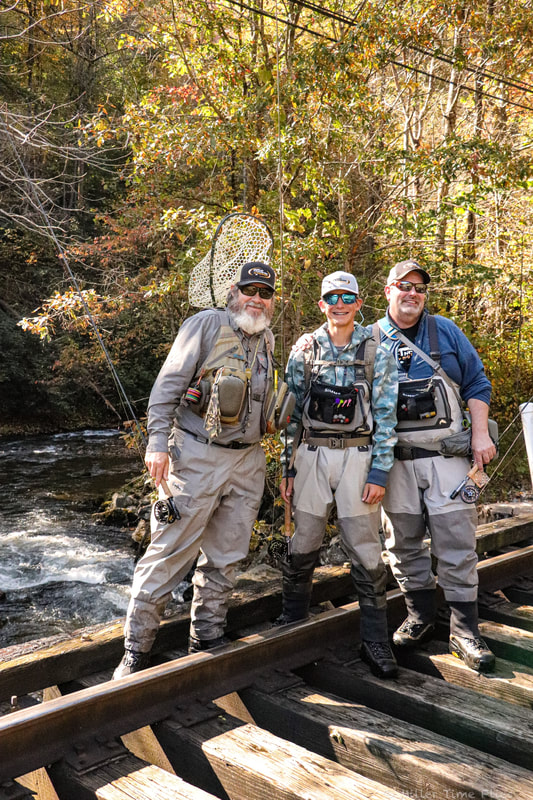 This was truly a great time!  The smile says it all! 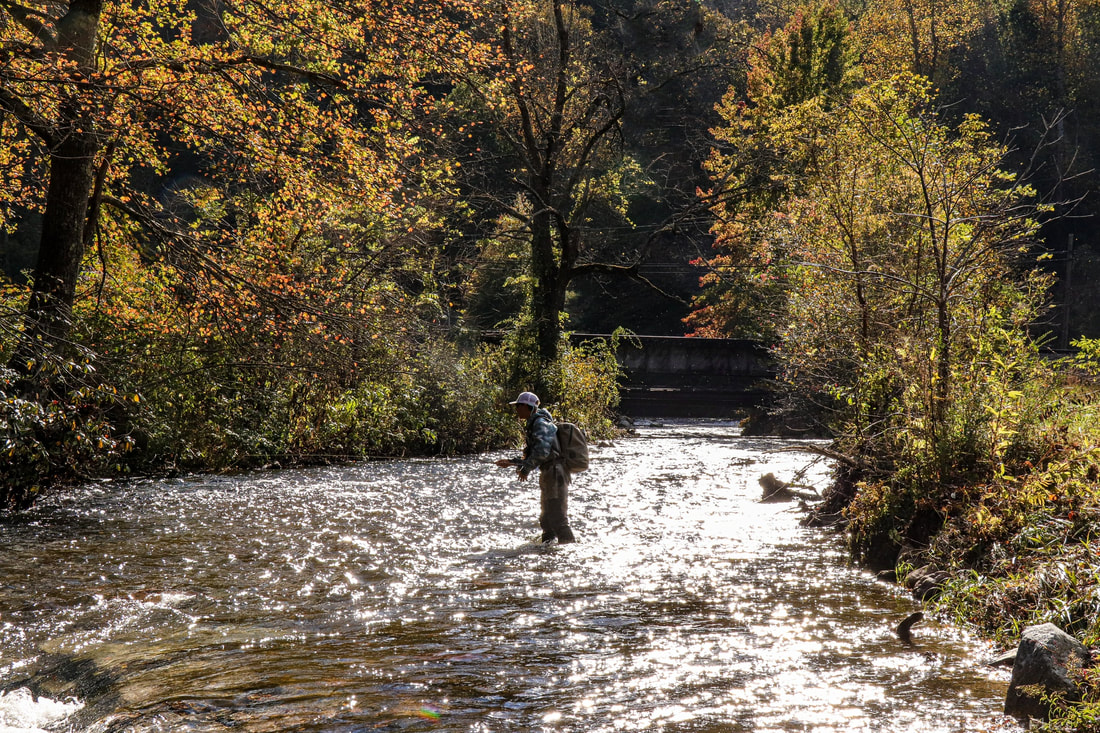 This may be my favorite picture of the whole weekend. We caught a bunch of beautiful small rainbows, a handful of decent sized rainbows and I caught a rather chunky fellow. Shannon recommended we have dinner at really good BBQ restaurant called Haystack Smokehouse. Man was that some good food; from the Brunswick Stew, to the pulled pork, brisket, andouille sausage and especially the Banana Pudding. I can personally say we will never go to Sylva and not eat at the Haystack Smokehouse (man now, I wish I could eat dinner there tonight). It was an early night for the three of us so we could be ready for Demo Day Saturday. 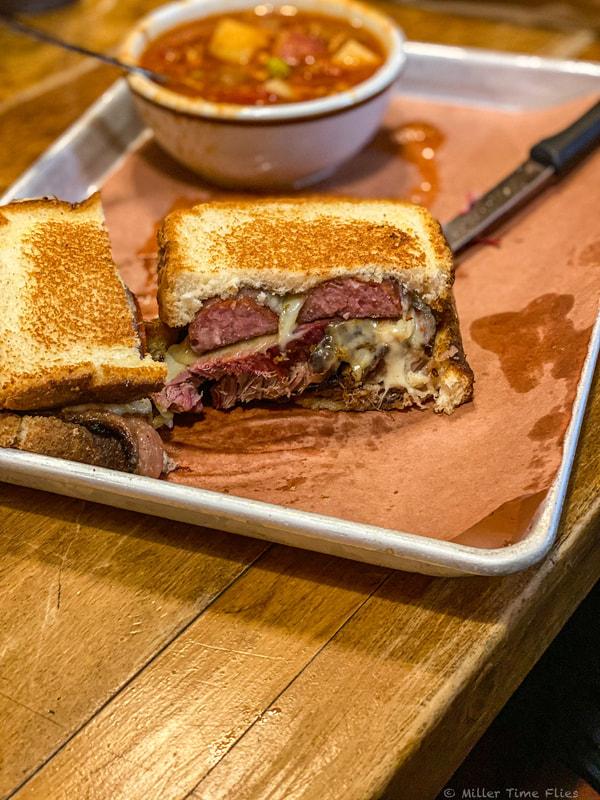 Good stuff here 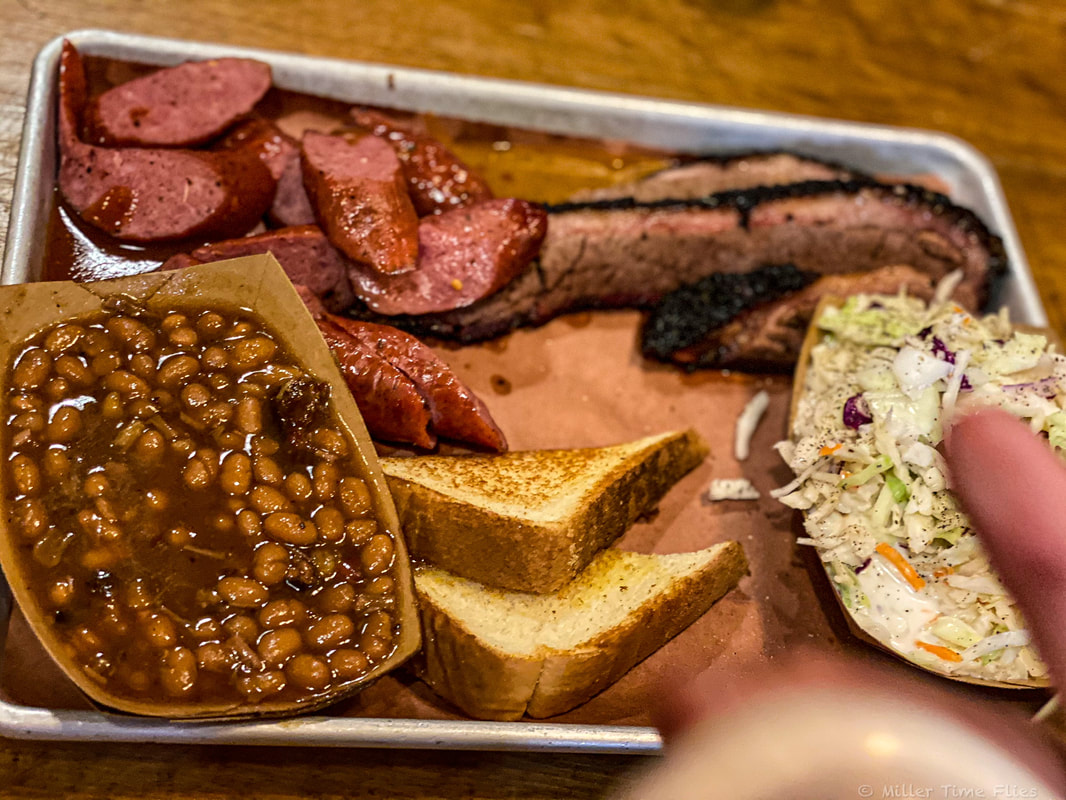 Tim was on this like skin on day old pudding! Brr, Saturday morning was even colder than Friday! This was the first morning this year I have seen frost on our truck. We arrived at the shop around 7:45 to make sure we were ready when the store opened and so Tim could record his episode for the shop’s *podcast called, Tuck Cast, With A Splash of Bourbon, with Shannon “Big Mess” Messer, Bobby the Bearded Wonder and Coach Dale Diesel Collins. Tim and the guys talked about the story/history of Norvise and what makes it so unique. They dove into Tim's relationship with the late Norm Norlander and what it takes to produce the Norvise Fly Tying System. Saturday was Big Mess’s 50th birthday and Tim’s 49th birthday. Once the shop opened there was a steady flow of customers throughout the day. We meet some current Norvise owners that came to visit for Demo Day. Some upgraded their vise or added a new Auto Bobbin or two to their collection. There were some who came to the shop to check out exactly what the Norvise was capable of and some came with intentions of joining the many other Norvise tiers. Tim gave his normal show demo for a group of people, he challenged several to take his bet could he tie a wooly bugger in under 60 seconds? If you have never seen him in person at a show, Tim bets someone that if he can tie a wooly bugger in under 60 seconds then they have to purchase a full set up and if he fails, he will give them a full set up. I have been going to shows with Tim for two and a half years now and I have never seen him lose… not too many people ever take the bet. I spent my day tying game changers and a baitfish or two. Every time I finished tying a new game changer, someone would buy it from me. I know selling flies is what a tier strives for, but for those of you who know me, whenever I tie a new fly, especially a game changer, I form this sort of attachment to each one of them. I am very thankful to those who loved the flies I tied Saturday so much, they wanted to fish with them. I look forward to seeing what they catch. 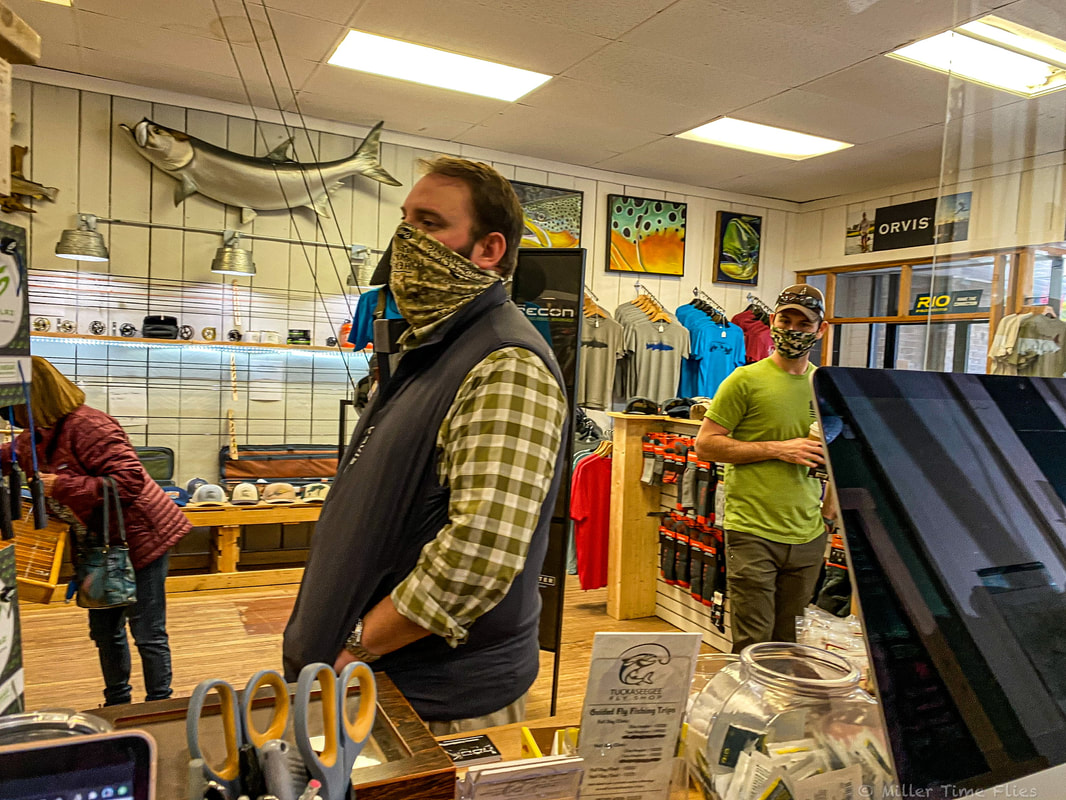 Bobby "the bearded wonder" checking out the crowd. 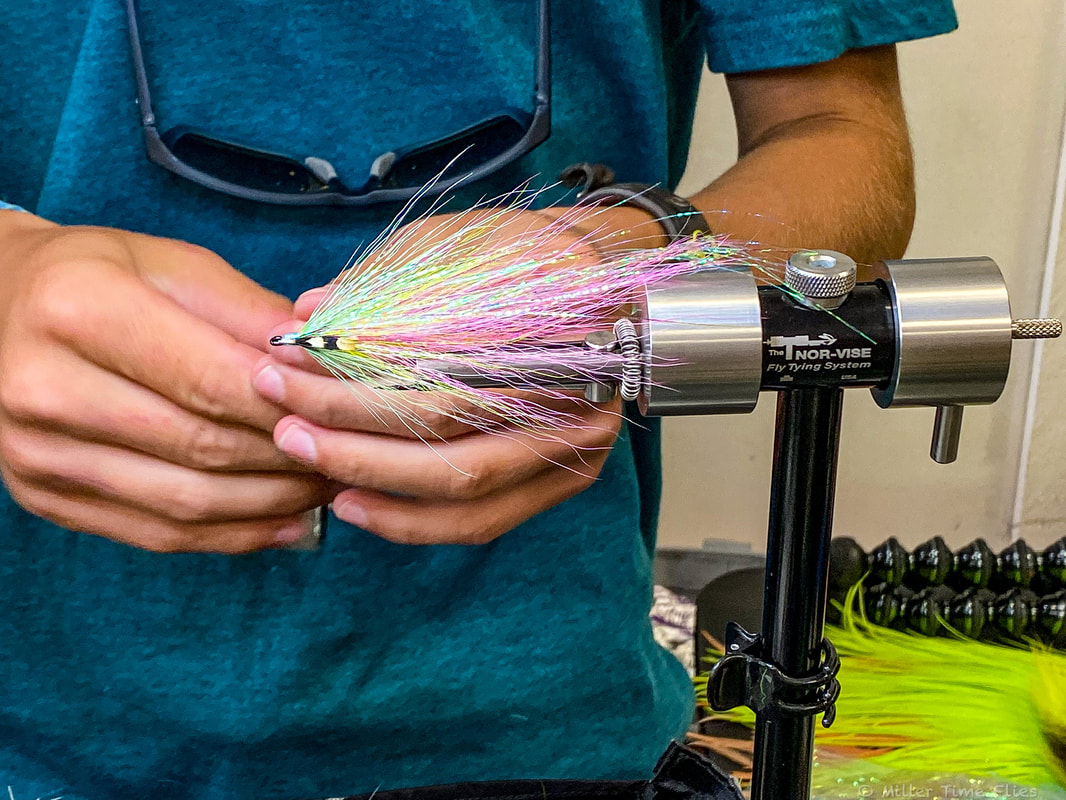 One of the flies Braden spun up this weekend. 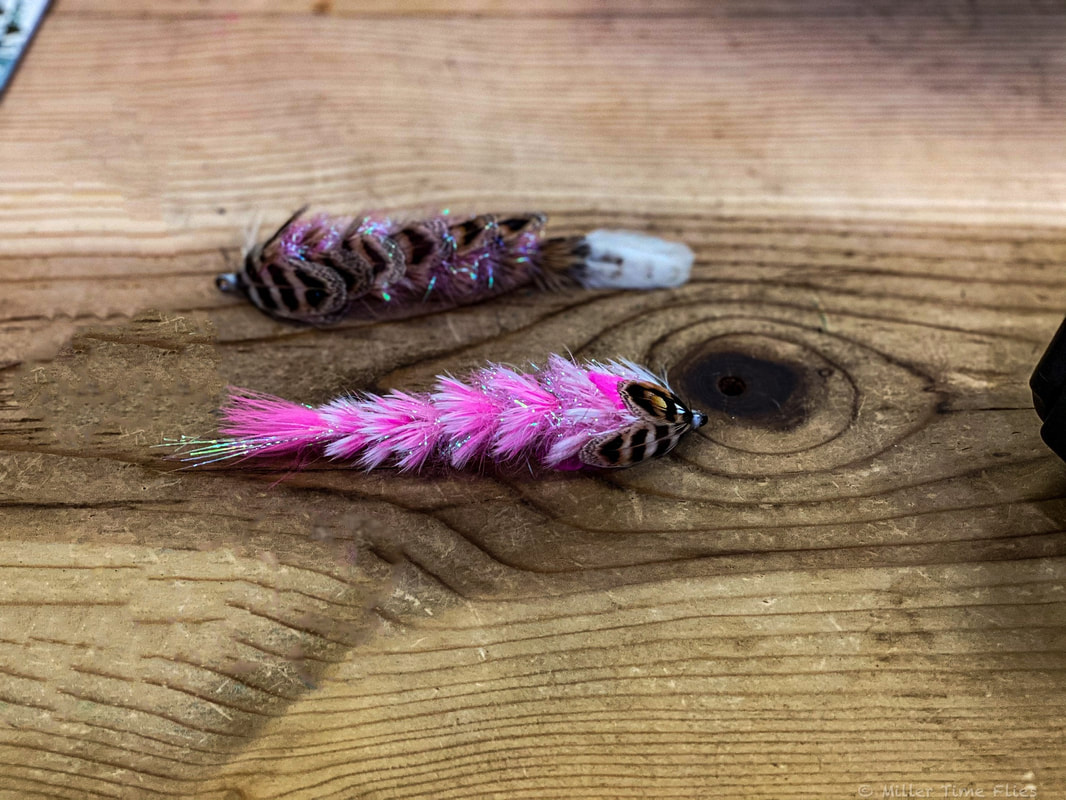 A couple of Gamechangers Braden tied. 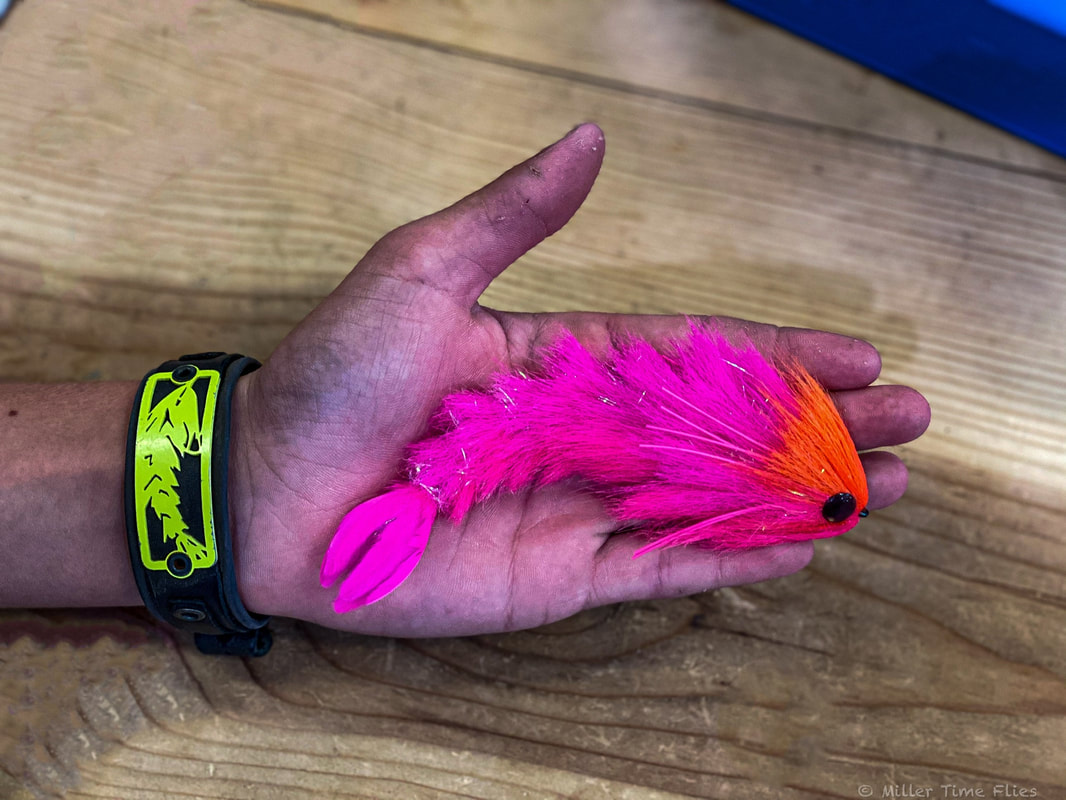 DAMN! 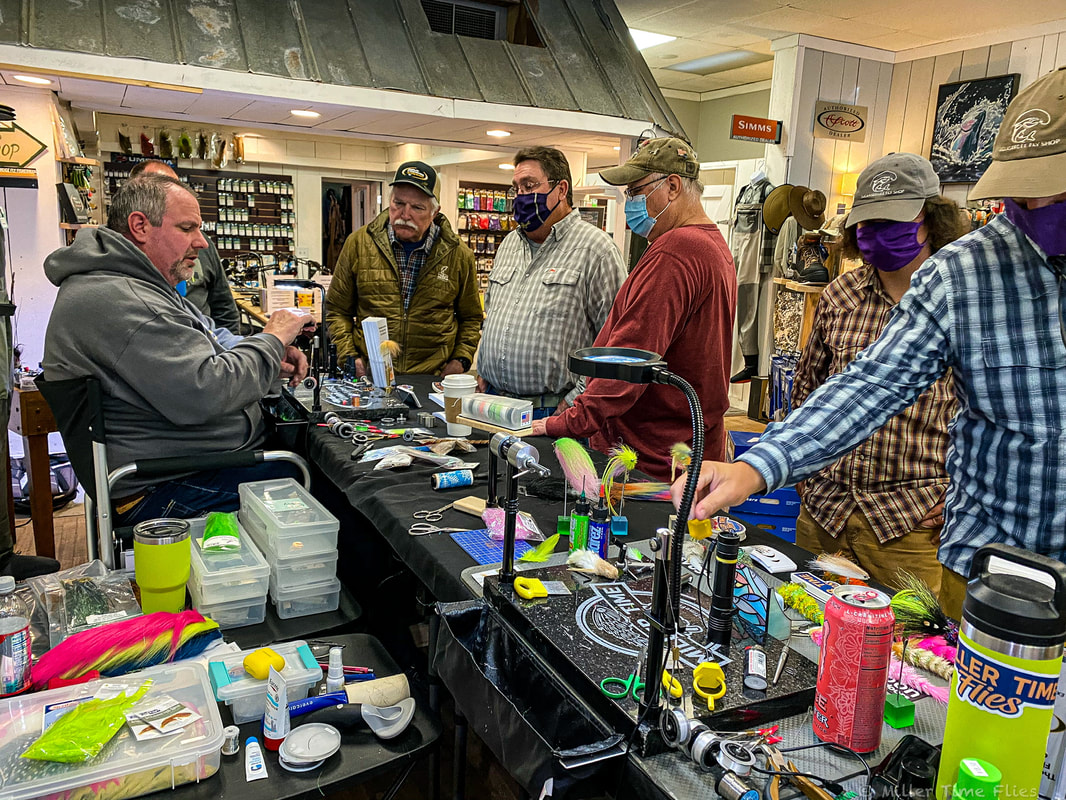 A small crown watching Tim spin the Norvise. 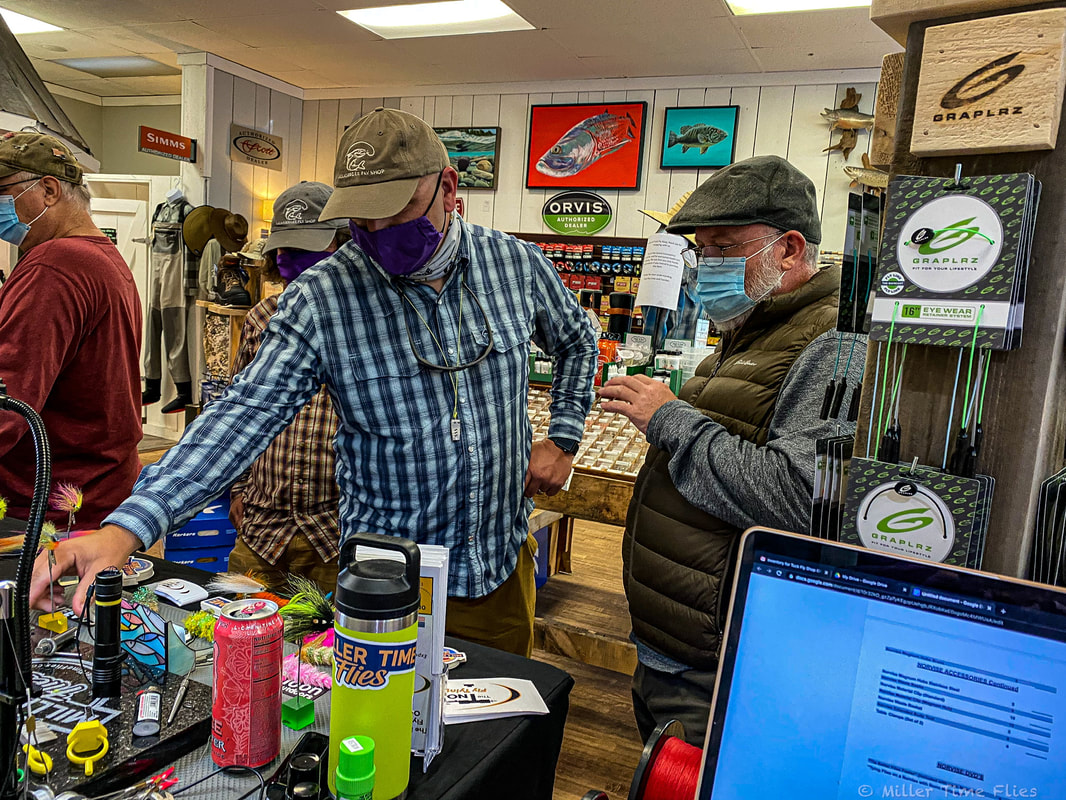 Coach Dale "Diesel" Collins, Jarrod and a customer looking on. Mom, Tim and I all had a wonderful day at Tuckaseegee Fly Shop for their Norvise Demo Day. We look forward to returning to Sylva soon to visit the shop again, see all they guys and Norvise fans, and of course to do some more fishing in the trout capital of North Carolina. Thank you to everyone who came out to the Norvise Demo Day to see Mr. Tim and I, and for checking out what makes the Norvise the most innovative fly tying system on the market today. If you are ever in Sylva or Bryson City, North Carolina you have to remember to stop in one of Tuckaseegee Fly Shop and say hello. Till next time...
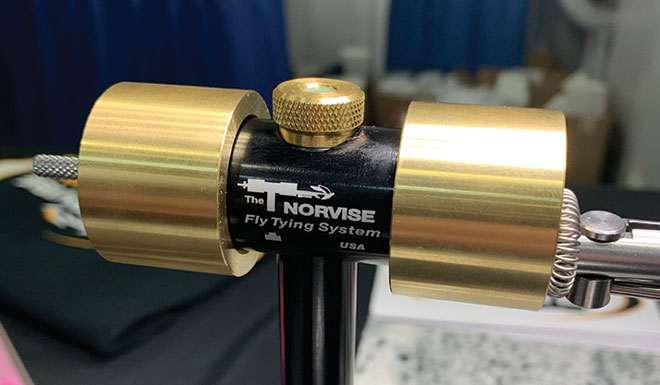
Tight lines - Tim This is a very proud moment for us here at Norvise. We are honored that our new Magnum Brass Hubs have been chosen for an Editors Choice Award from Fish Alaska Magazine. Here is what they wrote; Norvise Magnum Hubs are bigger, thus 40% heavier than standard hubs, and they spin a little longer and with more momentum than the standard hubs. Our tester has used these for the past several months and comments he doubts he will go back to the standard hubs. All three Norvise jaw configurations will fit in Magnum Hubs.
We are so humbled that one of our products have been chosen to receive this award. It is really cool for Norvise to have received this award. You have probably heard me say this before, machining is the best trade in the world! In what other career can you take an idea from your head, draw it on a computer, turn raw material into a finished product and then win an award for it. I am so proud to be able to do just that.
Thank you to Fish Alaska Magazine for choosing us for this award. It really means a lot to us! With the advent You Tube, Facebook, and Instagram fly tying has become, in my opinion, a big melting pot of ideas, twists and tweaks of different fly patterns. In our last post, I talked in depth about how the particular pattern we were tying, O'Neill's Controlled Chaos, was really a stripped down version of 2 other flies. I do believe it was different enough from the originals that I could call it my own, some may disagree with that statement and that is fine, what I am saying is in today's day and age it is challenging to come up with a truly new idea for a fly pattern. Think about some of the staple patterns invented years ago; The Clouser Minnow, Lefty's Deceiver, Brooks Blond, The Gurgler, Ray's Fly, The Adams, Pheasant Tail, Zebra Midge, The list goes on and on and on. These patterns are originals and many, many flies have been designed using these as inspiration. I am not saying designing a new pattern can't be done, I am saying that 1) it is not as easy due to the great evolution of fly tying over the past 20 years and 2) many people come up with “original” patterns that are basically the same as flies tied years ago and they really are not “original”. Sorry guys, but it is the truth. Every so often something comes along in the world of fly tying that is truly revolutionary that has never been done before, Blane Chocklett’s Game Changer is one of those patterns. I guess I first saw the Game Changer close to 10 years ago, a bait fish fly that actually moved like a fish…who would have thunk it. The challenge is many times coming up with the idea is the easy part, bring the idea to life well, that can be the challenge. The game changer has gone through many variations over the years and I believe the “Feather” version to be the best. It is a pattern with fantastic movement, both in the design and the materials, it is faster to tie that some of the other versions, and you can tie it in a multitude of colors. It is lighter and easier to cast than some of the original flies, and they are very durable. Truly a revolution, below is a step by step of a Feather Game Changer tied and photographed by Norvise ambassador Braden Miller. Materials;
Norvise Legacy Vise Norvise Automatic Bobbin Norvise Standard Inline Jaws Norvise Fine Point Conversion Norvise Magnum Stainless Hubs (Coming soon to a fly fishing show near you) 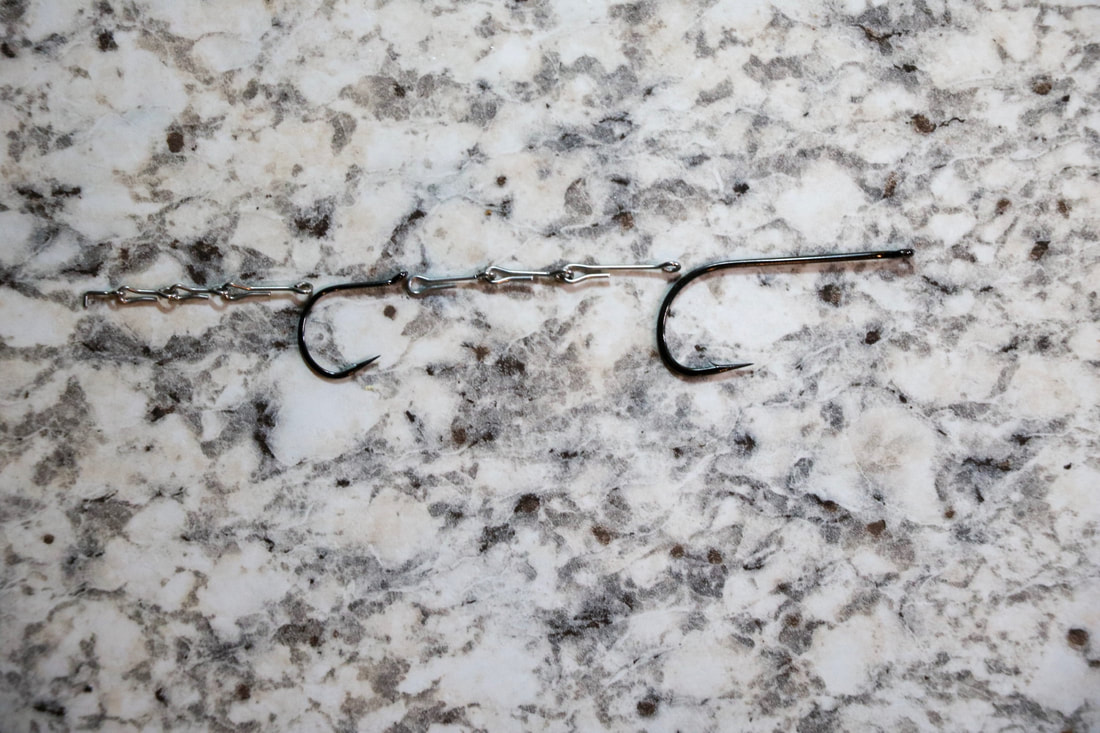 This picture shows how the Fish Spines chain together and where the proper hook placement is. The sequence that we like to use is a tailing shank (the one on the end with the 90 degree bend) 10 mm, 10 mm, 15 mm, Trailer hook (optional) 15 mm, 15 mm, 20 mm, Front hook. The secret is to gradually lengthen the shanks as you move up the fly. You can play with sizing and combo of your shanks, as mentioned, this is what we like to use.  After placing the tailing shank in the vise (this is what the 90 degree bend is for) Put a SMALL amount of filler flash at the bend of the shank. 1 to 1 and a half wraps MAX! this bit of material will support and separate the tail.  Prep 6 hackle tips to use as the tail of the fly, 3 for each side. You have options here for the tail, you can use marabou, hackle tips, I even saw Blane use material used for tying mop flies here. 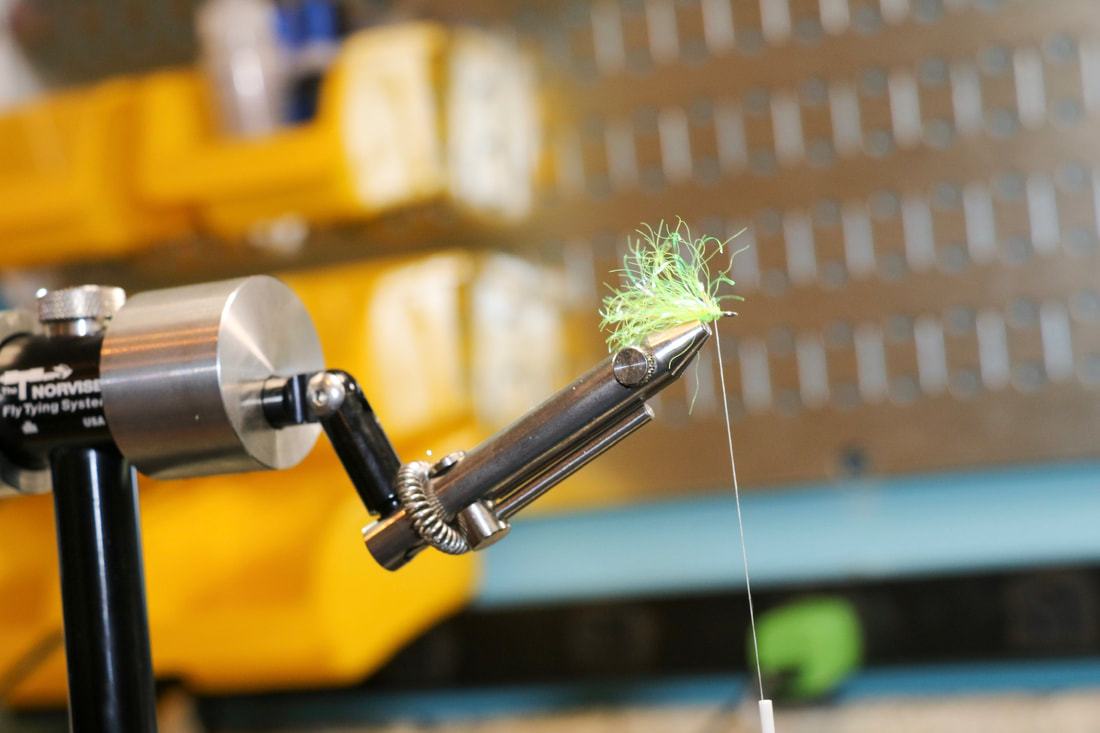 Put 1 to 1 and a half wraps of filler flash on at the bend of the tailing shank. This will help support and separate the tail feathers. 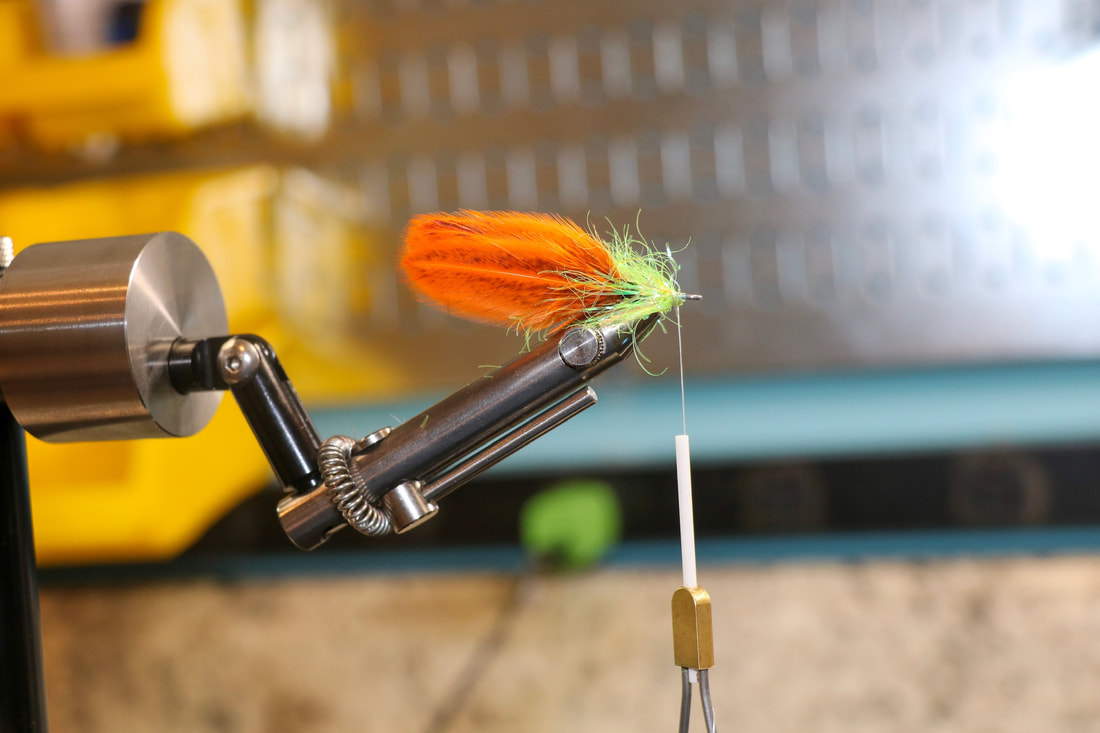 After prepping the tail feathers and cutting the shafts to length tie 3 tips on each side of the shank. The feathers are tied on each side of the shank with the first section of filler in the middle of the feathers. Here we have added second tie in of filler flash at the tail. Palmer it up about 1/2 the length of the shank. Remember this is a small shank, it is VERY easy to overdress these. Less is more, we still have to get 2 Hen Saddle Feathers on here. 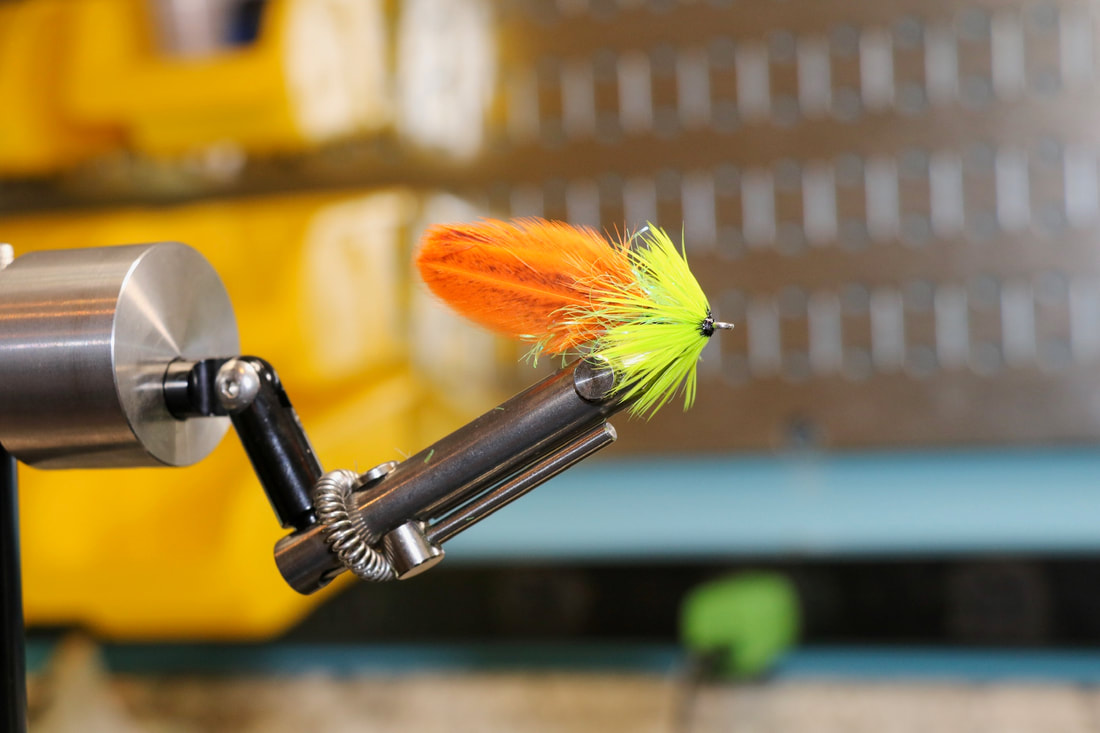 Here is the completed tail section with the Hen Saddles tied in and palmered to the front. You can see how the filler flash is used to support the Hen feather. All of the materials work together to give this fly incredible movement. Tie off and whip finish a neat head and use head cement on EVERY section. I had mentioned this version of the fly is faster to tie than the original and it is. Fast is a relative term here, you are still going to invest over an hour in this fly. A long time for sure, we typically are throwing these on heavy tippet so you don't really loose that many so you want to glue the heads on each section so they are very durable. I have FGC's that have landed over 50 pickerel and they are still going strong so dont let the tying time scare you off. 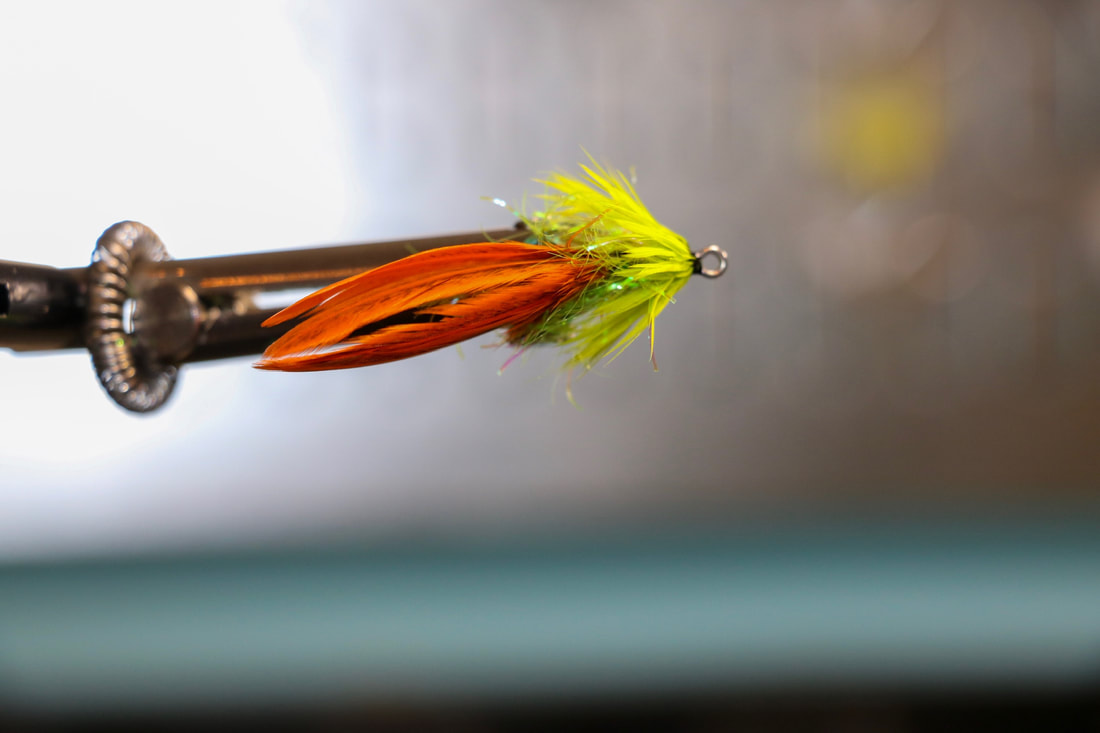 Here is a view of the tail from the top. You can see the filler flash in between the sides of the tail. You can also see how we are building a natural taper with our materials. 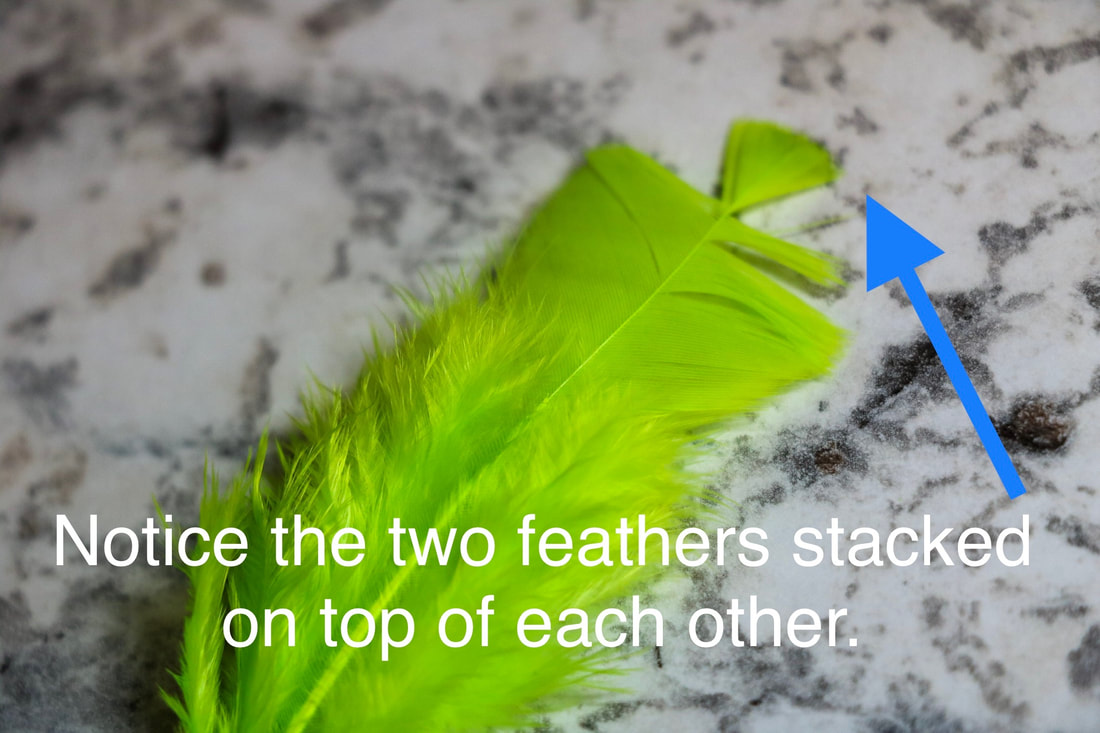 Feathers; As mentioned we are using feathers from a Hen saddle. Hen feathers are a shorter, webby feather with softer fibers that make them perfect for this application. To build the taper is simple. As you move from the tail forward to the front of the fly you will select feathers that are progressively longer for each section. The easiest way to do this is to start at the top of your cape for the tail section and gradually pluck from a point lower and lower on the cape as you move up the fly. The lower on the cape you go the bigger (longer the fibers are) the feather is. The longer the feather the more taper you get. The picture above shows how to prep the feathers for tie in. We are tying in by the tip and palmering forward. Do not use the fuzzy part of the feather, I will typically strip this off before I tie in. On the tail sections we are typically using 2 feathers. As we move up the fly we are adding feathers on each section. By the time you get up to the head you are tying 4, maybe 5 feathers in at the same time. Always tie the feathers and palmer them at the same time, regardless of the amount using the filler flash as a support. The progression is actually pretty simple; With the exception of the tail section it is filler flash - feathers - whip finish- glue - repeat. you will need to adjust the amount of filler flash as the shanks (or hooks) get longer. Toward the tail the filler flash may be too wide, you may want to trim it so it is a little shorter (Measuring from the core out to the end of the fibers) than the fibers of the feather you are using. as you get to about the middle of the fly you can use the full width of the filler flash. We will use wider and more feathers as we work up the to the front of the fly. This will build bulk and natural taper into the fly, two very important things you need to get the silhouette and the movement you are looking for. The most important thing to remember is DO NOT CROWD THE EYE OF THE SHANK! if you do the fly will not move the way it is supposed to. 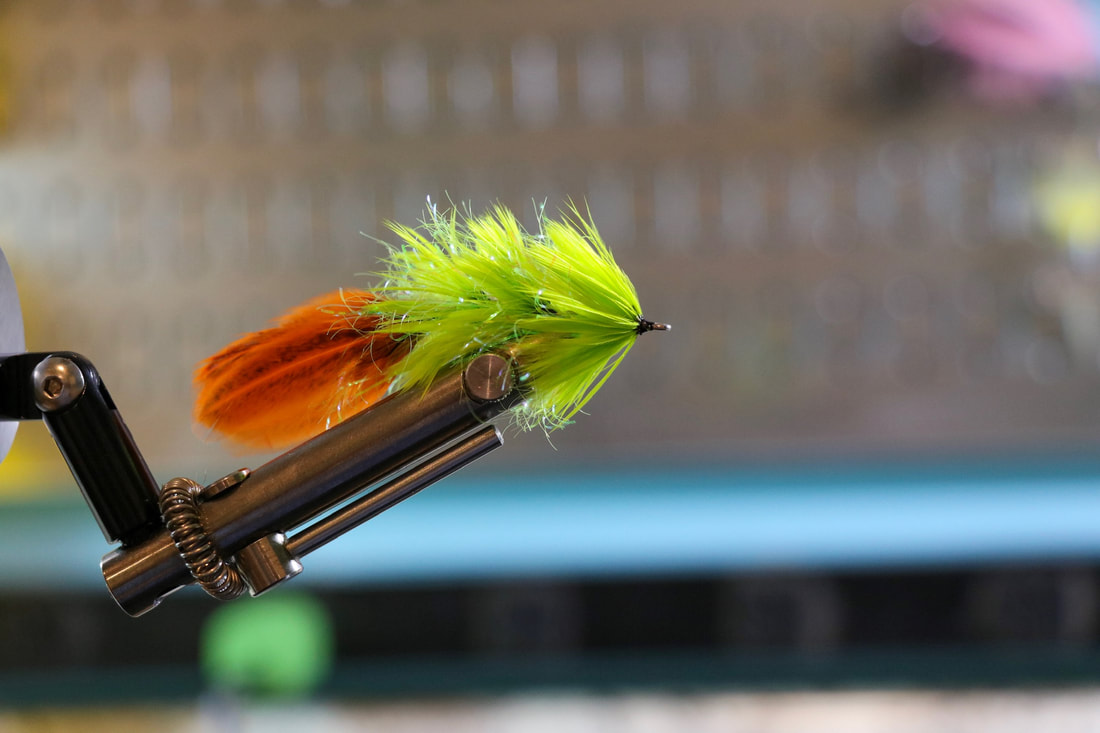 Here the second section has been added. 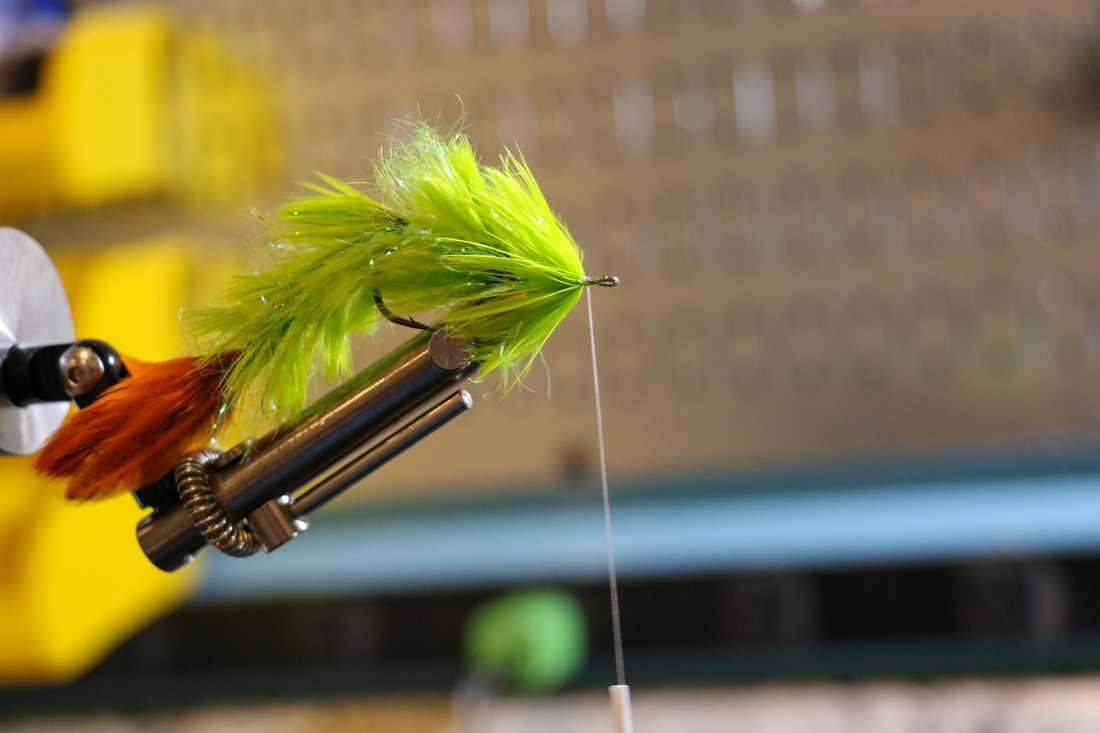 Here, several more sections and the trailer hook has been added. 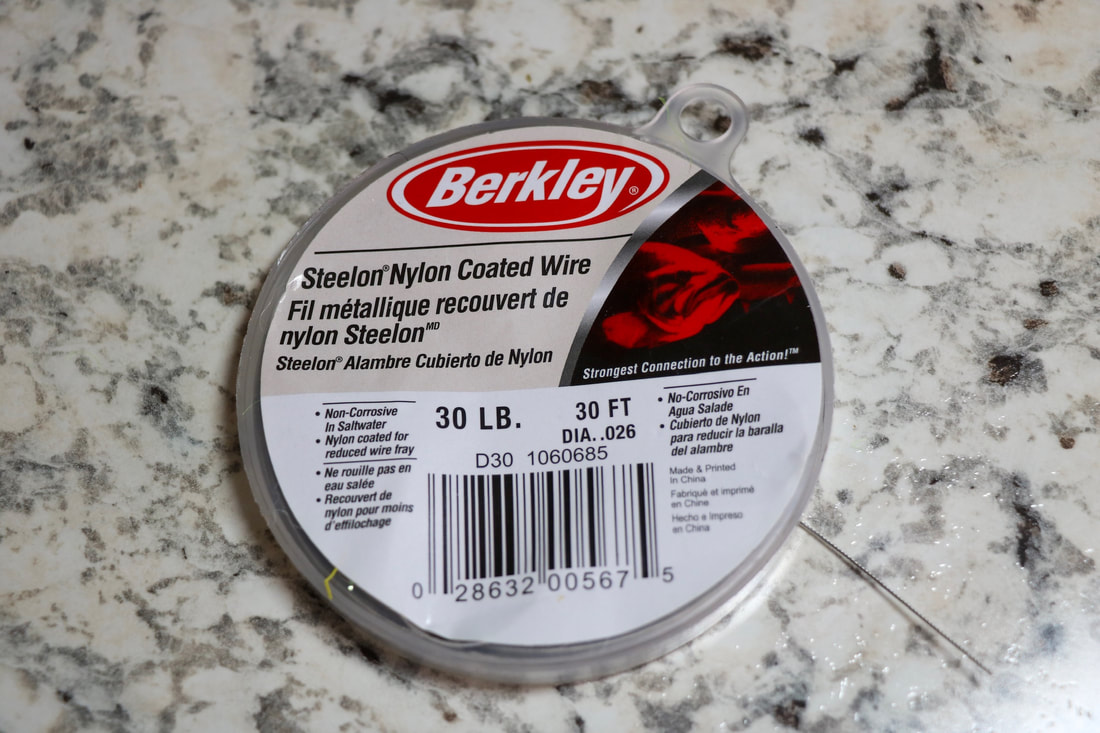 When you get to the point where you are adding a hook to the pattern we like to use a wire type leader material. This product from Berkley works well as does Surflon or a product called Beadalon you get in the craft stores. To make your connection cut a small piece of wire (about 4") and thread it through the eye of the shank folding it so the half way point is looped through the eye of the shank and equal lengths are pointing forward. Lay the section of the wire pointing forward on tip of the shank and use 3 or 4 loose wraps of thread to hold the wire on top of the hook shank. At this point you want to adjust the length of the loop coming off the back of the hook so the tail section of the fly has freedom to move, but is not so big it can foul. A good rule of thumb is to make the loop about the same size as the loop in the adjacent shank. 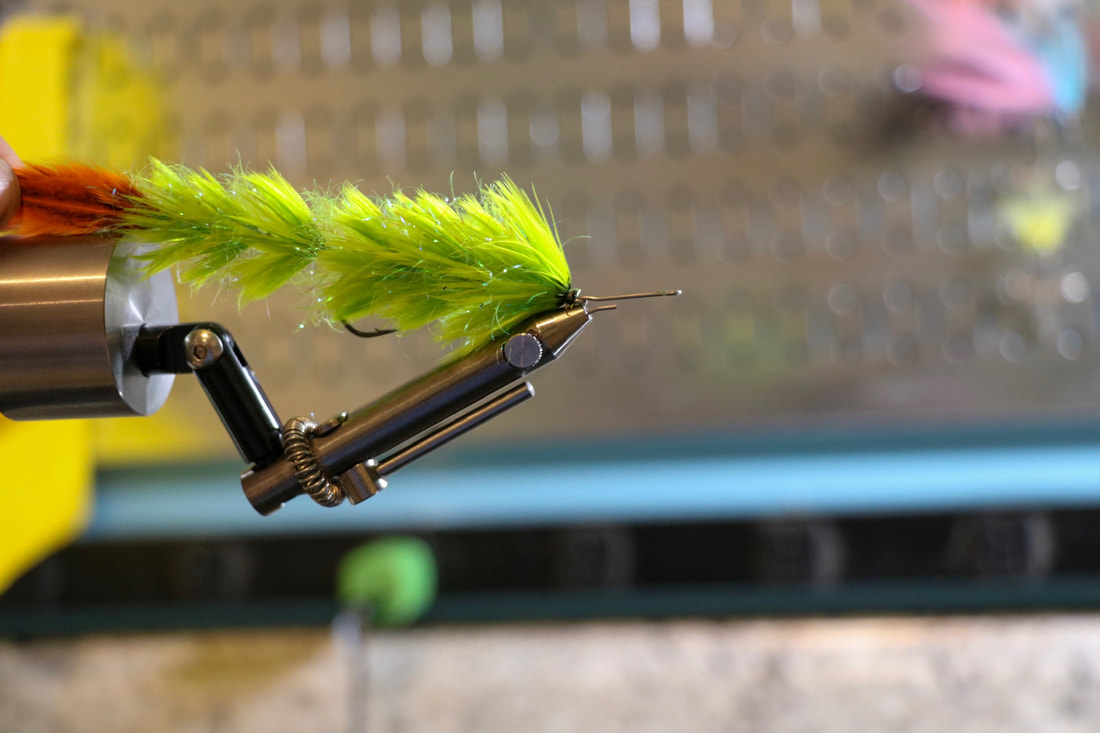 Here we are working our way up the pattern by adding more shanks in front of the trailer hook. 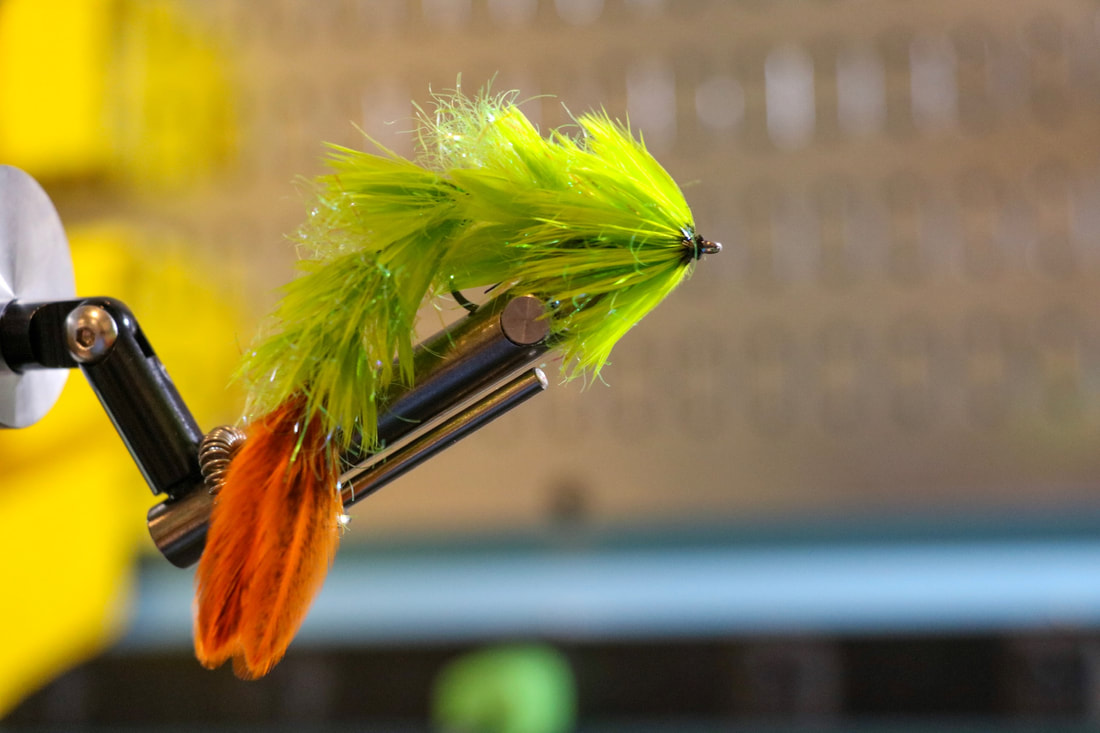 Here we are ready to add the front hook. 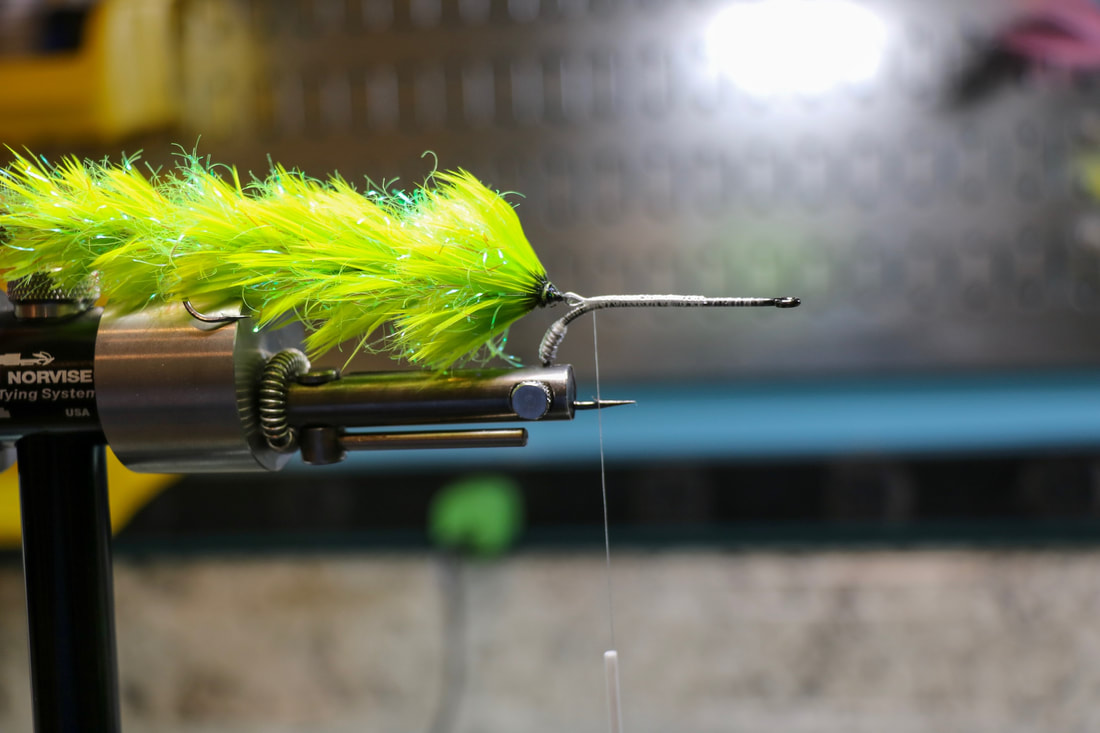 This picture is a good example on how to do the wire connection. It also shows that Braden used a few wraps of lead on the bend of the front hook. this will help keel the fly and keep it swimming true. You can use lead wraps for this or, depending on the size of the hook, Tungsten Scud weights work fantastic for this step. Also notice Braden switched from the Norvise Fine Point jaws to the Standard inline jaws. We will typically use a hair clip to clip the back of the fly to the jaw to prevent it from flopping around when we are tying. Clipping the back of the fly to the jaws will also help to prevent us from sticking our fingers with the rear hook point. The Norvise Large, Saltwater jaw would be a good choice here as well. 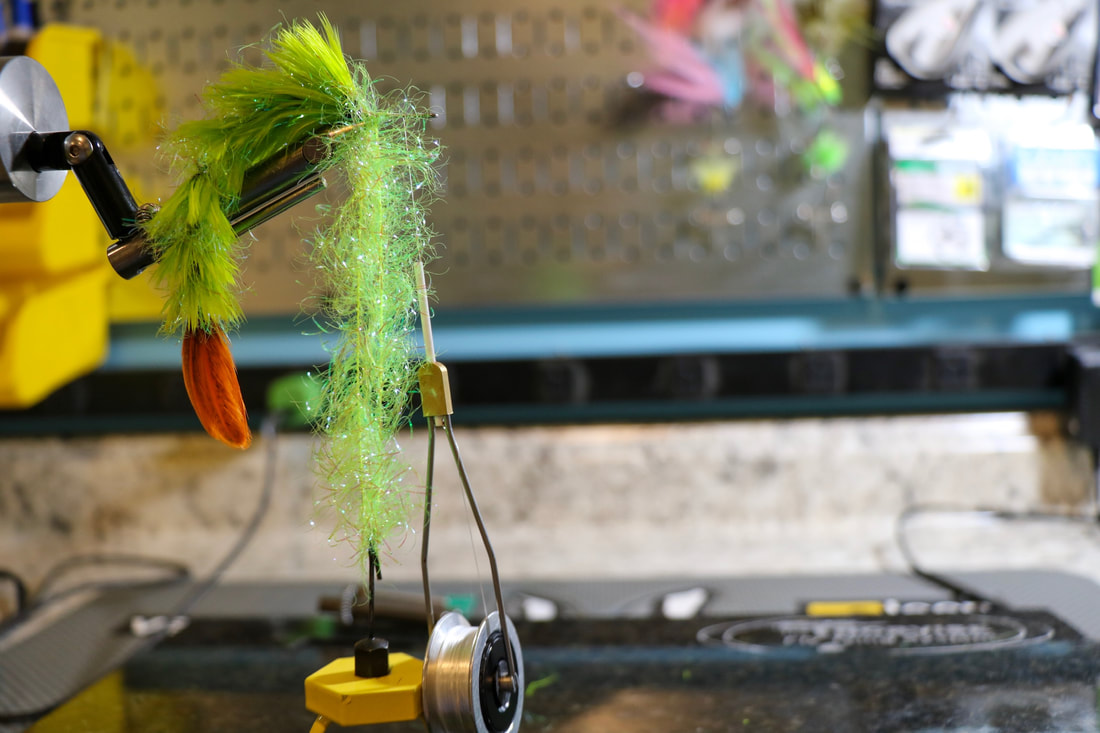 OK, we are tying on the front hook and close to bringing this pattern home. This is a cool technique that will really help bulk up the front of the fly. Tie in a long piece of filler flash in on the hook by the opposite ends at the bend of the front hook. This will make a loop of material hanging off of the shank of the hook. hang your dubbing twister in the loop and twist the 2 halves of filler flash together. This will tighten the core of the flash and really make the fibers stand out creating a platform for the 4 feathers you will use to finish the fly. 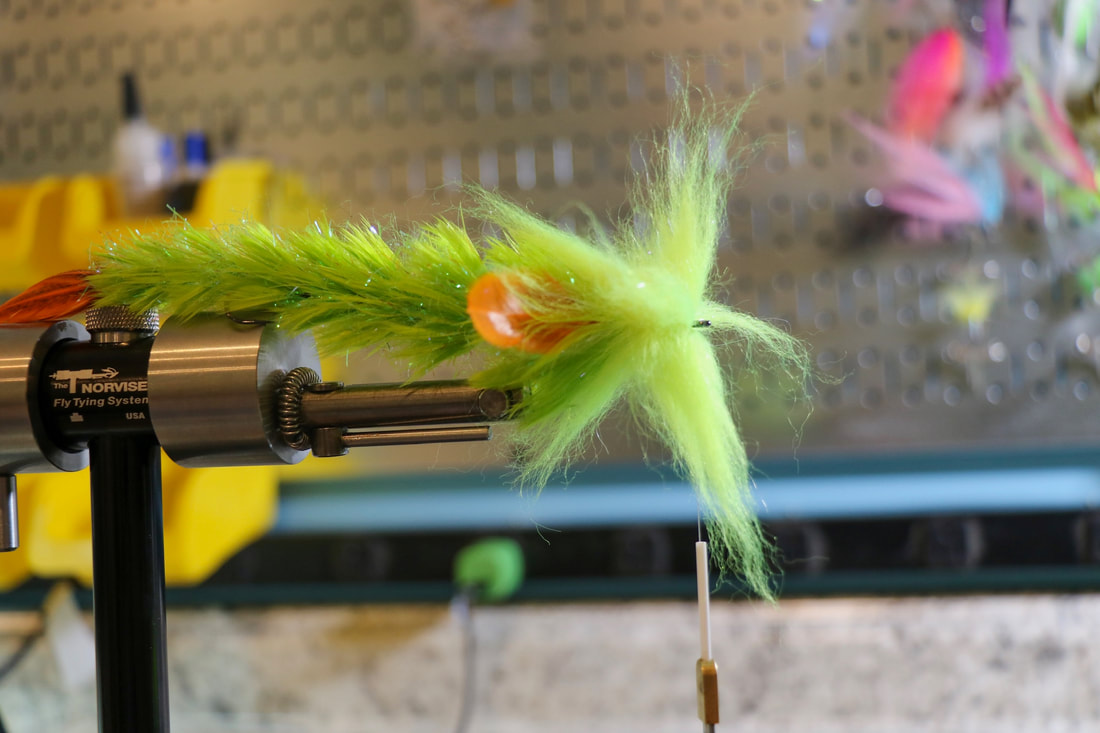 After wrapping the twisted filler flash and the 4 hen saddle feathers to finish up the body of the fly we have added Hackle tips of either side of the fly to act as pectoral fins. This will help the fly swim and they just look way cool. NO we have a decision to make, what to do with the head. Just like the tail we have options here. We have used spun Deer hair, Slider or Popper heads, Fish Skulls or Masks, or my favorite palmered Schlappen. Here Braden has chosen to do a stacked laser dub head. This is the same technique we used in the collar for the popper and the slider on the last 2 patterns we tied. Pull a clump out, even up the tips and tie on the shank in the middle of the clump. Here Braden has tied 4 clumps, one at every 90 degrees. How far you bring the flash and the feathers will determine how big the head is. I like to use about 1/3 of the front hook shank for the head of the fly. Once the stacks of laser dub are tied in use a brush to brush out the fibers. Brush everything forward first, then brush everything back. This will give a very nice "airy" head that will veil back over the rest of the front section of the fly. 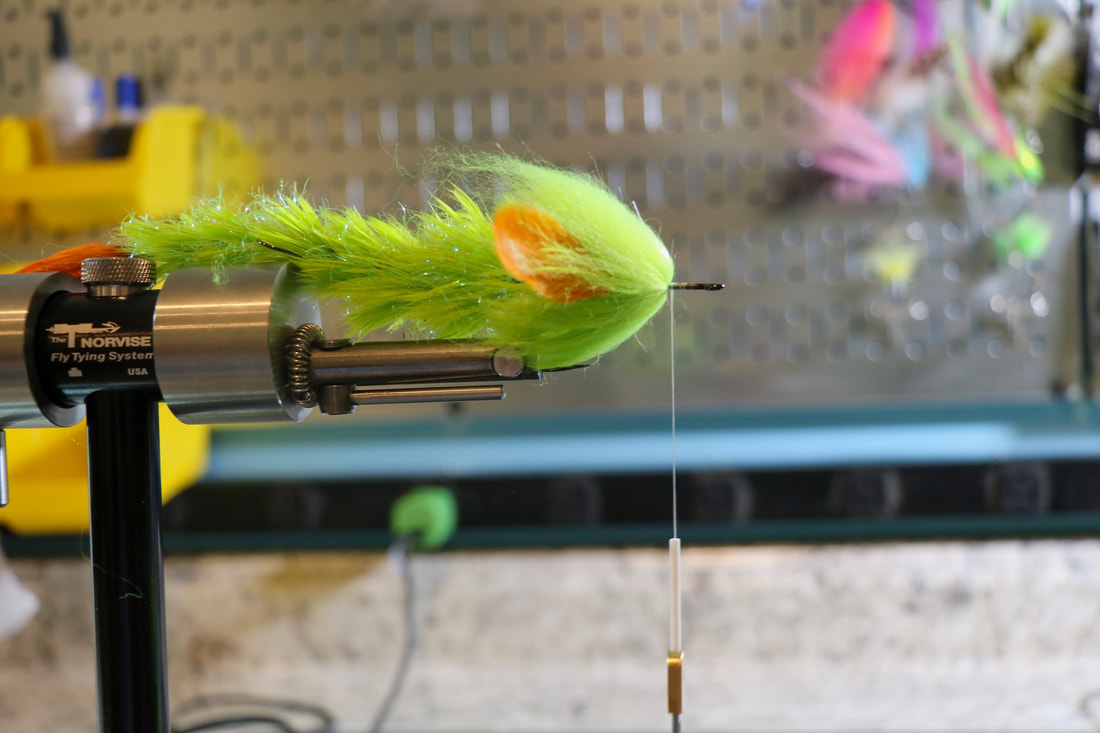 Repeat these tie in's until you reach the eye of the front hook. 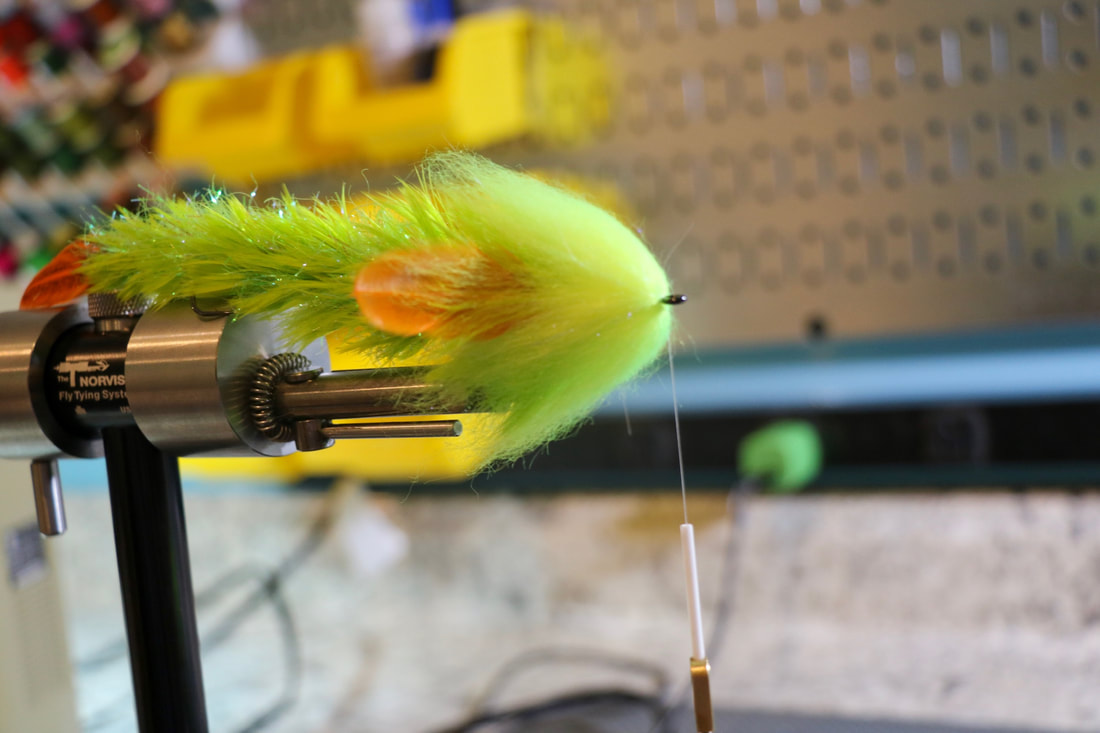 Now you could call it quits here and this will fish just fine. 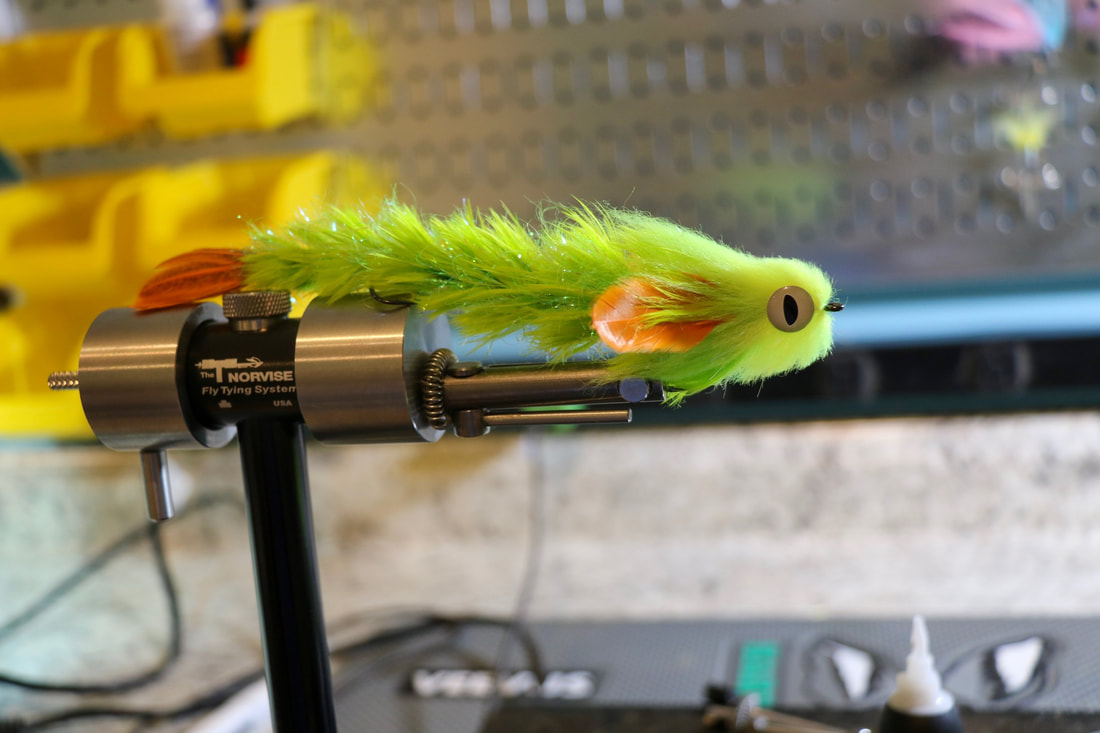 Always tinkering and pushing the techniques of fly design. Here Braden trimmed the head a bit to give it the shape he wants and added some Flymen Dragon eyes. Here is the finished fly!
The Feather Game Changer really is not a difficult pattern to tie, it is basically repeating multiple sections of pattern over and over again. Once you see one of these in the water and better yet see how they produce fish I think you will understand why we spend the amount of time that we do to tie these. Your investment will be rewarded, trust me! Thank you Blane for coming up with such a fantastic pattern and a special thank you to Norvise ambassador Braden Miller for tying and photographing this step by step for us. I am sure the Norvise faithful appreciate your effort buddy! Till next time... Tight lines - Tim OK, So this week we are back on our series of my favorite Smallmouth patterns and this one may be my favorite. The O'Neill's Controlled Chaos is a pattern developed over the past few years. This fly is a direct decedent of Mike Schultz's Swinging D and Eric Snyder's Twisted Swinger. The Swinging D is a fantastic fly, one of the best Smallmouth flies out there. It takes a long time to tie. Mike himself offers a stripped down version to combat this issue. My buddy Eric Snyder stripped it down a little more with his pattern the Twisted Swinger. The Controlled Chaos is stripped down even more giving what I feel is good balance between a fly with the action that I want and time spent at the bench. More of a platform really, the possibilities are endless. When fishing this fly you want to throw it on an intermediate or a type 1 sink tip on a shore leader. The idea here is the foam head will try and float the fly and the line will try to sink it. The result is a battle of wills that give this fly incredible action. Originally designed as a Smallmouth pattern, we have successfully landed Smallmouth, Largemouth, Trout (Rainbow, Brown and Brook) Chain Pickerel and Striper to name a few. Size can be adjusted by modifying the hook, shank and head size. This one is about 3.5 / 4 inches and will throw nicely on a 7 weight. This one is in "Bleeding Shad" color. We also use Black / Chartreuse and Fire Tiger. Recipe; Hook; Partridge Attitude Extra #1 Tail; one white and one Pearl Grey Marabou Blood Quill Flash; 2 or 3 strands of silver Flashabou Body; Complex twist of Schlappen and Polar Chenille UV silver. Shank; Flymen 35 mm (1 3/8 inch) shank Body; Complex twist of Schlappen and Polar Chenille UV silver. Collar; Senyos Laser Dub red / white Head; Rainey's foam diver head size small Norvise products used; Rotary Norvise, Magnum Hub, Auto Bobbin, Saltwater Jaw 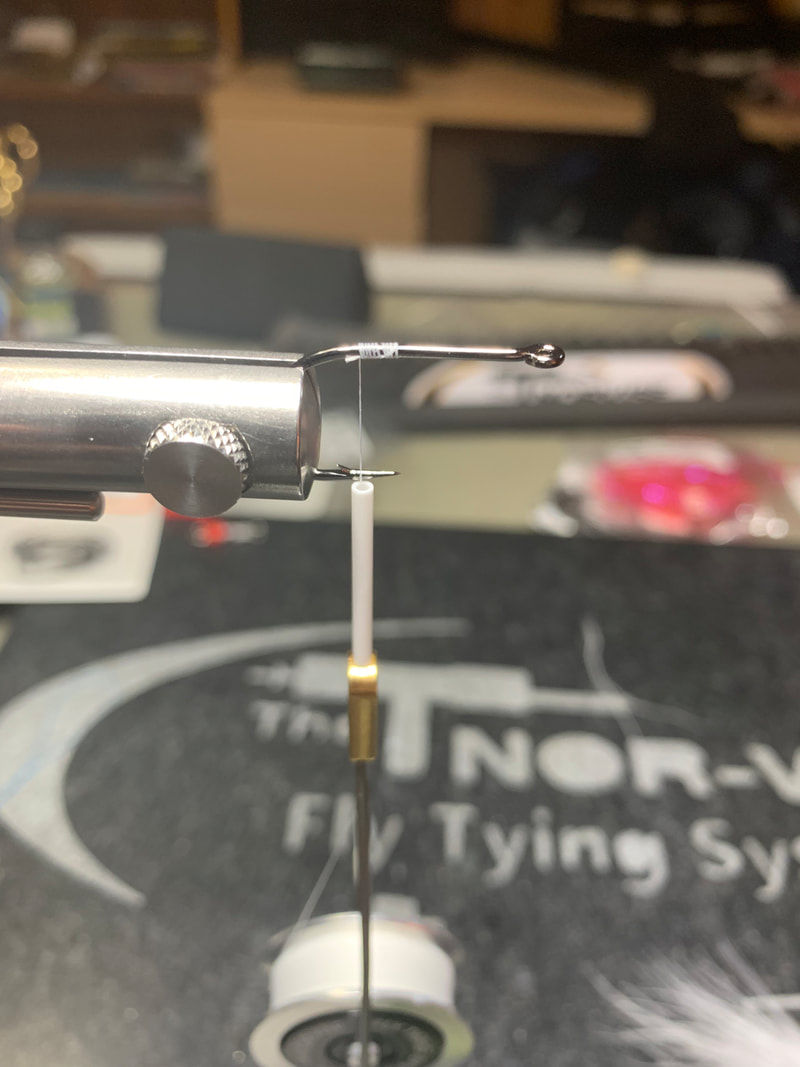 Tie on on the back third of the shank and wrap back to just in front of the hook barb. 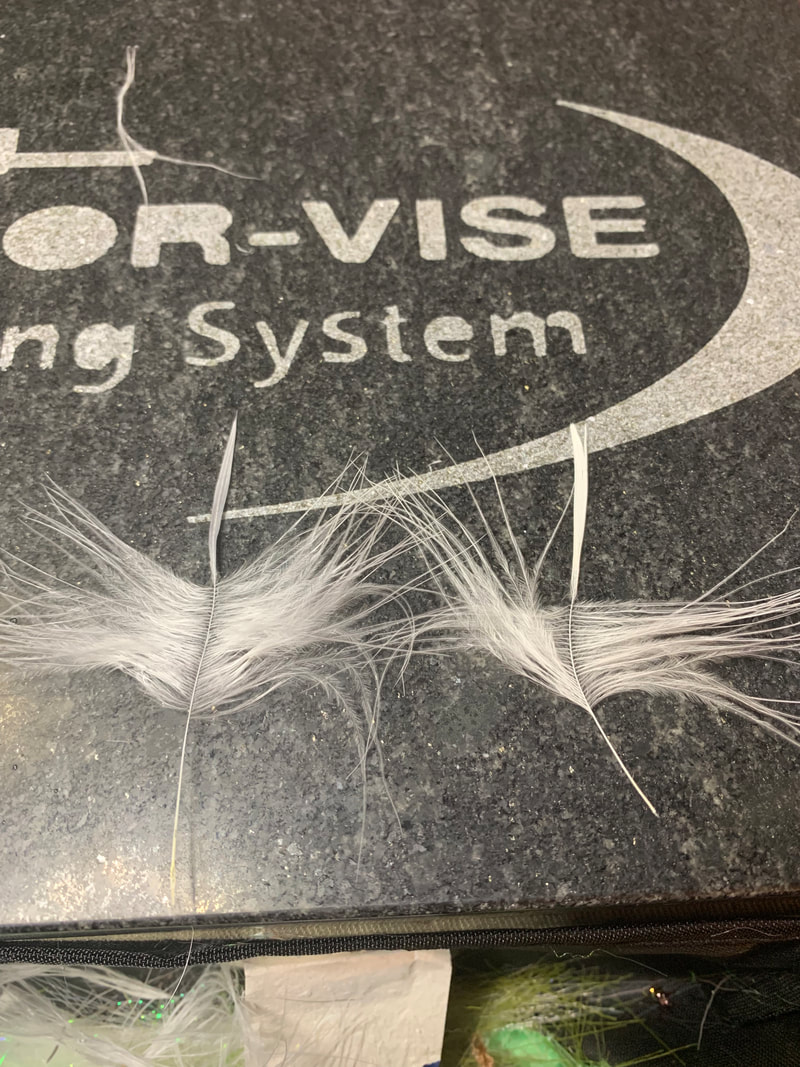 Select and prep 1 each white and grey Marabou blood quill. We will be tying in at the tip of the feather so stroke the fibers back leaving about 1" of fibers to make the tail. 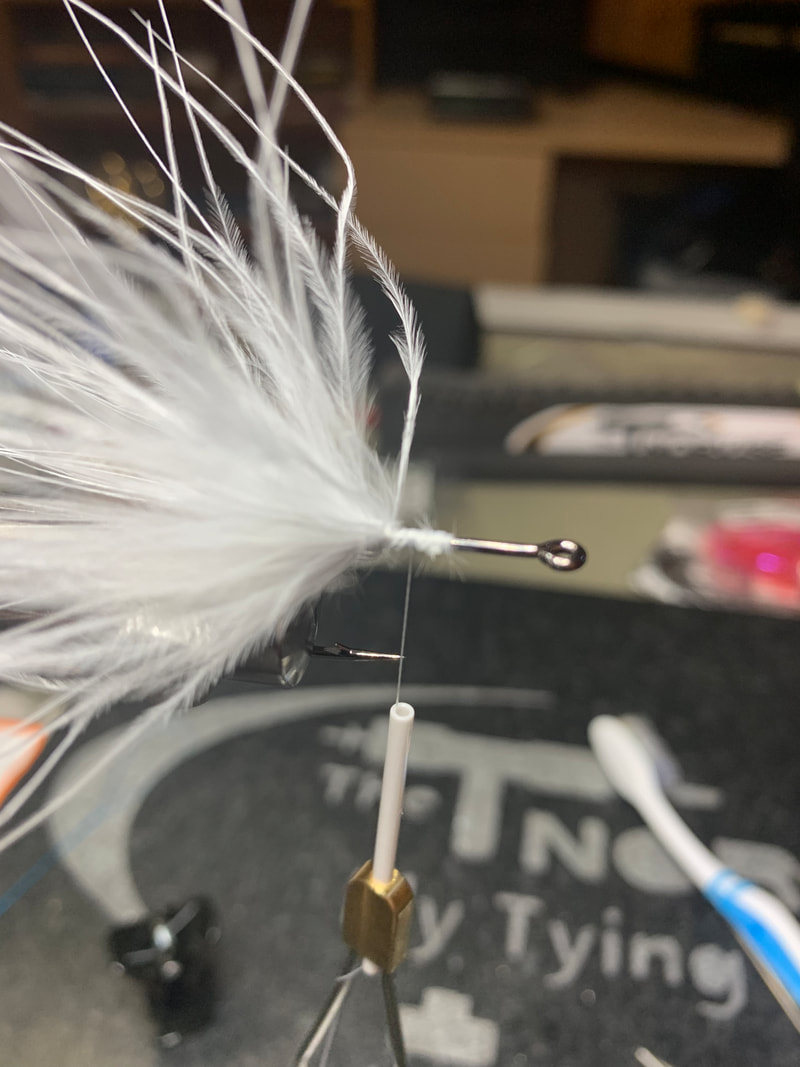 Tie the tip of both feathers and palmer forward until all of the fibers are on the hook. Take care not to trap any of the fibers as you are wrapping. Use your bodkin or a brush to pick or brush out the tail as you are wrapping forward. Remember, if you are using a Norvise you can just spin the vise.  After you are finished wrapping the tail stroke / Brush all the fibers back and wrap your thread back over the stem of the feathers. This will make the tail very durable. Put 2 or 3 strands of silver Flashabou down each side of the tail. 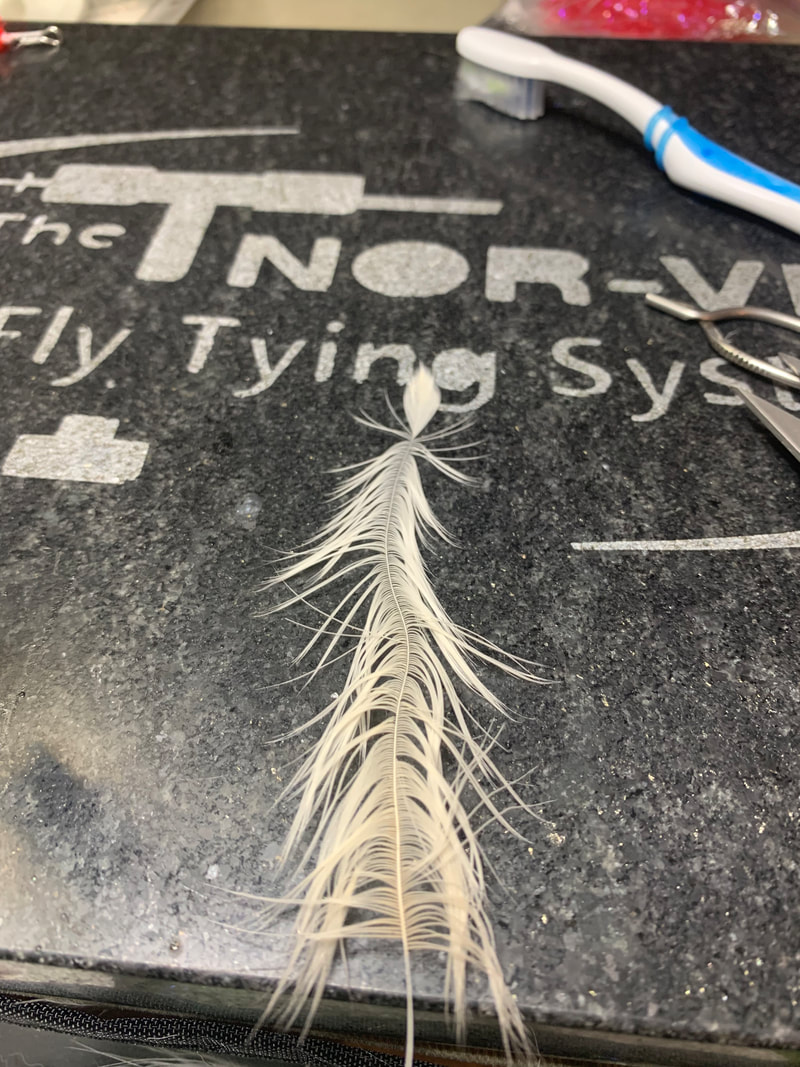 Select one long, fairly even Schlappen feather. Strip the fuzz from the bottom and stroke the fibers rearward. 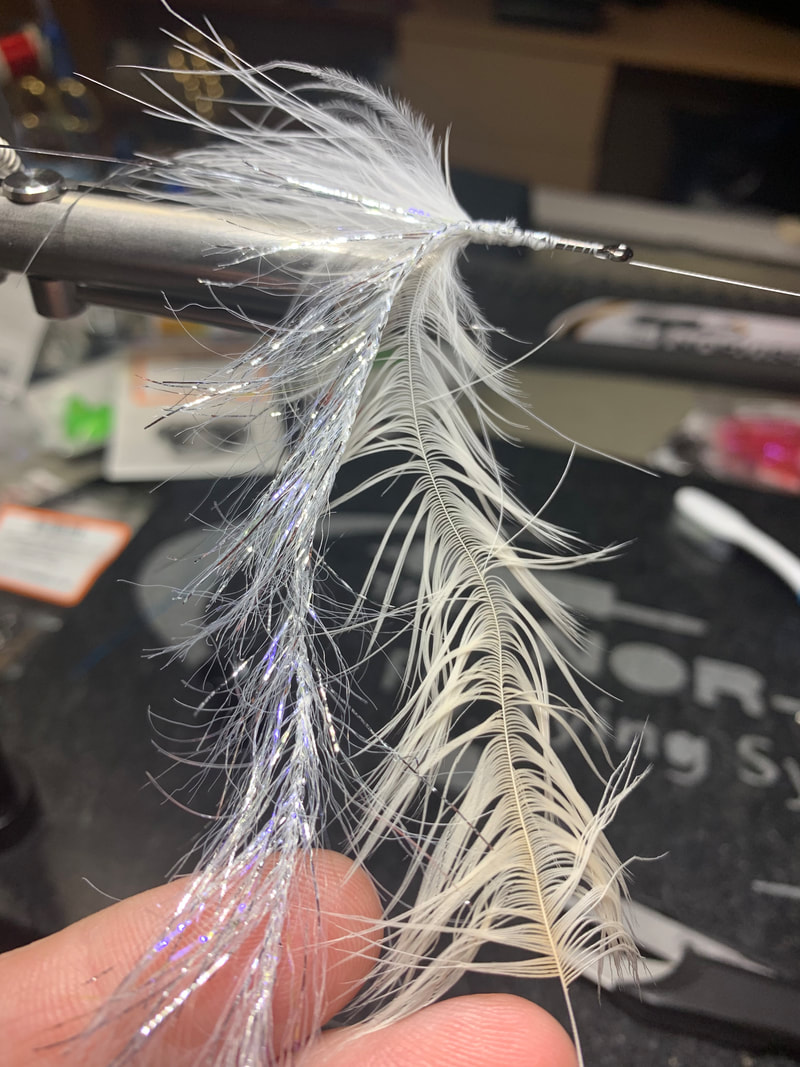 Tie the feather and an equal length of Polar Chenille in at the base of the tail. See the video below on how to use the spin function of the vise to make the complex twist. 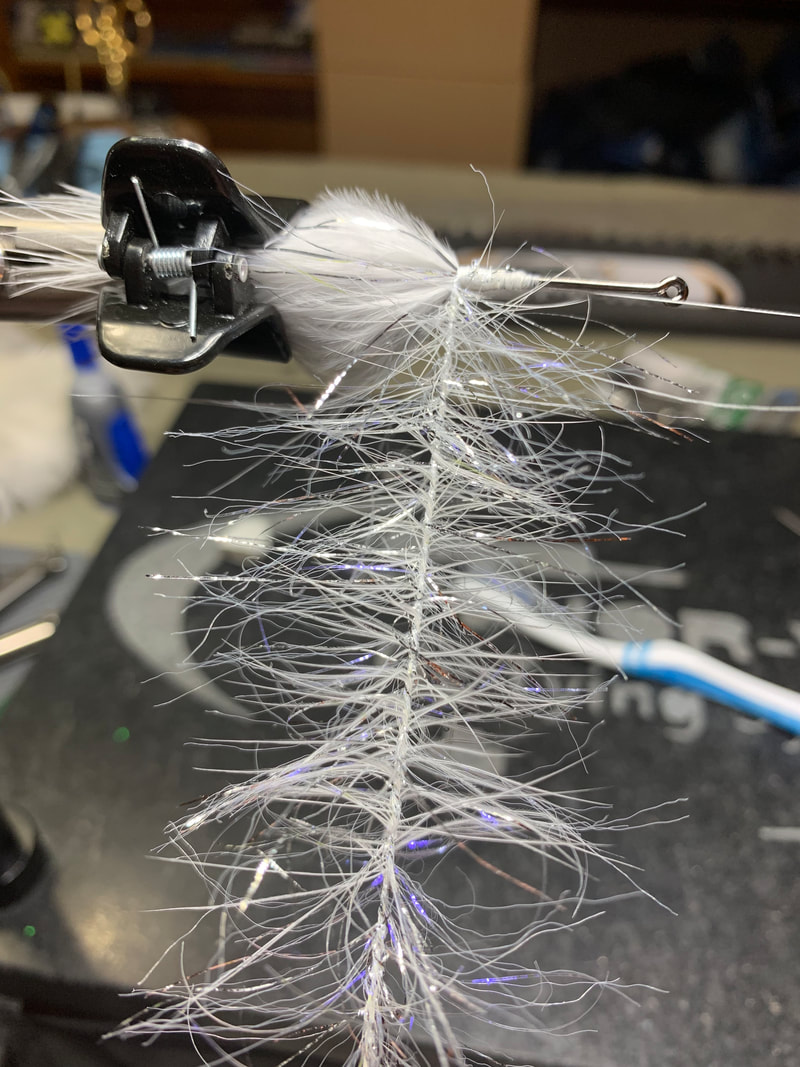 Clamp the base of the feather and the polar chenille together and twist them together. Use a brush to brush out the fibers so they don't get trapped underneath one another. To see a video of how to make the Complex Twist with the Norvise click HERE 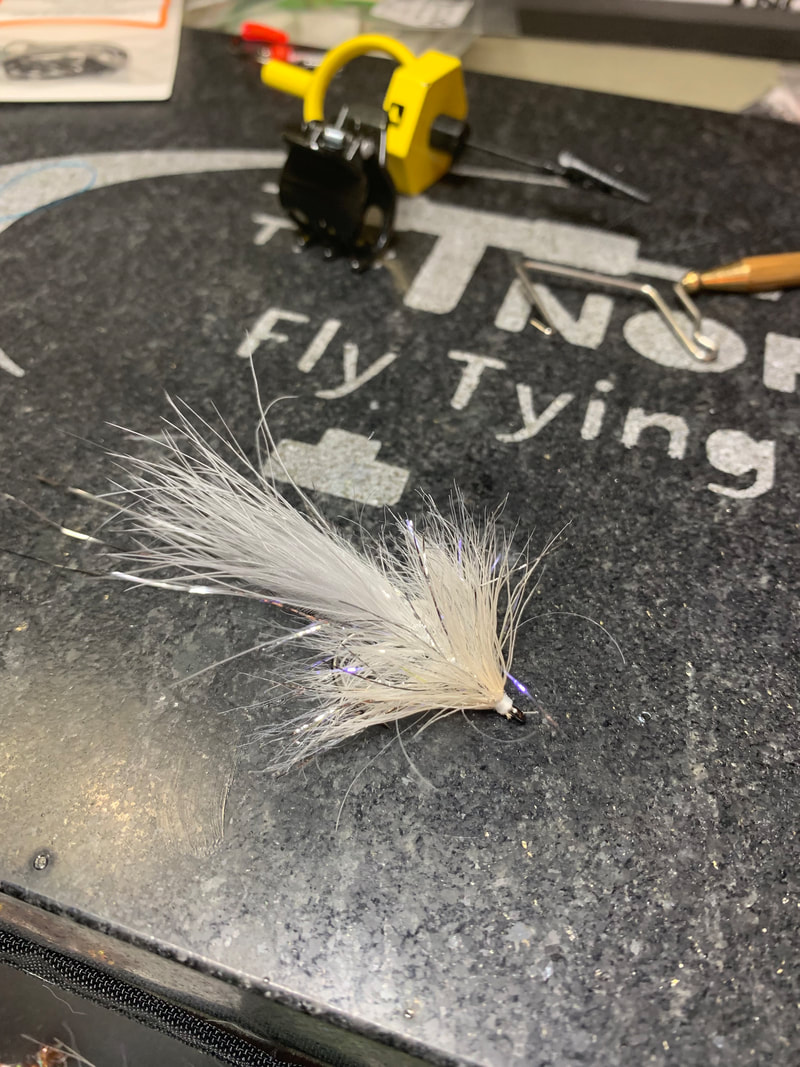 Palmer the complex twist forward to the eye of the hook. Take care to stroke the brush reward after each turn so the fibers are not trapped. Tie off and clip the brush at the eye of the hook. Use your bodkin and a brush to pick / brush out the body of the fly. This is the completed tail section of the pattern. 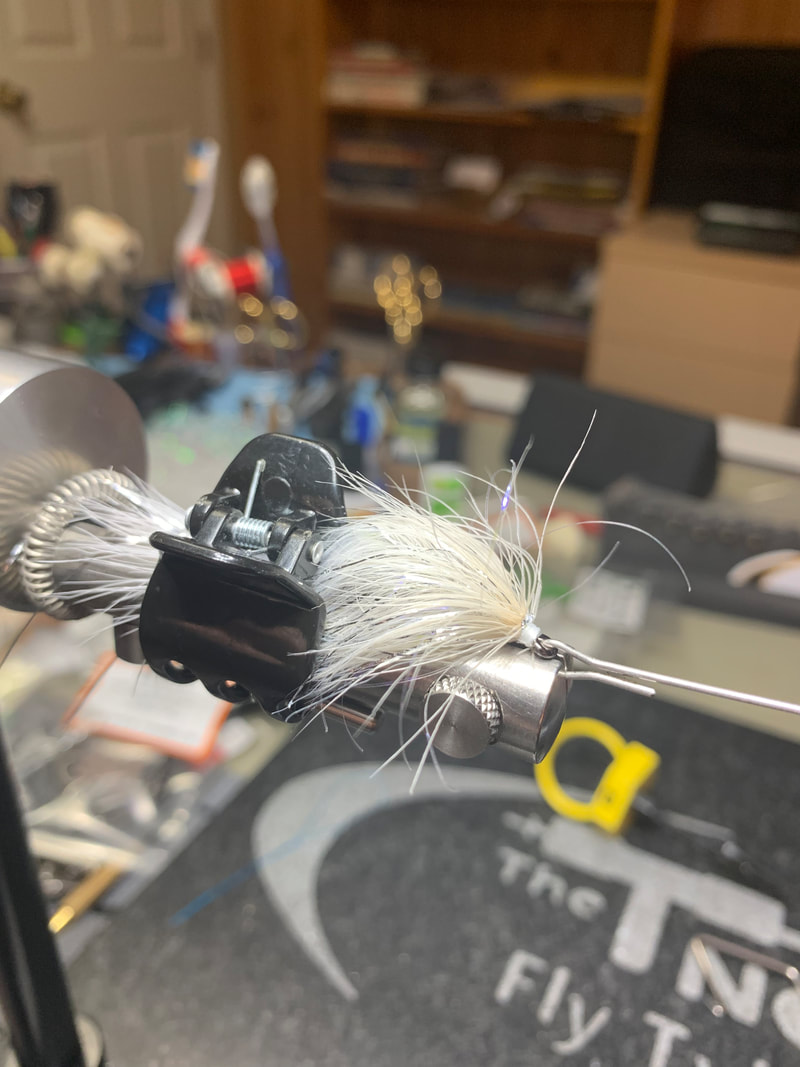 Attach the rear hook to the Flymen Shank. You can see I have used a hair clip to secure the tail section of the fly to the Saltwater Jaws. This is one reason I like using the bigger jaws when tying articulated flies. 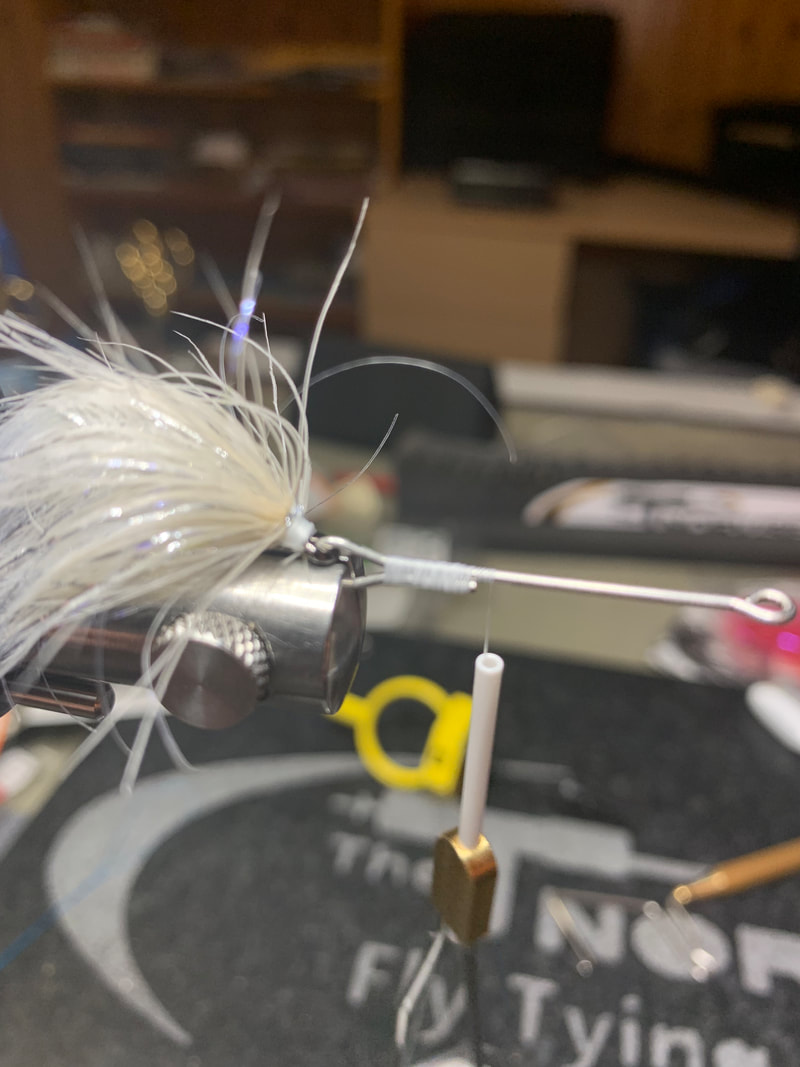 Close the shank with a good, solid thread base. 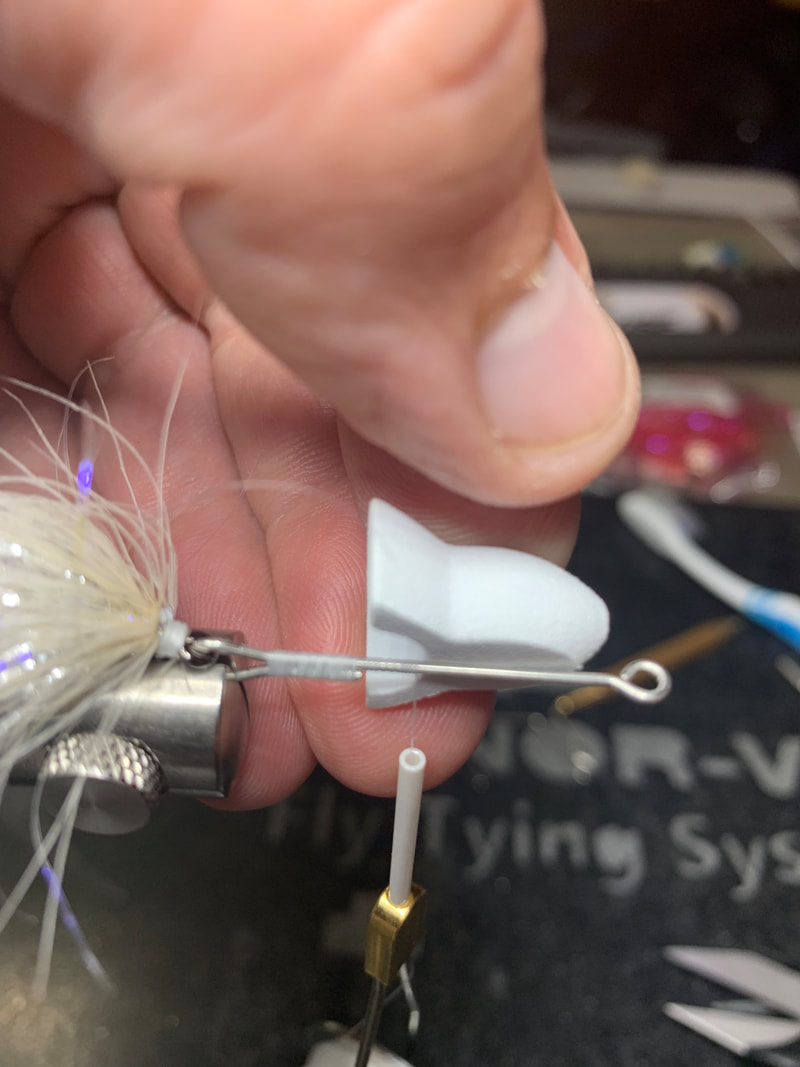 Here I like to use the thread to mark where my head will stop. This is the spot where I stop palmering the body. Remember, you have to leave enough room to get the head on the fly! 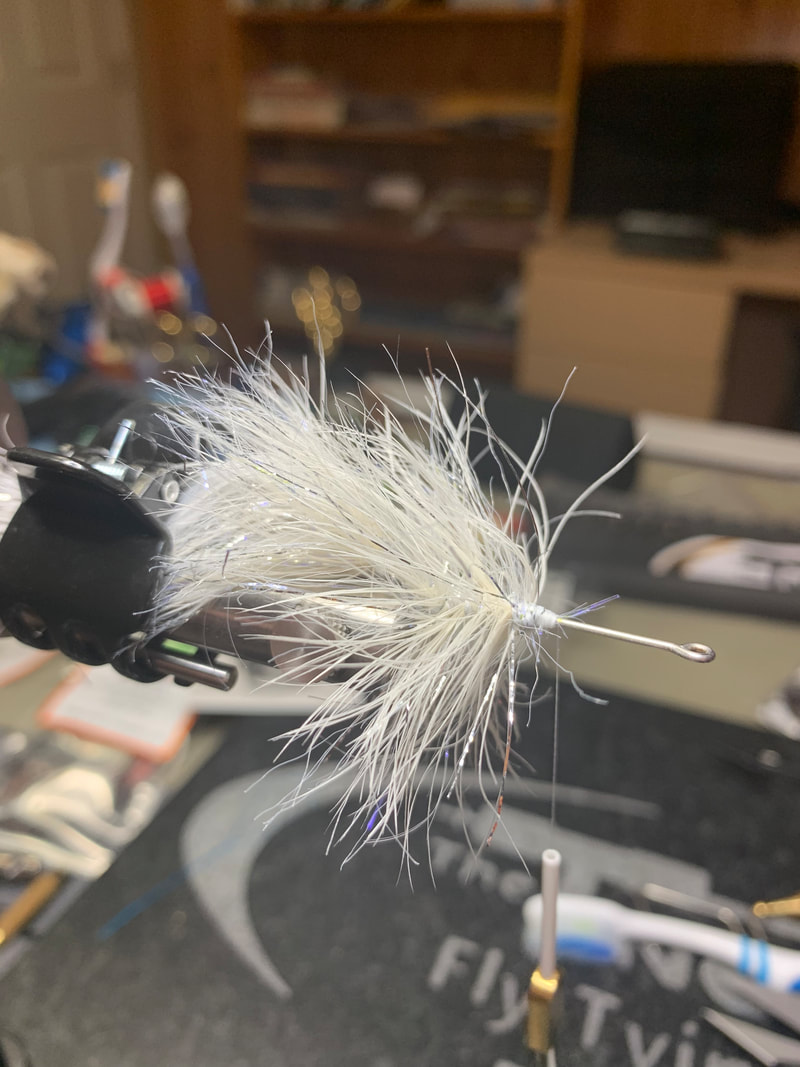 Repeat the same steps for the complex twist for the front half of the body. 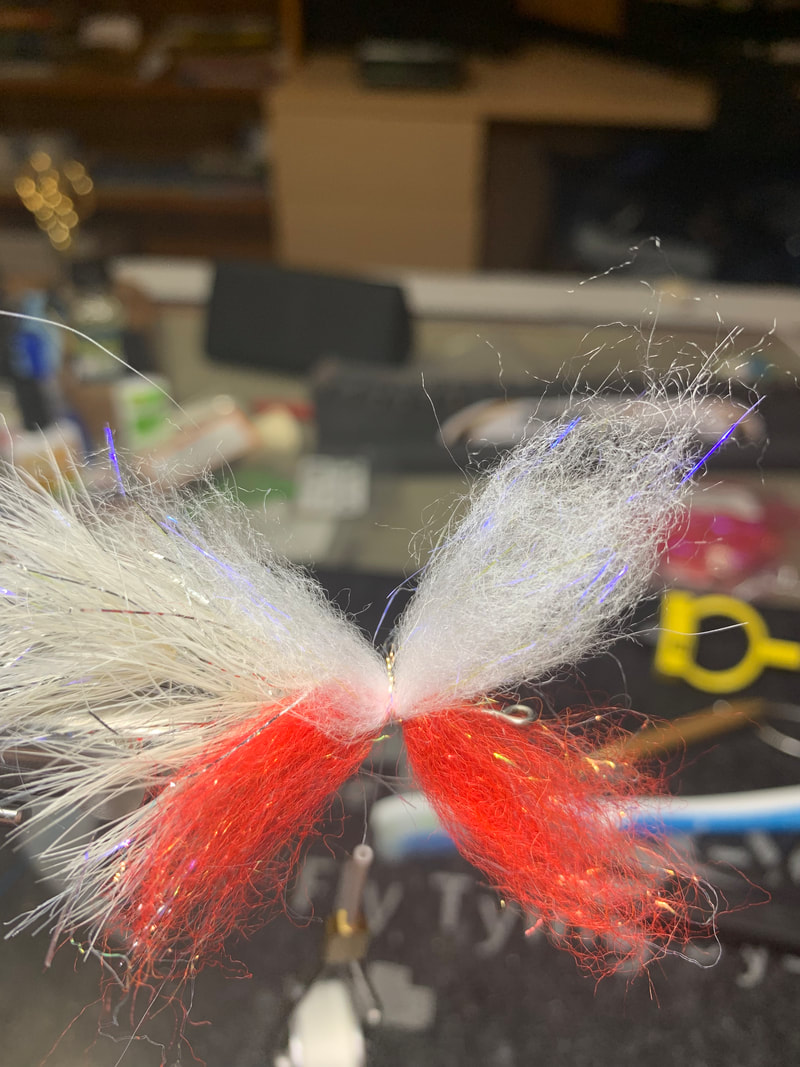 Hi tie 2 clumps of Senyos Laser dub on the shank. Red on the bottom and White on the top. 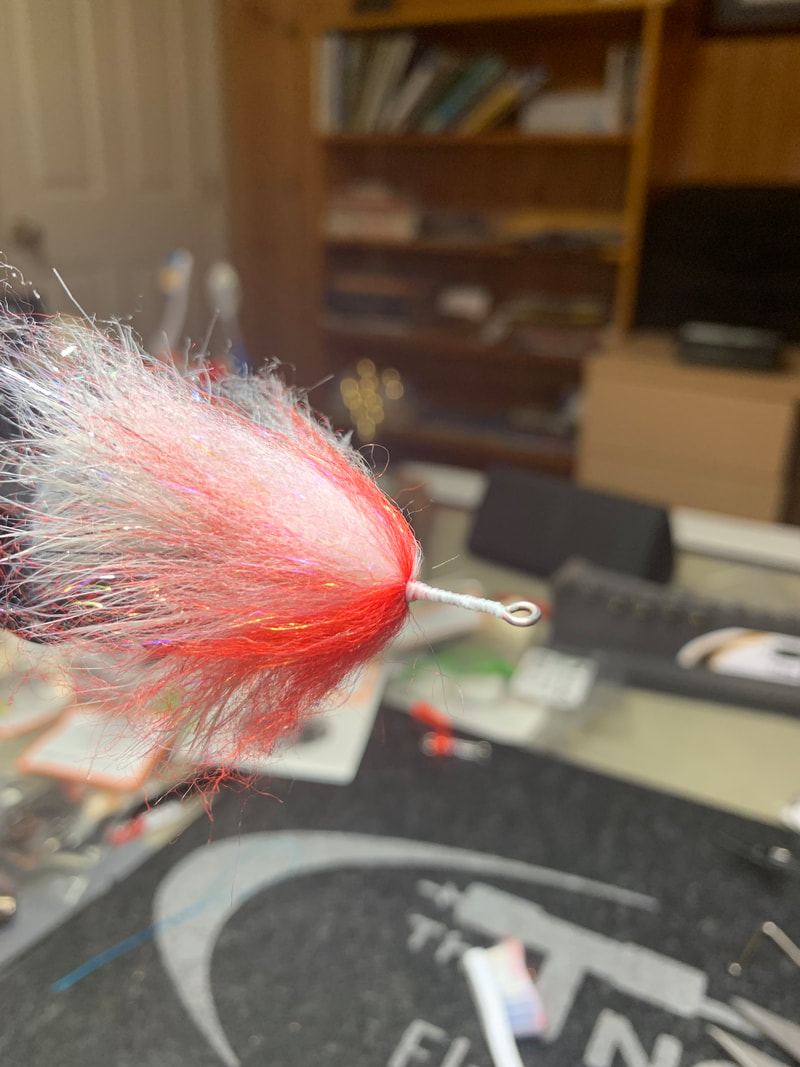 Fold the front half of each clump rearward and build a thread dam in front of the collar. Brush out the collar so that it becomes "fluffy" and veils over the front body. Lay down a heavy thread base on the rest of the shank. This will give the glue something to grip on when you install the foam head. 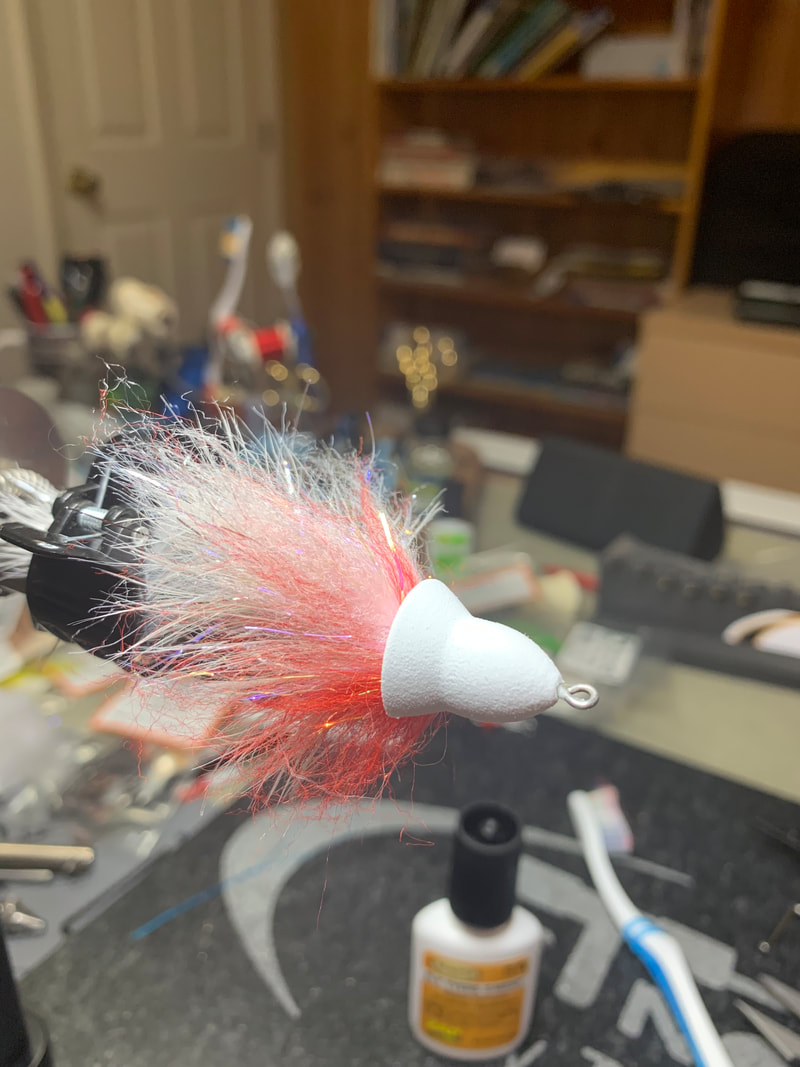 Coat the thread base and the front of the collar with a heavy dose of Zap-A-Gap and slide the head on over the shank. You have about 5 seconds before the glue takes hold so get it on and positioned quickly. You will only get one shot! Build a nice thread dam in front of the foam and head cement this to finish off the fly. 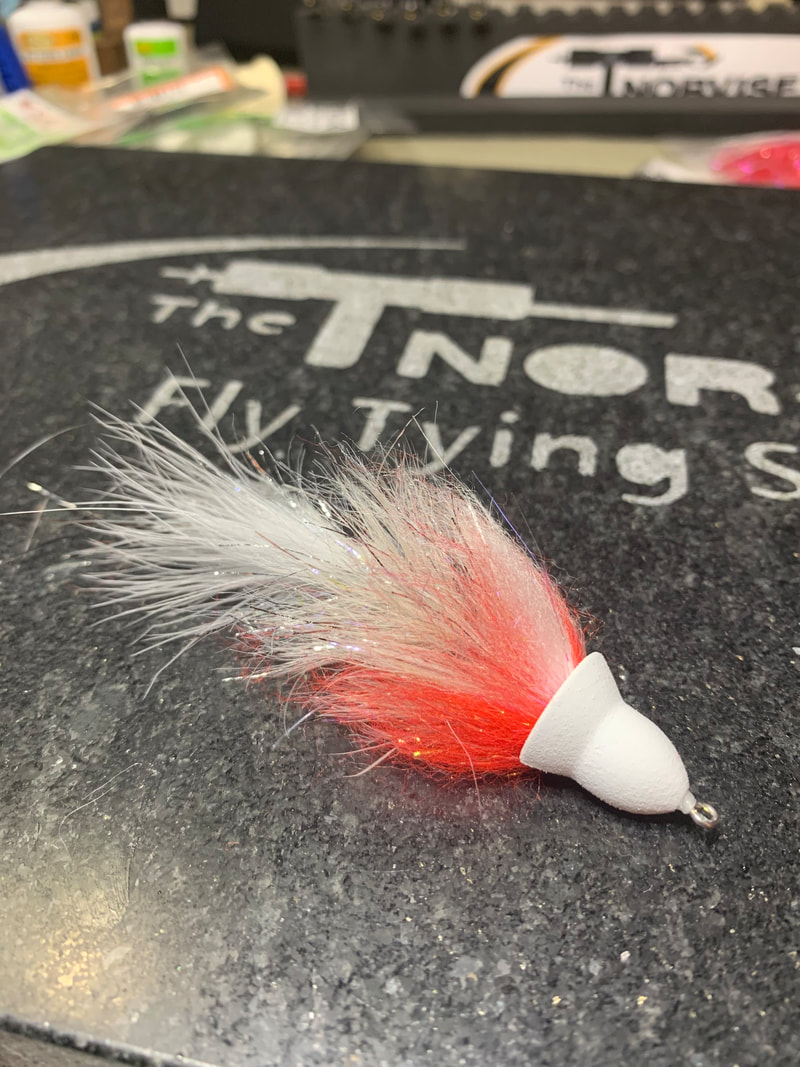   The last three pics show the finished fly. As mentioned this Bleeding Shad color combo is a favorite of mine followed closely by Fire Tiger.
When fishing be sure to mix up your retrieves and most importantly pause between strips. You will be surprised to see, even when you are not moving the fly it is always in motion. Often the strikes will come during the pause. I hope you enjoy tying and fishing this pattern. It has become one of my favorites over the past few years. Till next time... Tight lines - Tim We have been Pretty busy the past few weekends here at Norvise. We will get back to the top 5 Smallmouth flies next week, I promise. I wanted to share this with you first. Many of you may know that Project Healing Waters is a program that was near and dear to Norm's heart and we have continued that tradition. Anyone involved in PHW as a participant, volunteer, program lead or administrator will receive a 40% discount on any Norvise product. We believe wholeheartedly in this organization and believe it to be one of the best programs out there for helping our veterans. This past weekend we got to see an organization as passionate about PHW as we are. Stars and Stripers is an annual outing for disabled veterans from Project Healing Waters. The Kent Island Yacht club id located right off of Rt 50 in the Stevensville, Maryland area. One day, typically in August many boat captains, mates, cooks, and volunteers descend on the club to host this great event. This year, the tenth year for this event, around 25 boat captains donated their time (and boat) to take close to 50 PHW veterans fishing for the day. We were invited down to set up a area to tie flies and show the veterans how we do what we do. This was such a rewarding day getting to tie and talk with several of the veterans. The event was very well run, and the food was fantastic! We would like to thank the Stars and Stripers organization for having us, we are already looking forward to next year! Check out some of the pictures from Saturday.  Team Norvise at the event; Tyler, Myself and Braden Miller 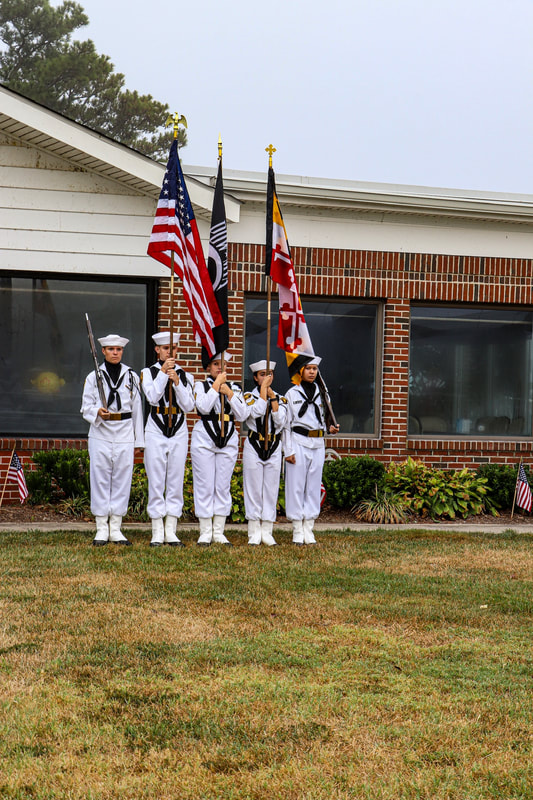 Presenting the colors. 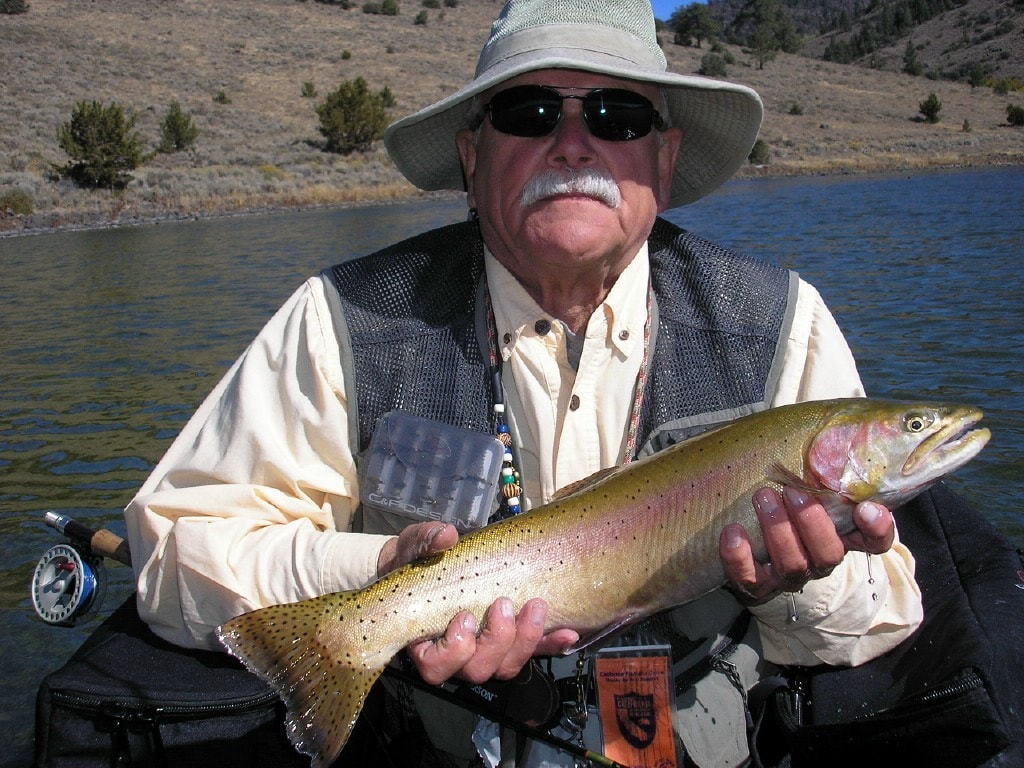 Mark was the organizer of the event, the MC, and the gentleman who invited us to participate. Truly a class act. 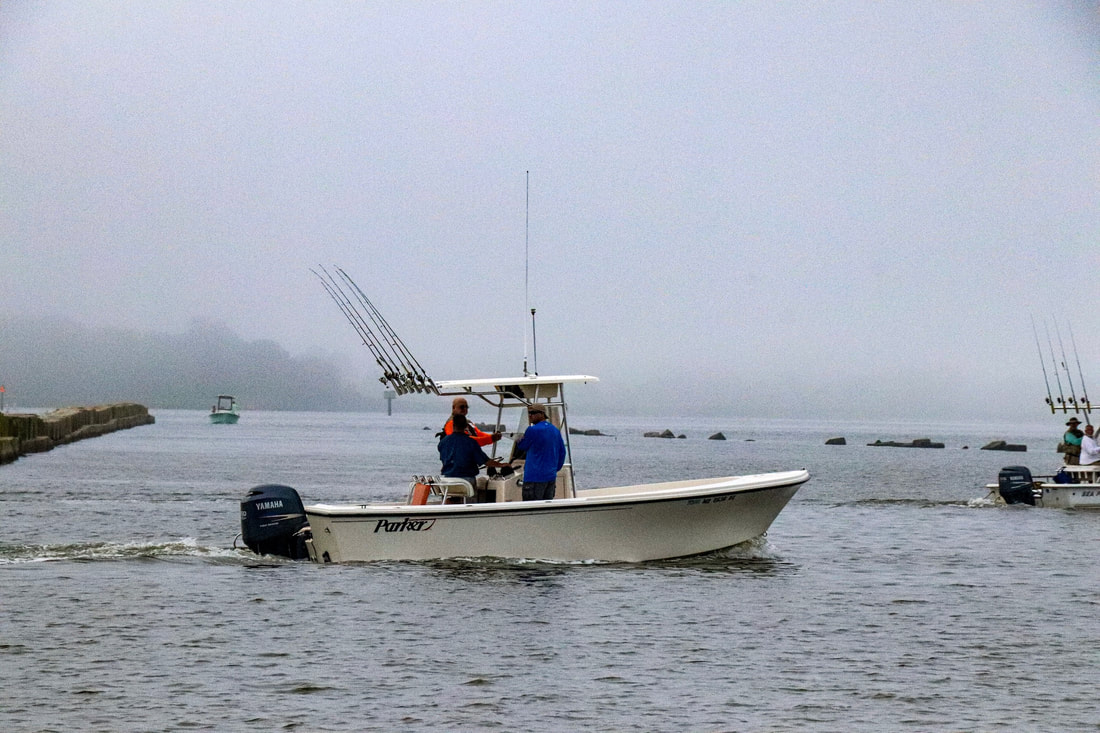 There were some sweet rigs at the boat dock in the morning. 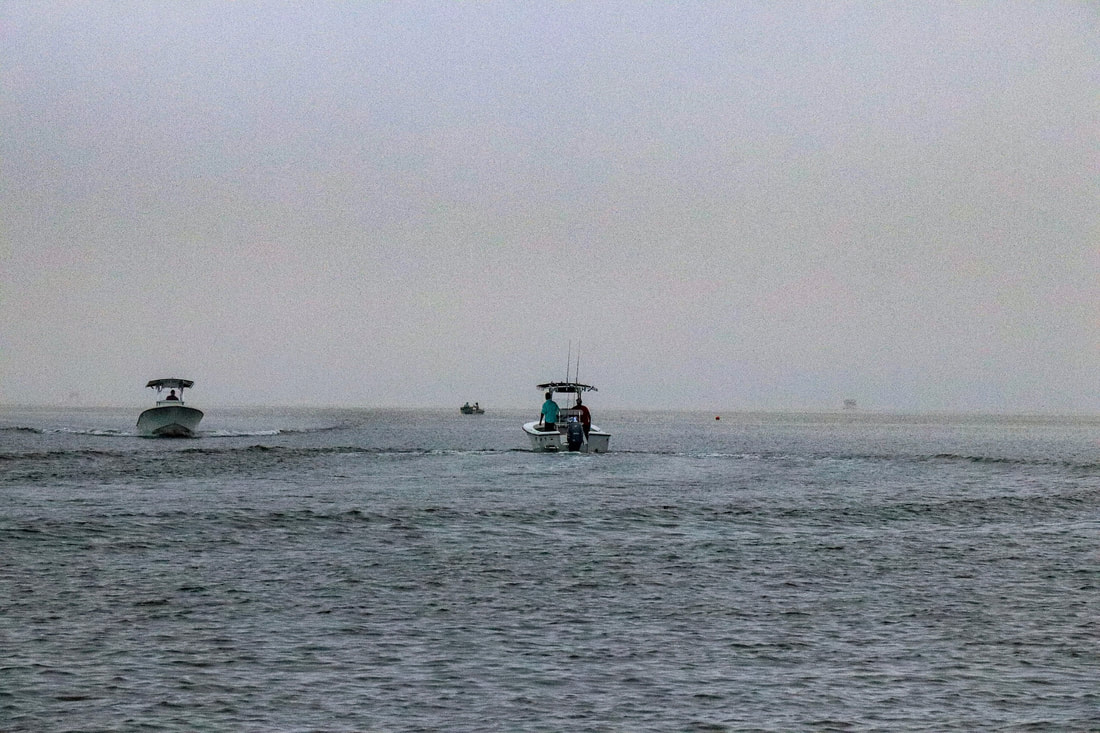 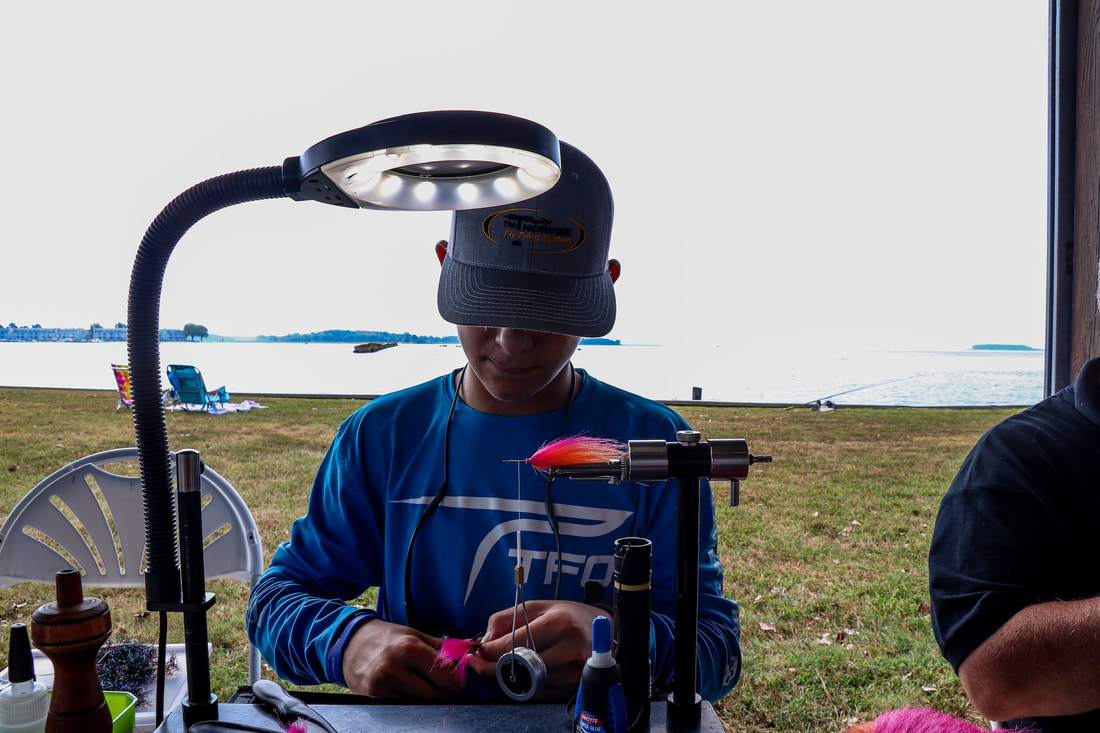 Braden spinning up a Fair Flies Fly Fur baitfish. 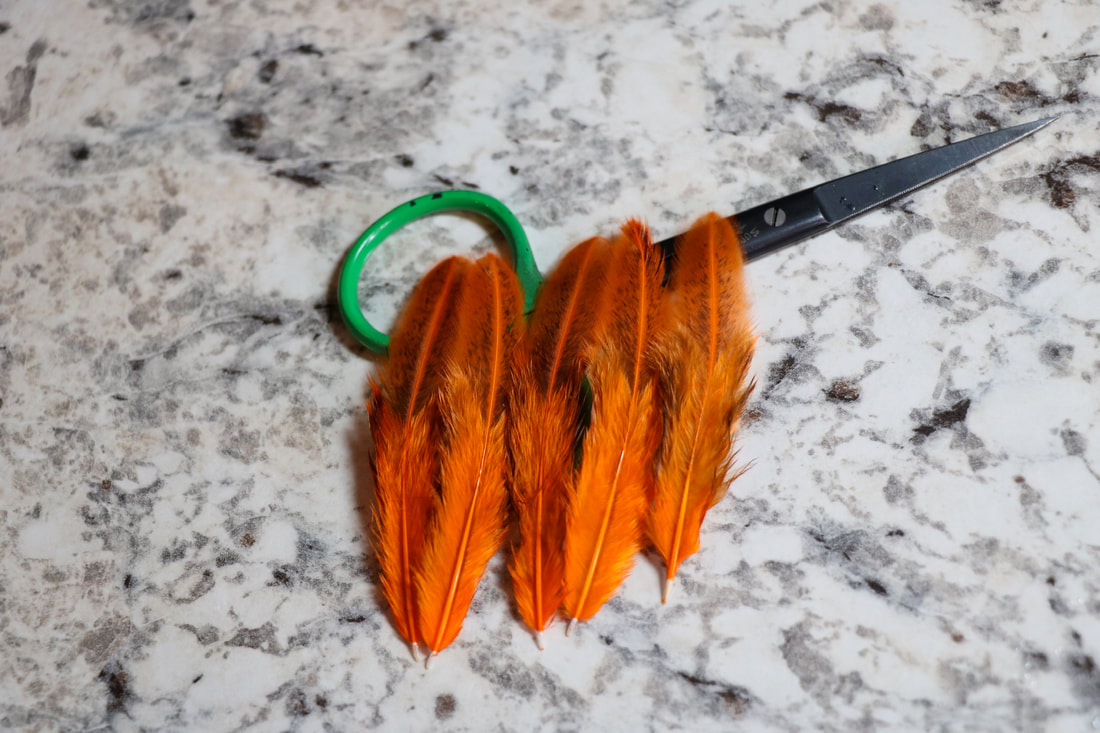 This and all of the great pictures were taken by our staff photographer Casey Miller (Braden's Mom). 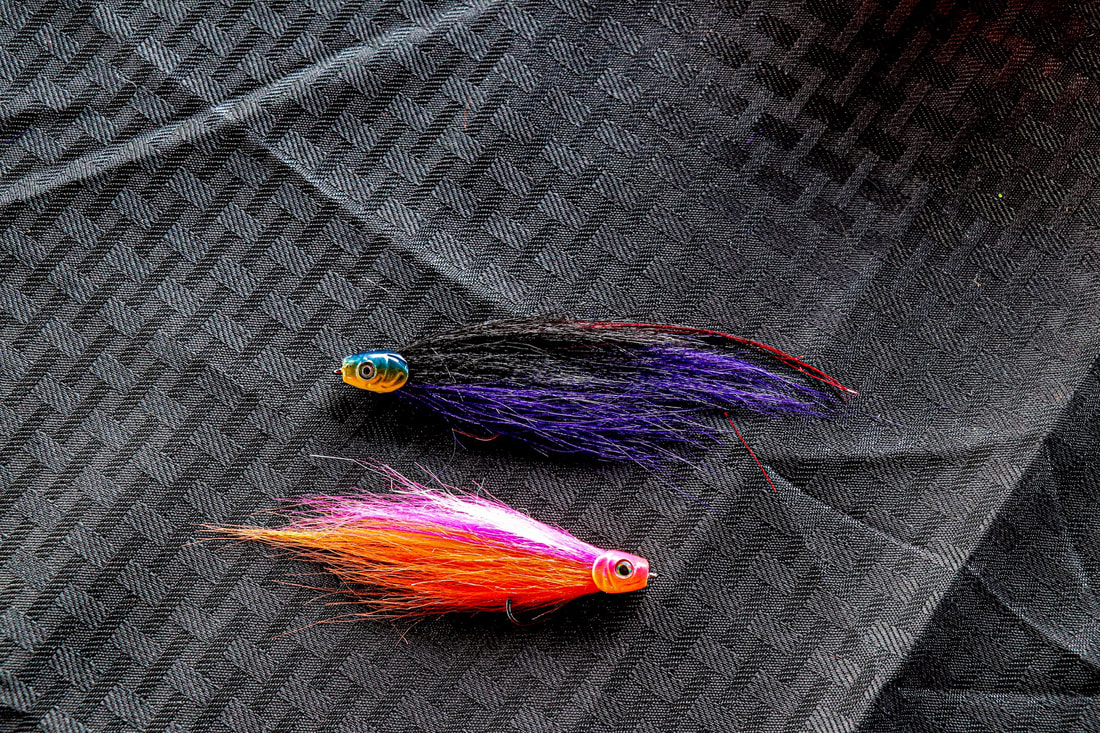 Spawn Fly heads rock!  Braden working with one of the veterans as he spun his first bug on a Norvise! 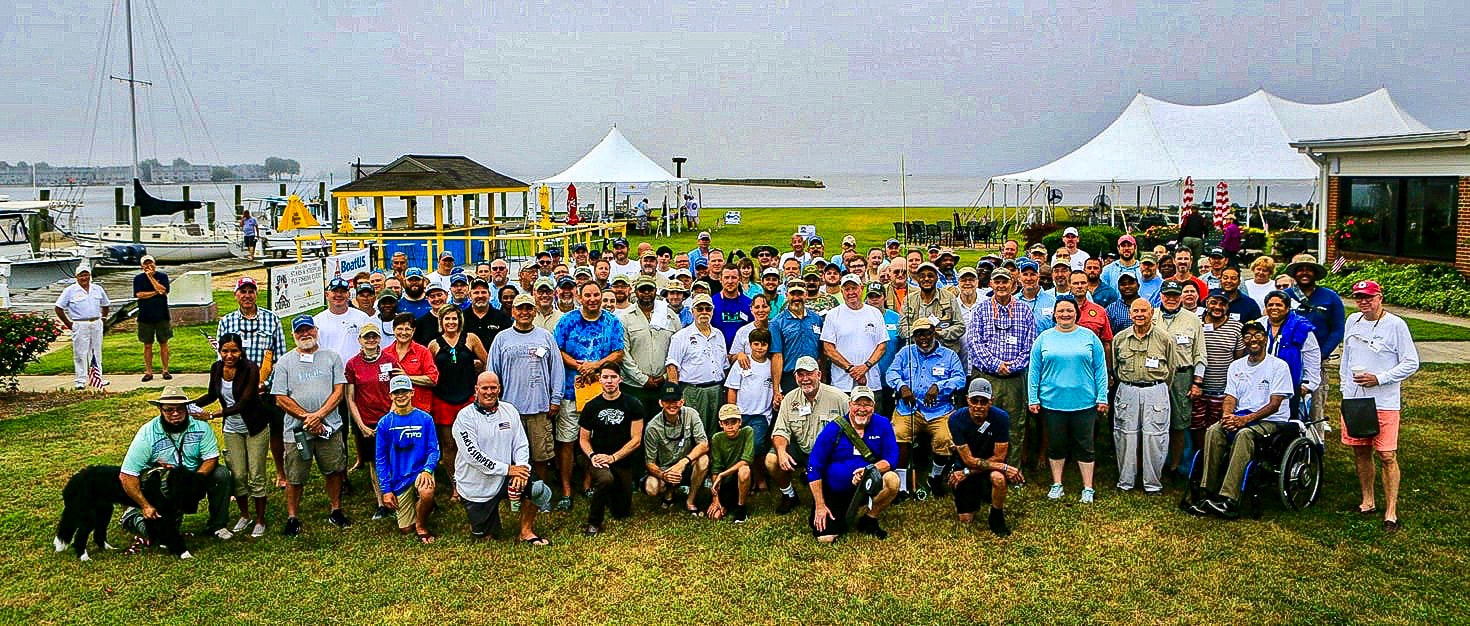 The group photo. This is a big event with a lot of moving parts. Great job to all involved for pulling it off without a hitch. As mentioned it was a great day, very fulfilling and for a great cause. I would encourage everyone in the fly fishing industry to be involved with Project Healing Waters on some level. These great men and women risk it all so that we can live in the greatest country in the world and do things like this everyday. Honestly, we owe it to them and it is the least we can do. Till next time...
Tight lines - Tim As mentioned in my "5 favorite Smallmouth Flies" post a few weeks ago, any Smallie fisherman worth his salt has a large assortment of Poppers. Smallmouth bass were tailor made for fly fishing. I have often said "pound for pound Smallmouth are the hardest fighting freshwater fish that swims". I dont think any true Smallie addict would argue that statement. Add to that a fish that is willing, dare I say prefers, to take a fly off the surface and you just may have the perfect fly rod fish! I love poppers! I love fishing them, I love tying them, I love designing new ones, I just plain love poppers. What is better than watching a huge frog or fish popper disappear in that tell tale "flush" of water then when you throw the steel to them, they just loose their mind. Watching a popper be eaten may be one of the most exciting things in fly fishing! Below is one of my favorite popper designs, it can be tied very small say on a #4 hook to very large, on a 4/0. This is the pattern I base most of my other popper designs off of. You can change the tail to Cohen's Creatures frog legs for a frog popper, bucktail and saddles for a longer profile or you can even articulate it. Check out this great pattern below... Recipe; This is for the "Bleeding Shad color, we also do Fire tiger and Burple (black / purple) Hook; Gamakatsu B10S (this is a size 1) Thread; Tyer's choice, color to match body (I am using Veevus 6/0) Tail; One white and 1 grey Marabou blood quill tip tied and palmered. Body; complex twist of 1 white schlappen feather and UV Polar chenille, silver Collar; Senyo's laser dub Head; Flymen double barrel Popper hers (this is a medium head) Eyes; Flymen 4mm Ice eyes I am using the Norvise Large Inline , Norvise Magnum Hubs and Norvise Material Clip to tie this pattern.  Place the hook in the vise, tie on the thread on the back third of the hook and wrap back to just above the barb. 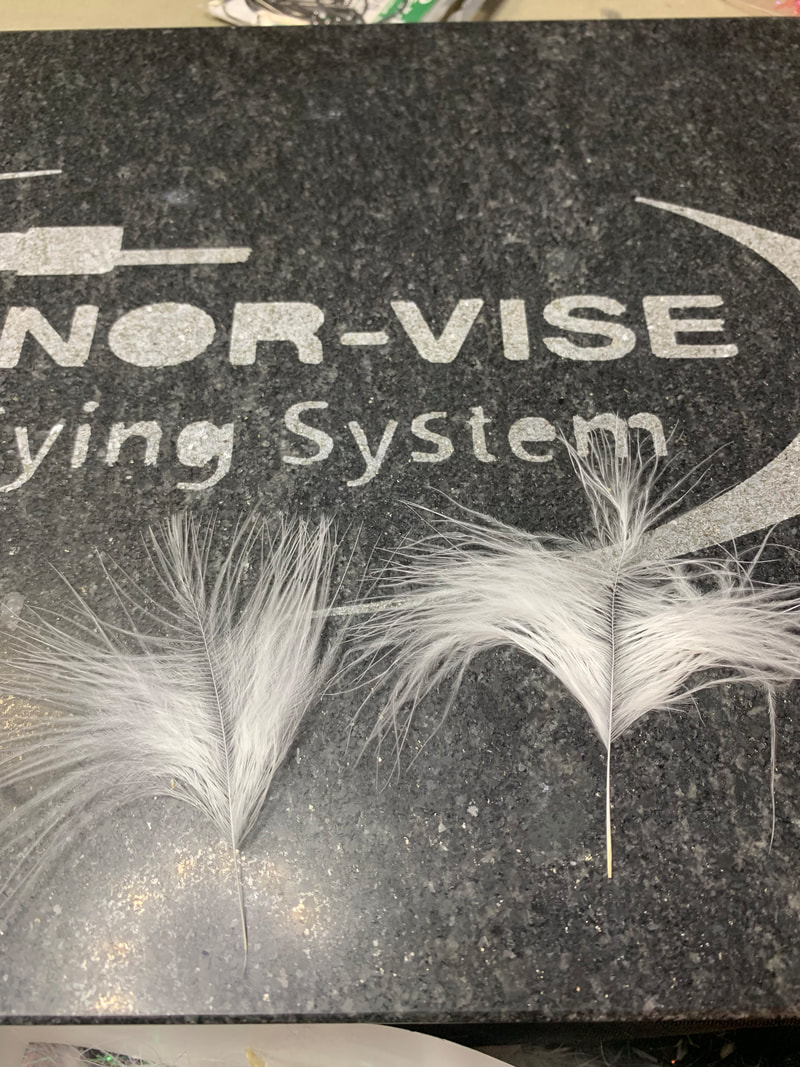 Prep 1 white and 1 grey Marabou Blood quill. Strip the fuzzy stuff off of the bottom and stroke the fibers back leaving a small amount on the tip to tie in. You want about 3/4 of an inch of feather preened back. This will be the tail. 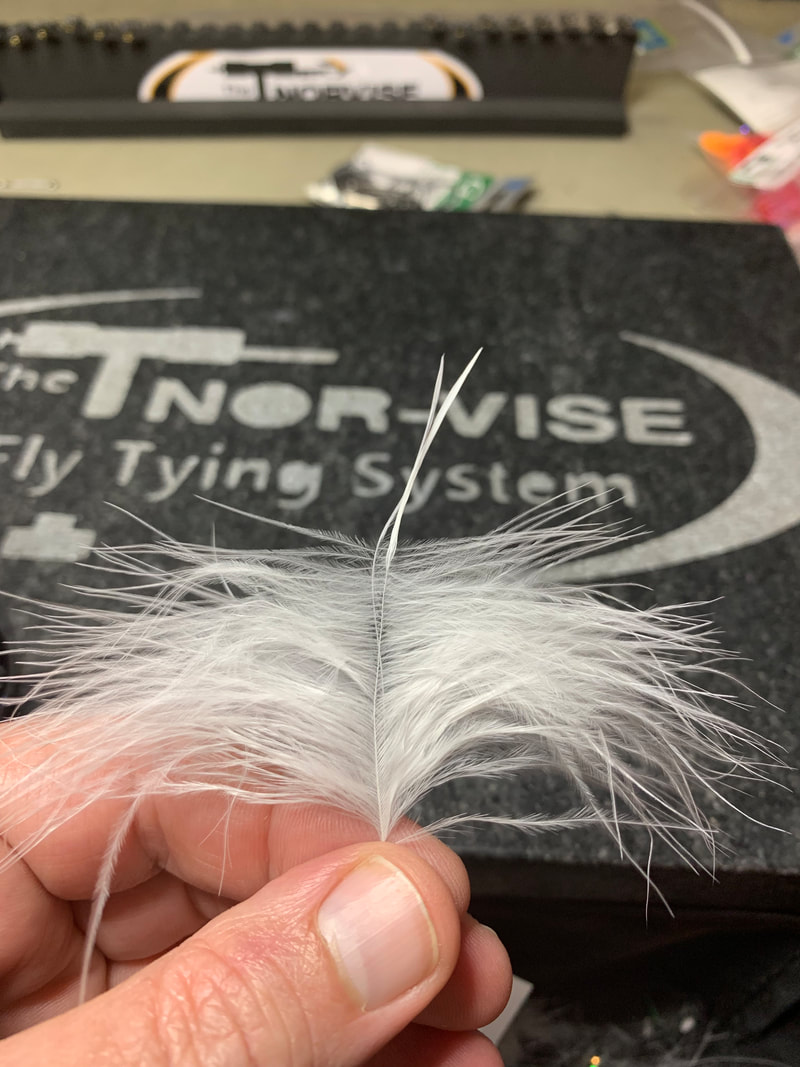 Marry the feathers together one directly on top of the other. Wetting the tips will help with the next step. 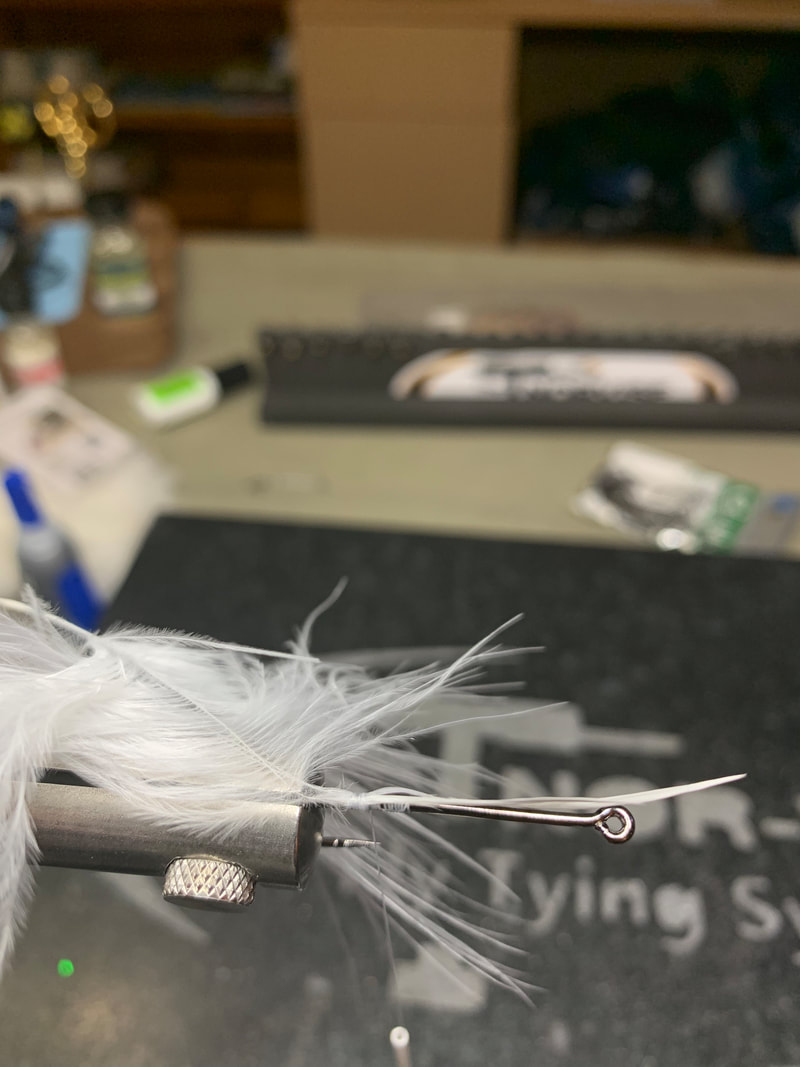 Tie both feathers in at the same time by the tip at the point where the thread ends right above the barb. Wrap 3 or 4 turns forward, Fold the tip back and wrap back over 3 or 4 tight turns back to front. This "fold in" method will keep the tips from pulling out while you are palmering the feathers forward. 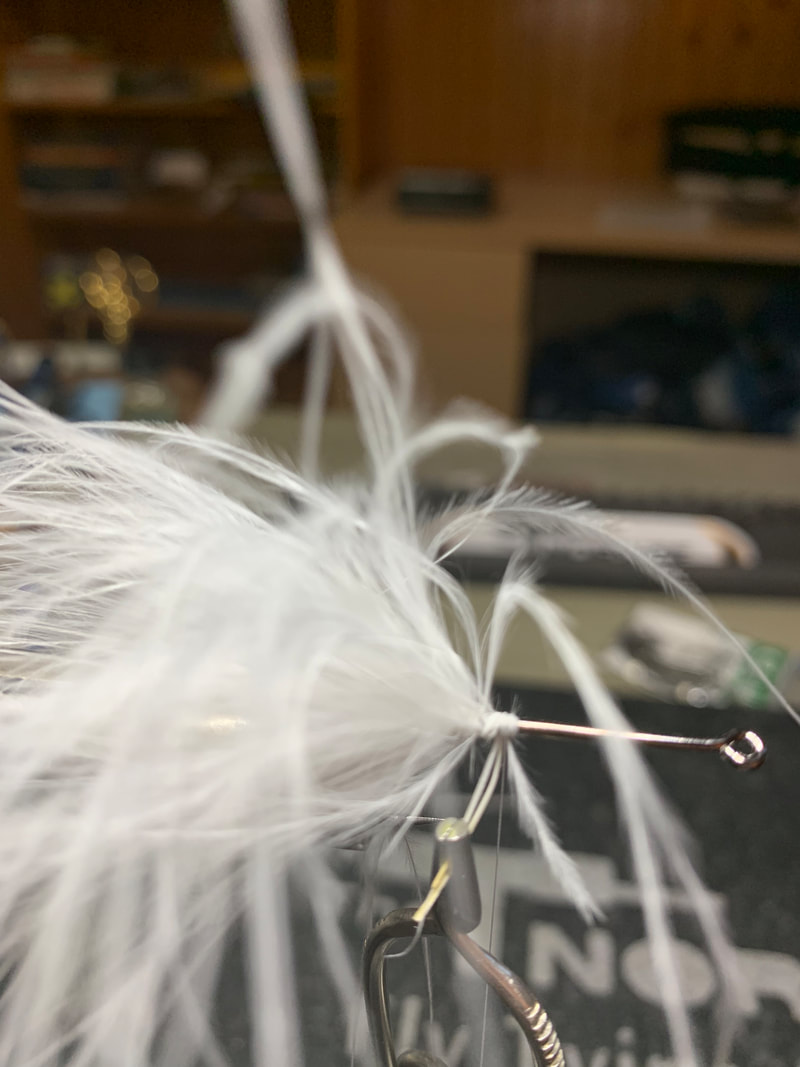 Advance the thread forward to just past the tie in point, half hitch and place the bobbin on the thread post. I like to grab the feather stems with a pair of hackle pliers. Now wrap the feathers forward (or spin your Norvise) taking care not to trap any of the feather under the stem. Once you have wrapped the whole 3/4 of an inch of feather tie off the bare stems with several tight wraps. 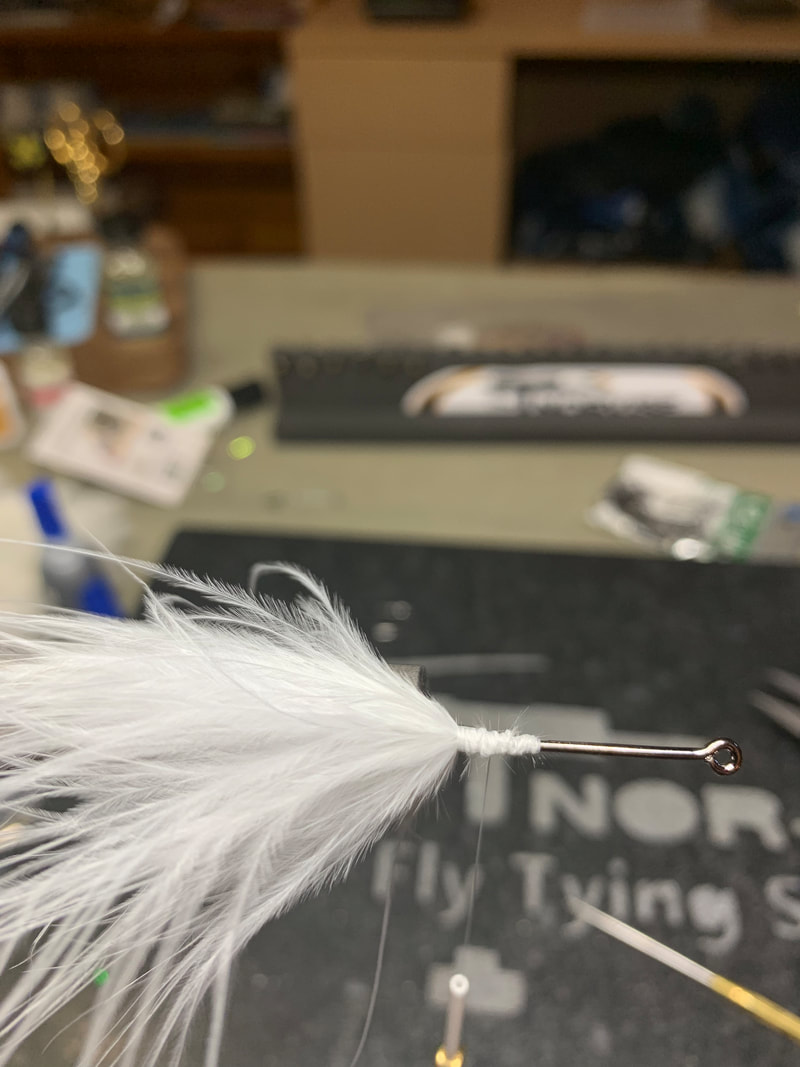 Marabou gets a bad rap in my opinion for not being durable, here is how to make it very strong. Use your bodkin or a tooth brush and stroke back all the marabou, Take care to make sure they are evenly distributed around the hook shank. Now, take your thread and COMPLETLY cover the stems with thread. A drop of Flex Cement here is a fantastic idea. By covering the stems you are protecting the weakest part of the tail. If the stems don't blow up, the tail will last a very long time. I have tales tied in this manner with well over 50 Pickerel landed and the tails look almost brand new. Remember, a Pickerel is a cousin of the Pike and Musky! 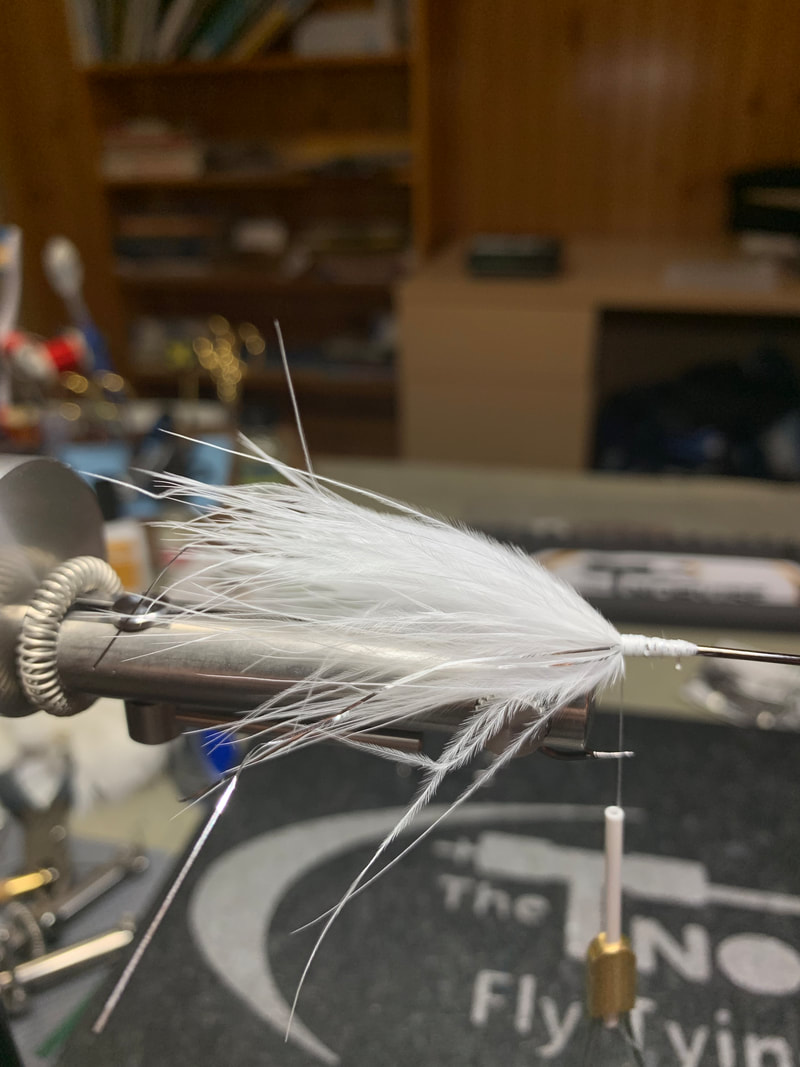 Add a couple of strands of silver Flashabou down the sides of the tail. Trim the Flashabou so it it just a little longer than the Marabou.  Next select a good, thick, webby Schlappen feather. Strip the fluff from the bottom and preen the feather back so you can tie it in by the tip. 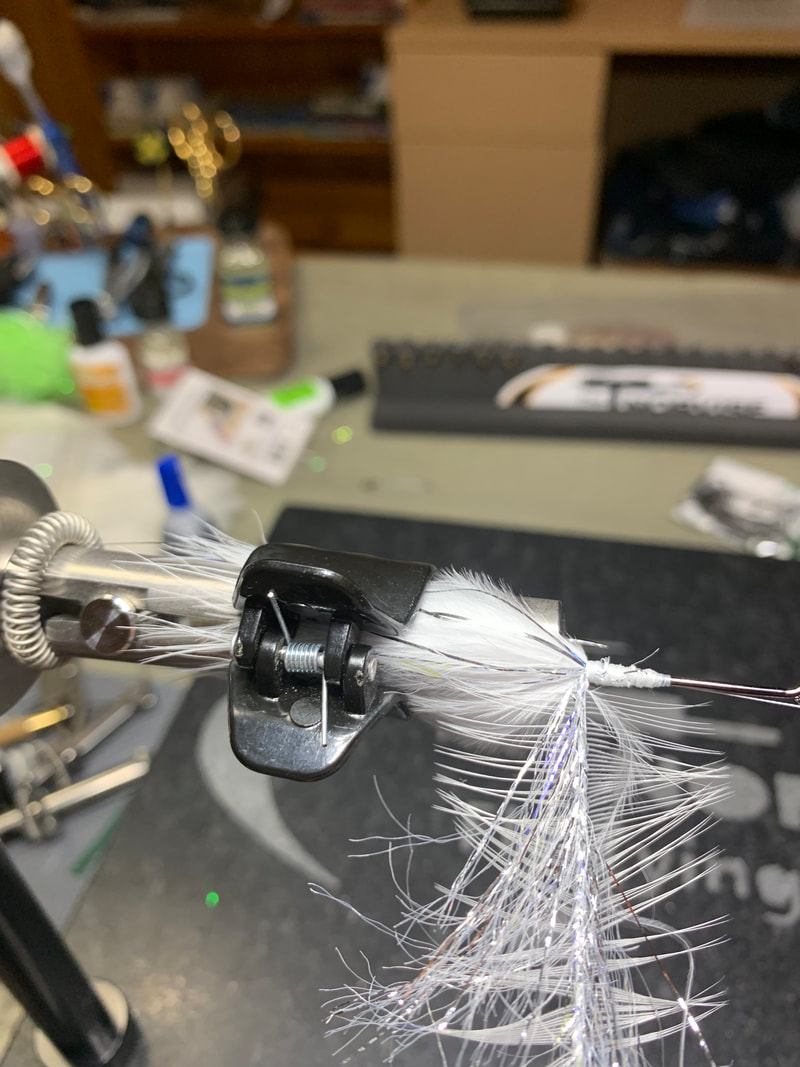 Tie the Schlappen in by the tip and tie directly on top of it a length of Polar Chenille in UV silver. Note I have a clip on the tail to keep the marabou away from the Schlappen. Now, hold the feather and the Polar Chenille together with a pair of hackle pliers at the base and spin them together. This will make a dubbing brush of sorts. This "Complex Twist" will blend the feather and the polar chenille together, it will also strengthen the feather by wrapping the core of the polar chenille around the feather stem again, protecting the weakest part of the brush. You will have to use a brush of your bodkin to pick out the fibers. Spin a little and brush, spin and brush, etc. Note; at the bottom there is a link to a video showing how to do this step by spinning your Norvise, it is pretty cool. 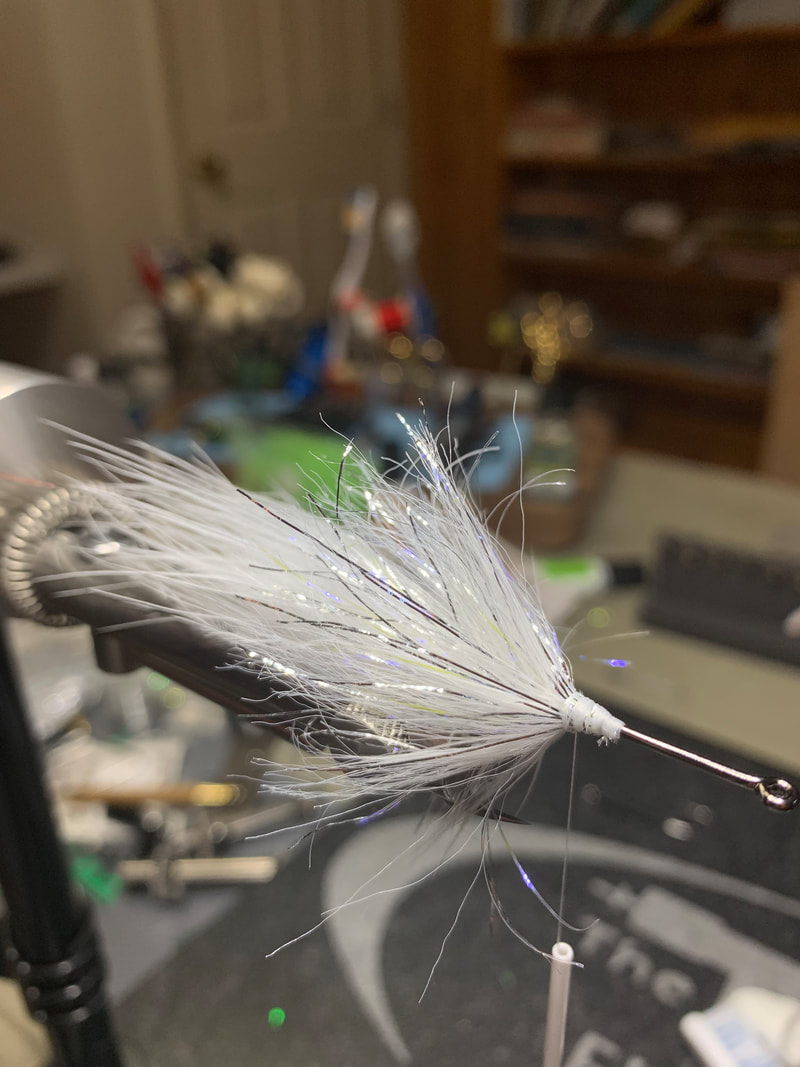 Palmer the complex twist forward laying each wrap right next to the previous wrap. Make sure you stroke back the fibers on each wrap to prevent them from being trapped. Isn't this a cool looking body? 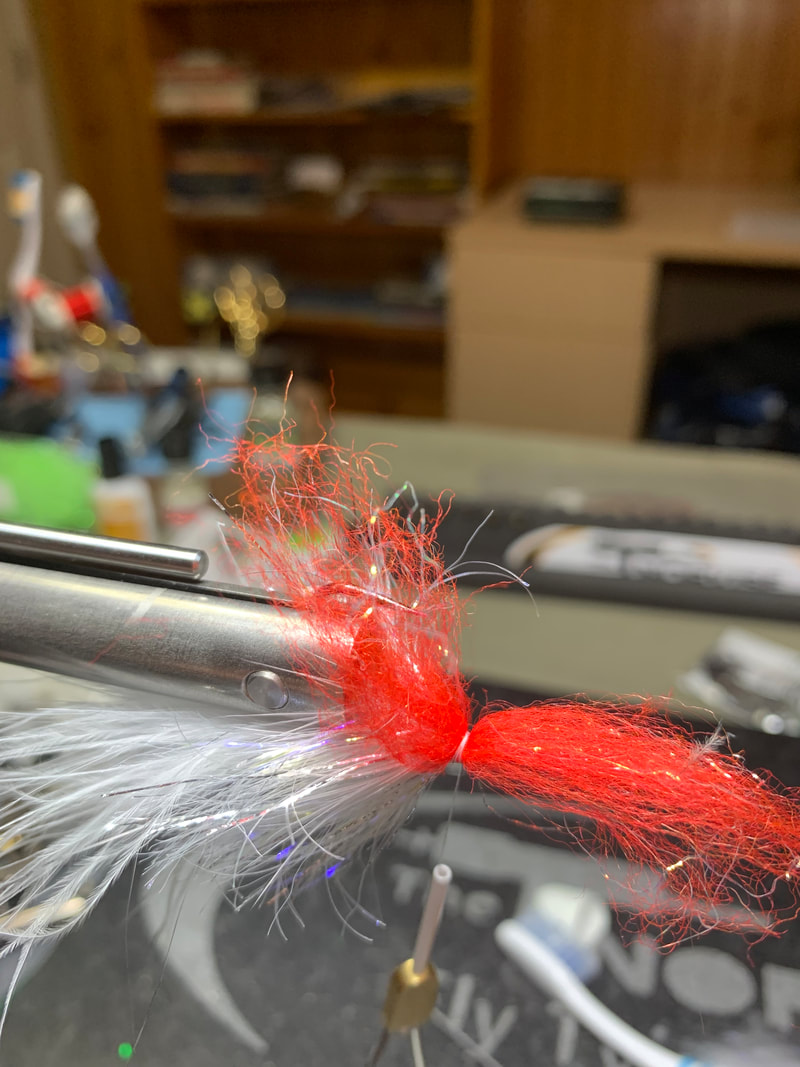 Now we are going top build the collar. We will use Senyo's laser dub, red on the bottom and white on the top. Select a small bit, about the thickness of a match stick. Align the the fibers and tie the clump to the hook in the middle. Make sure the material is distributed 180 degrees around the bottom of the hook. Repeat this step in the top with white laser dub. 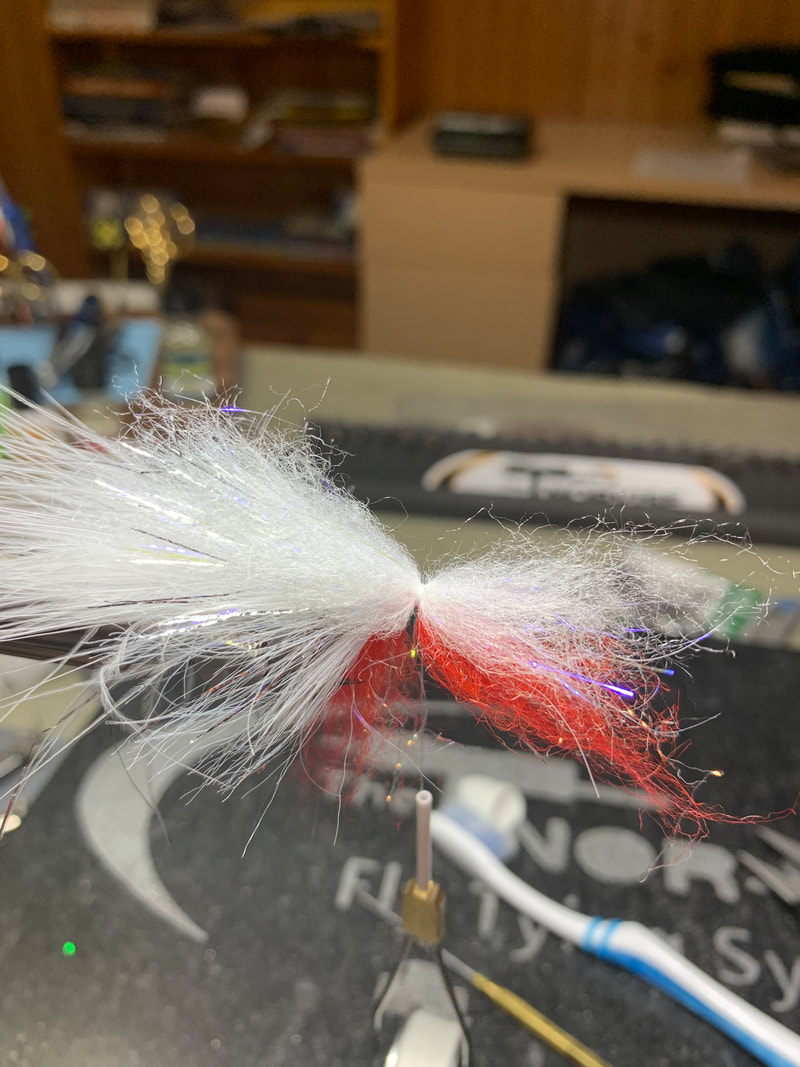 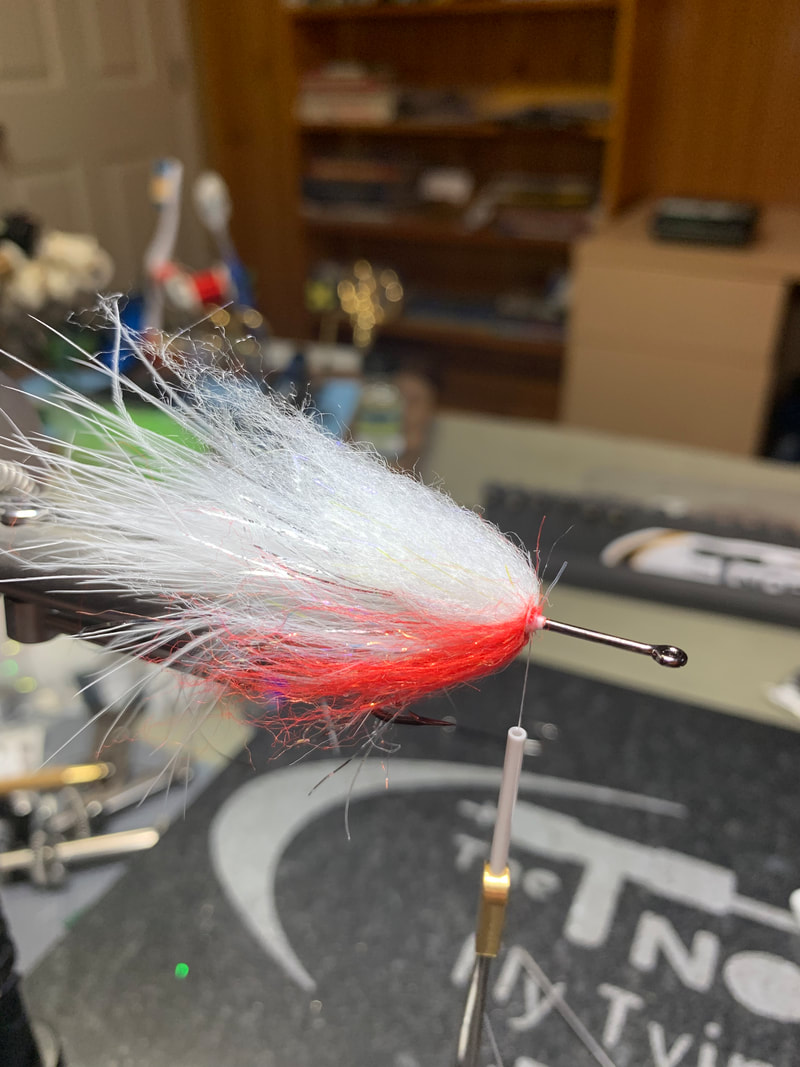 Now, fold the front half back on the top and the bottom. Use the thread to build a dam in front of the collar so it will "veil" back over the body. In this picture it looks like you can't even see the body, once it gets wet the collar and the body really work well together and it looks super cool.  Use your bodkin to punch a hold through the popper head.  Cover the entire front of the hook with several layers of thread. This will give the glue something to grip on TEST FIT THE HEAD FIRST! once you are happy with it use ZAP-A-Gap to glue the head to the hook. Warning; you have 1 shot and about 7 seconds before the glue takes hold! Get the head on and situated quickly, if not you may be cutting a perfectly good popper head off and trying again!  The finished fly with the eyes attached. As mentioned, this can be tied in multiple sizes and colors so the sky is the limit.  This is one of my favorite of my designs. I say "My" designs, The palmered tail I learned from Rich Strolis and the body I learned from Eric Snyder. Thanks guys for being part of a great pattern! Till next time...
Tight lines - Tim For a link to a quick video on how to do the complex twist using the Norvise, click HERE. |
Archives
June 2024
Categories
All
Get Your Norvise! Click Here!
|


 RSS Feed
